Tuesday, December 31, 2013
Scrapbook Picture Frames
Choose from five different styles of unfinished frames and then personalize it to make it your own!
Directions:
1. Trace your frame on scrapbook paper of your choice and cut out. You could also use a craft knife to trace the frame on the paper using a craft mat.
2. Glue to your frame using Pioneer's Embellishment Glue Stick. It is perfect for this project!
3. Add stickers and bling!
Monday, December 30, 2013
Cabinet Board Wall Plaques
Customize a Cabinet Board Wall Plaque making a trendy decor piece that you will love to display in your home!
Directions:
Chalkboard
We taped off our edges and sprayed with black chalkboard paint!
Burlap Monogram
We glued burlap to the back of the plaque and then glued our monogram with E6000 Adhesive. Then, we screwed hooks to the bottom to make a one of a kind key holder.
Family Photo Display
We added frames to the board using Velcro on the back of the frame. This way you can change the photos when you want! Then we added a vinyl quote, available at Craft Warehouse stores.
Monday, December 23, 2013
Rubber Band Loom Crafts Book Review
Available at your local Craft Warehouse store is this Rubber Band Loom Craft book! This 24 page book is perfect for beginner-advance rubber band bracelet makers!
What I love about this book is that it only has three bracelets that are the same to our other book. So, you could own both and get a lot of different designs! This book is called "loom crafts" when really it only has bracelets, one ring, and one necklace design. Other than that, I love all the different kind of designs! I feel like this book has loom designs for both boys and girls, which is nice too! For only $6.99, it is perfect for that rubber band jewelry maker, no matter the age!
Friday, December 20, 2013
Amy Tangerine's Cut and Paste Pages by Project Life Design Team Member April Joy Hill
Hi everyone! My name is April Joy Hill and I'm so excited to share my Project Life pages with you all. All of the supplies I used on this spread can all be purchased from Craft Warehouse! I got lucky and got the chance to work with Amy Tangerine's new Cut and Paste Mini Kit and a few of the Winter cards from the Seasons Mini Kit!
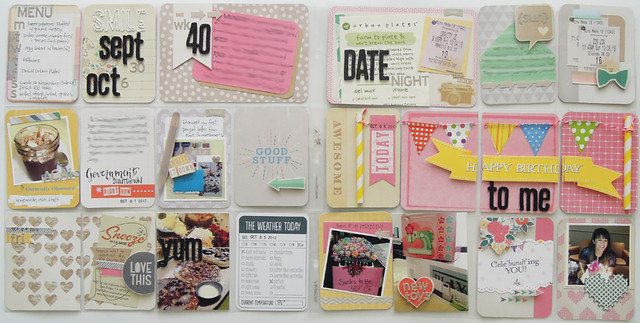
Here's a quick look at my spread:
Before I give you some close-up shots, I did want to give you a peak into my personal process for completing my Project Life spreads.
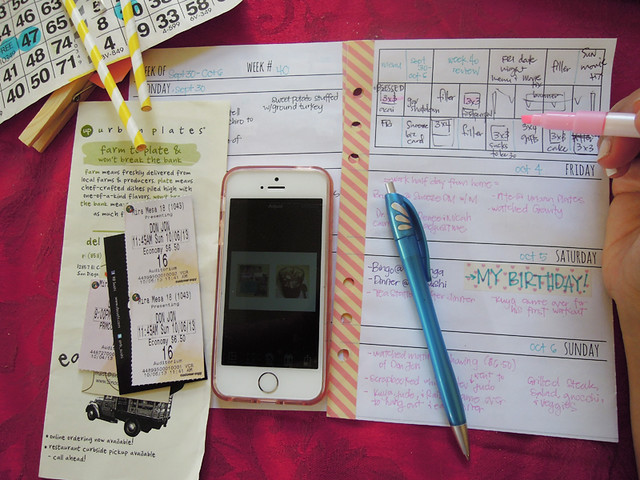
I have a Filofax-style planner that I write in every day. This helps me keep track of what went down during the week (from just our normal everyday activities to events we attend, and also my meal planning). On the planner pages that I designed, I included a Project Life diagram that I use to fill in what will go where. I take all my photos for Project Life on my iPhone, so I scroll through my album to choose photos and write them into my diagram. Personally, there is no rhyme or reason as to what size I choose to print my photos. Usually it's just whatever I think the photo will work best in. While I do this, I will also have the memorabilia that I want to include in the spread and those get filled into my diagram too.
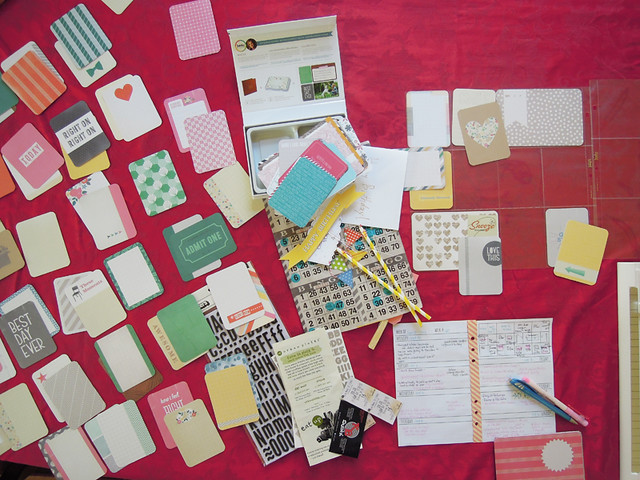
Since I don't have a dedicated scrap room, I work on either our dining room table (note the red tablecloth!) or the floor in the family room. I like having a lot of space to spread my mess out which is definitely what I had to do with this kit. There were so many awesome cards in the pack, so I had spread out the cards to see the full assortment of cards that I had to work with! With the cards spread out, I was able to choose which cards to use as a base for my spread!
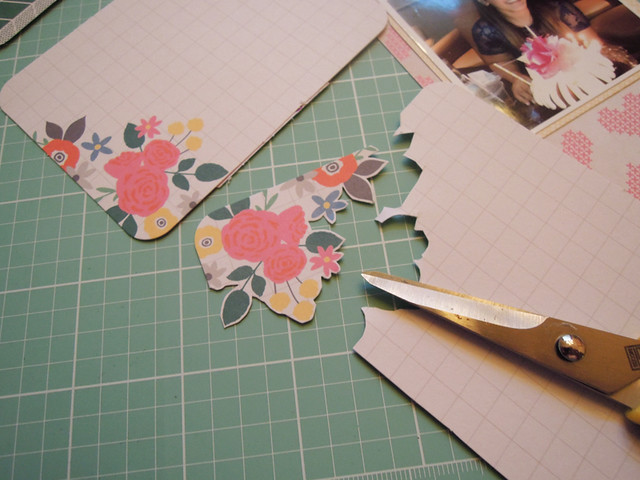
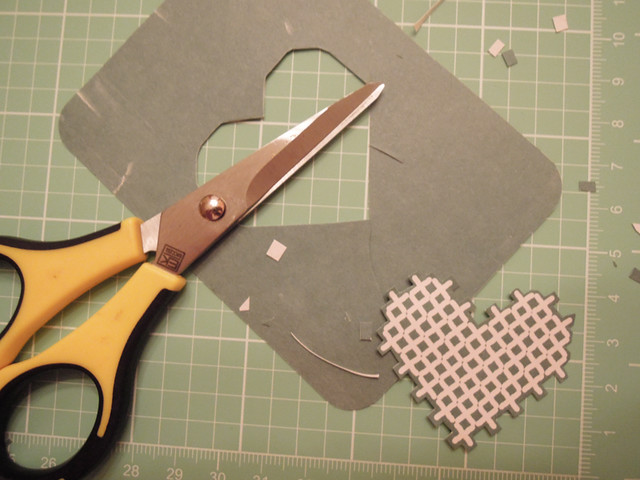
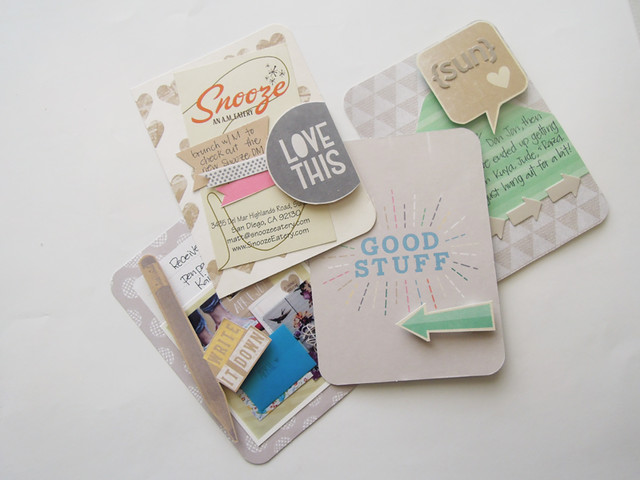
With a general idea of what supplies I'll be using, I start working on "making it my own." I LOVE incorporating layers and embellishments to my spreads. One technique I use often is fussy cutting design elements from pre-made cards to create perfectly coordinated embellishments for other cards. I did this a lot with this specific spread:
Sometimes I'll add some foam dots to the back of the embellishment to add some dimension and sometimes I'll just adhere it flat:
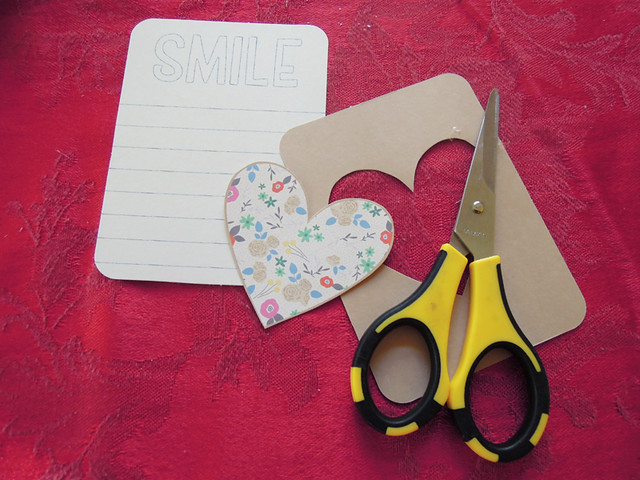
More fussy cutting:
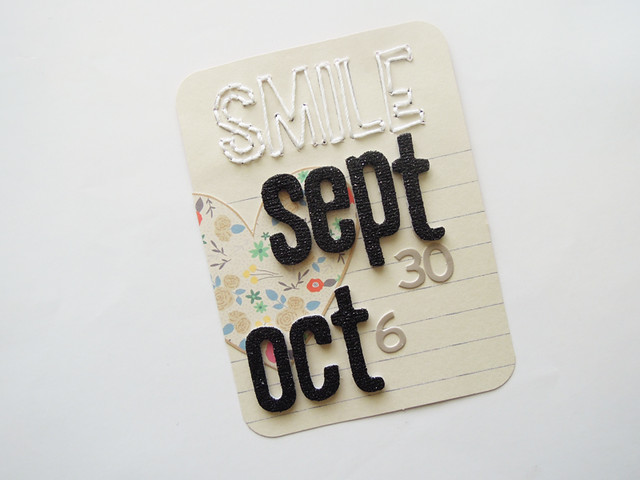
And here is that same heart used in my title card. I also added some hand stitching to the word "SMILE" that was printed on one of the cards to add texture:
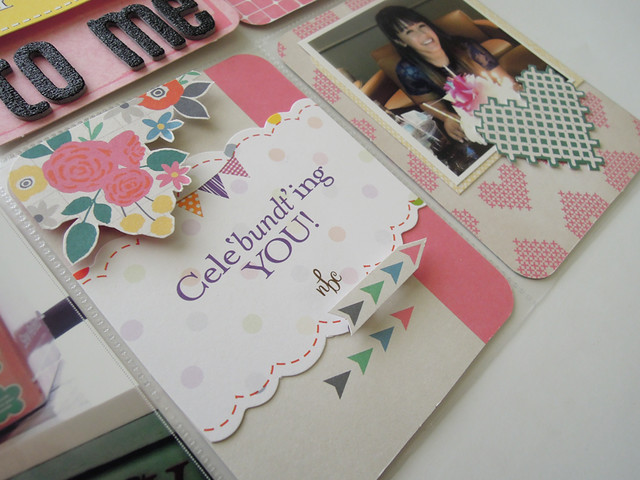
Here are more cards that I used fussy-cut elements on:
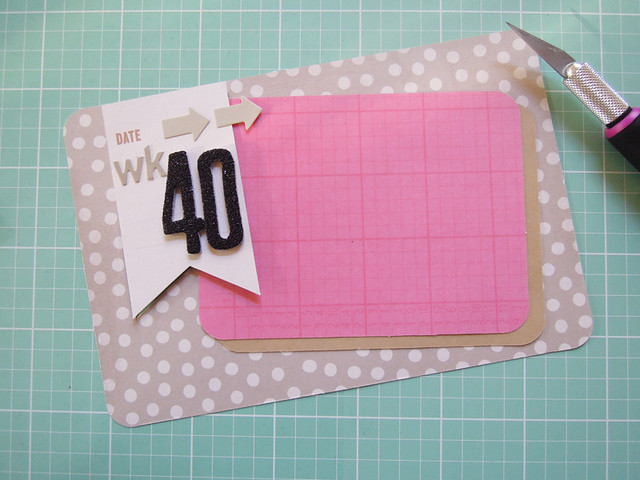
Another technique I use often is taking my craft knife and cutting out elements from a card, so I can layer without using any additional materials.
If I have scraps from another card available, I will almost always use them as layers:
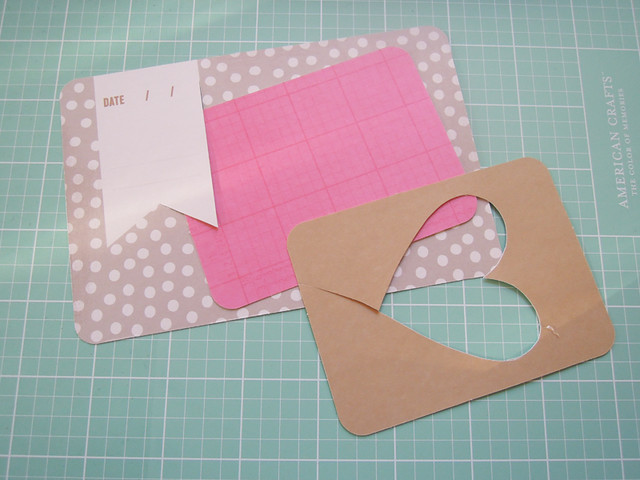
The final card:
With all my cards designed, I fill in my journaling and stamping.
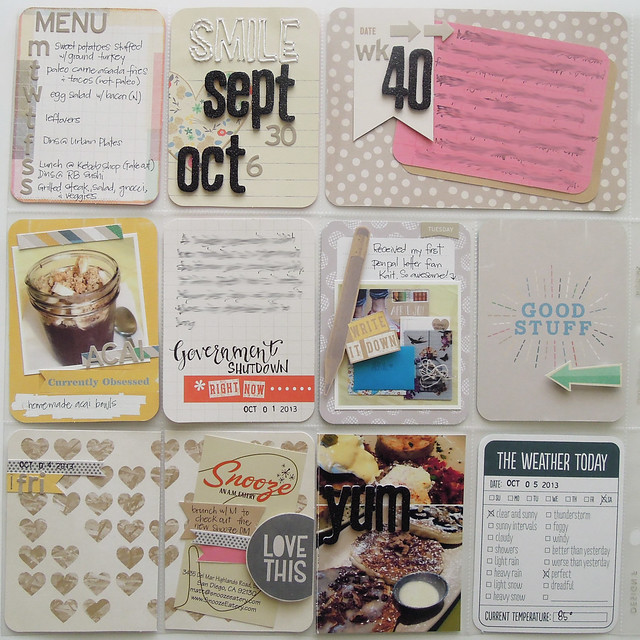
Here's a closer look at the left side of my spread. I always use Design F page protectors because I like using only 3"x4" cards. My weekly spreads include a menu card where I write what I cooked for the week, a title card with the dates, and a week in review card. You probably can't even tell where the Winter season cards are in this spread. They may be Winter-themed, but they work perfectly with the Amy Tangerine Cut and Paste edition!
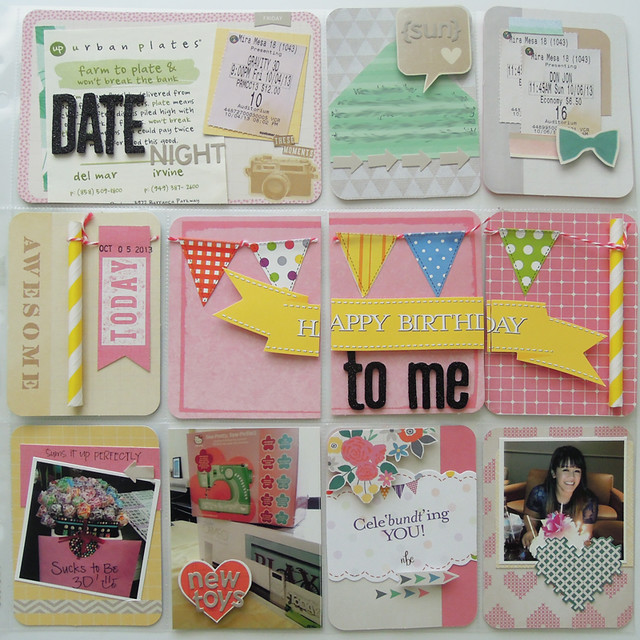
Here's the right side. Week 40 was my birthday week, so I had a lot of fun stuff going on this weekend. The yellow straws, bunting, and "happy birthday" sign were from the birthday cake my aunt got me. When I saw the cake and the paper embellishments it came topped with, I knew right away I would be including them into my PL spread.
I hope you found some of my techniques helpful! Thank you so much for letting me share my Project Life spread with you!
Thursday, December 19, 2013
Craft Warehouse Project Life Design Team Member April Joy Hill
 When we saw April Joy Hill's pages, we knew this girl was fun! She has such an out going personality and it shows and we knew that April Joy would share a bit of that spunk with us! Here is what inspires her to create!
 I've been scrapbooking on and off since I was in high school (about ~12 years ago, whoa!). I fell in love with the hobby when they opened a scrapbooking store near my house, but college (and just life as a young adult in general) got in the way and I didn't keep up. For a long time between college and now, I'd dabble with paper every so often and it would spark that love I had, but then would eventually die down again.
It wasn't until I discovered Project Life in late 2011 that I really got interested again and actually stayed interested. I immediately fell in love with the concept of Project Life, so I attempted it in 2012. Unfortunately, it was a huge failure on my end, but I think I needed that failure to push me this year. Failing to have that year documented in album form helped me realize how important it actually is to me that I have these years documented and it's been the motivation that I've needed to keep continuing with it.
What inspires you to be creative?
I am mostly inspired by other creative people that I find online and on Instagram. It's truly amazing what other people are capable of and I love the push it gives me to try to create something just as pretty!
What Craft Warehouse products do you love to use?
I love that Craft Warehouse carries all the popular scrapbooking brands that you would typically have to purchase online and that they carry the full line of all the Becky Higgins Project Life core kits and products! It's so convenient!
How can you encourage others reading this column?
This may sound funny to say, but I am a lazy scrapbooker. I don't like pulling out machines or crazy tools to complete a page/spread (it's the cleaning up after myself once I'm done that I dislike). I am also the epitome of "out of sight, out of mind," so if I don't see something in front of me - I won't use it. Since I'm like this, it forces me to improvise with what I have and to use what I have! I think that's important for others to know. I'd love to encourage others (especially newbie scrapbookers) to not get discouraged from what they see from others, and instead, get inspired to make it your own with what you have because those end up being the best scrapbooking pages!
Make sure to hop on to April Joy Hill's blog and follow her on Instagram! Come on back to the blog tomorrow for April Joy's Project Life tutorial! You will learn some awesome tips and tricks!
Wednesday, December 18, 2013
Chevron Rubber Band Bracelet
 This is by far my new favorite design! I have worked at it to
make it easy for beginners and yet, advanced bracelet makers will love
it for its versatility when it comes to design!
You will need:
14 Blue Bands
Black Bands
White Bands
Directions:
Making sure the loom's arrow is facing away from you, place one blue band on peg 1 to peg 2 and then down the rest of the row.
Begin back at the beginning again by placing three black bands on peg 1 and stretching it to peg 3.
Place three white bands on peg two and stretching it to peg 4.
Continue doing the above steps stretching the bands skipping a peg every time, while alternating colors.
When you get to the last peg, make a figure eight with a black band and place the band on the end as a "cap".
Turn the loom around and begin looping the blue bands over the others like you would a regular bracelet.
Helpful tips:
There will be a lot of bands on your loom. Make sure the bands are all pushed down as you go so they do not pop off.
As you get ready to hook the blue bands over, bring the blue band up a bit with your nail, so it is easy for the hook to get it.
Before removing your bracelet from the loom, gather one end of bands and place them on a jump ring (this will keep it more secure than a C or S hook).
Extend your bracelet to fit by using a hook and black bands to fit your wrist. You can watch the video below to see how:
You can alter the bands to create unique bracelets like this Camo Bracelet by using our NEW Camo Loom Bandz!
Tuesday, December 17, 2013
Gifts in a Jar
We have just the gift that will fit any size and shape! With all the holiday goodies around, these treats will still be there to fill the cookie jar leaving a lasting impression! We found you the perfect list of Mason Jar recipes by The Frugal Girls! Fill your jar and then top it with a seasonal jar hat to make your gift have personality!
*Canning Jars $1 each (Clear, pint or quart) on sale until December 22nd, 2013
Monday, December 16, 2013
Redneck Wine Glasses
This fun glass is perfect to personalize as a gift this Christmas! Fill with dry hot cocoa or candy with a ribbon around the lid and give it to a friend, teacher, or co-worker!
Supplies:
Mason Jar
Mason Jar
Glass candle stick
Sandpaper
E6000 adhesive
DecoColor Paint Pens
Directions:
DecoColor Paint Pens
Directions:
1. Use sand paper to rough up the top
of the candle stick and the bottom of the mason jar. This will give each
a little texture for the adhesive to stick better.
2. Adhere the candle stick to the bottom of the mason jar using E6000 Glue.
3. Use a DecoColor Paint Pen to personalize your jar.
* Canning Jar $1 each (reg $2.99) and Candle Stick 4" $1.96 (reg $2.99) on sale until December 22nd, 2013
* Canning Jar $1 each (reg $2.99) and Candle Stick 4" $1.96 (reg $2.99) on sale until December 22nd, 2013
Sunday, December 15, 2013
Snowman and Santa Pails
A great gift to warm a heart Just add cocoa and marshmallows!
Directions:
- Choose 2 pails that are the same size.
- Choose a Santa hat or a Snowman hat from our Christmas selection.
- Add a belt for Santa or a scarf for the Snowman to keep the 2 pails together.
- Using Beacon 3in1, glue the belt or ribbon scarf to the top of the bottom pail leaving a half of your material to go over the bottom of your top pail.
- Place your pails on top of each other allowing the belt or scarf to hold both pails together.
- Put some tissue paper in the hats to hold them in place, then glue them to the top bucket lid.
- Add vinyl faces or buttons to complete your gift.
Saturday, December 14, 2013
Chalkboard Pails
Give your homemade goods the presentation they deserve with these Peel and Stick Chalkboard Labels on our Acrylic Paint Pails!
Tall Pail:
Cut scrapbook paper to fit around the outside of the pail.
Use washi tape or ribbon as your trim.
Glue ribbon onto pail using Beacon 3in1 glue
Cut small strips of ribbon and tie them on to the handle.
Last make a chalk board label and place it on the front of your pail.
Short Pail:
Glue ribbon inside your pail using beacon 3in1 glue.
Fill it up with your favorite cookies
Then add a chalk board label to give it the final touch.
* Peel and Stick Chalkboard Labels $5.99 Includes 24 stickers: 12 large and 12 small. All Acrylic Pails on sale until December 15th, 2013. To see the entire list of sizes available go to our website here.
Friday, December 13, 2013
No Loom A Touch of Gold Rubber Band Bracelet
Pony Beads are very easy to put on a Rubber Band Bracelet! The best part is that you can personalize it any way you want! I used Craft Warehouse's metallic ones to give this bracelet a little shine! See how to make your own below!
You will need:
Navy Loom Bands
6 Gold Metallic Pony Beads
Directions:
To find out how to make a no loom rubber band bracelet, watch this tutorial video. Use 7 Navy loom bands to create the beginning of your bracelet.
When you get to the 8th band, slip a Pony Bead on to the band and then slip it on the hook just as before. Alternate a regular band and then a band with a bead until it fits around your wrist. Place a C or S hook on the ends to hold in place.
I only used 6 beads on this bracelet as I noticed as I write or type the beads on the bottom of my wrist hurt as I lean on them. So, this bracelet only has beads decorating the top!
We would love to see what you are creating with your loom bands! Tag your photos in either Facebook or Instagram with the hashtag #craftwarehouse so we can see!
Floating Frame Photo Display
Create a wall of frames using photos and your favorite vinyl saying to tie it all together!
Directions:
1. Pick out your favorite photos and sized frames.
2. Place photos inside the frames.
3. Apply vinyl to the top of one frame's glass according to the package's directions.
4. Hang to create a focal point in your home.
*Floating Frames 8"x8" $6.99 (Reg. $9.99) and 12"x12" $14.99 (Reg. $14.99) on sale until December 22nd, 2013
Subscribe to:
Posts (Atom)


