


I think pinwheels are so cute. I have been wanting to make them for the longest time and keep forgetting! This was my first real try at them and here is my how-to...
- Punch out a few squares from double-sided patterned papers that coordinate with your project. I used 2 sizes: 1 1/4" and 1 3/8".
- Using a ruler, draw light pencil lines from corner to corner, both ways.
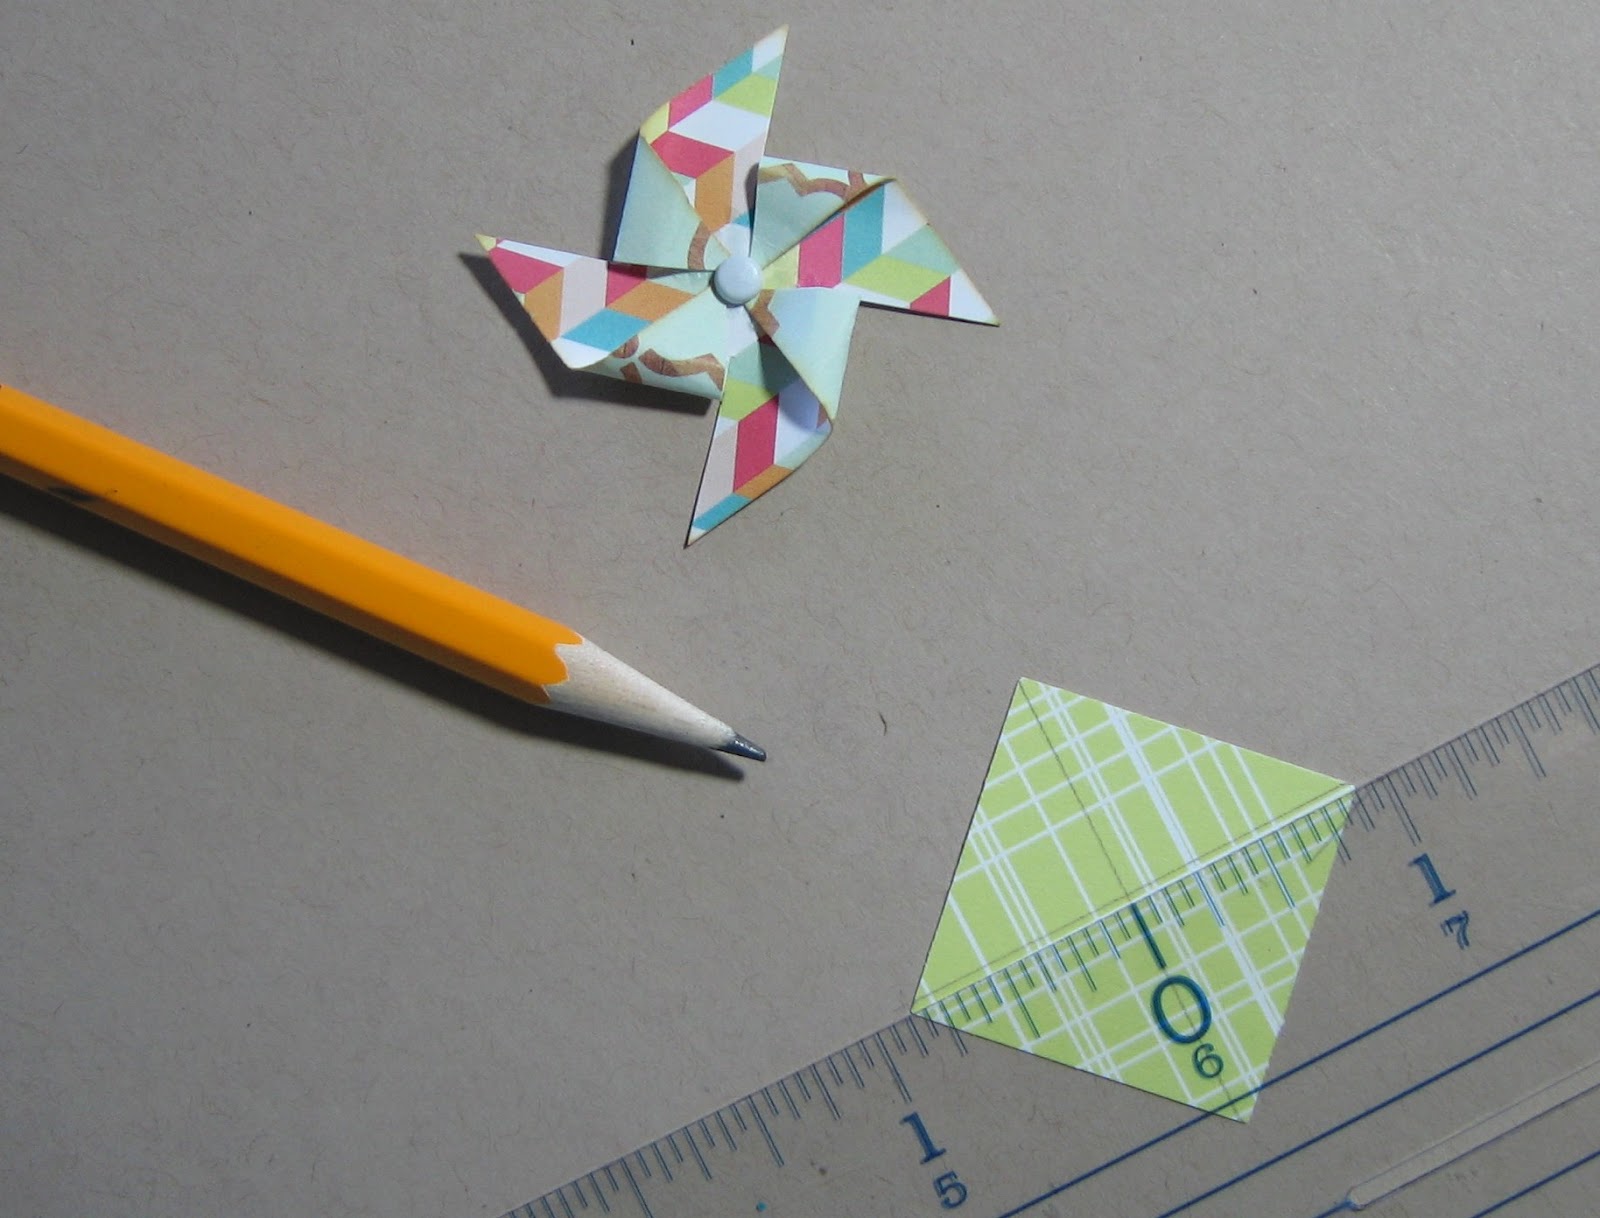
- Cut in from corners to about 1/4" from center. Erase pencil lines.
- Place a glue dot at center of square. Begin curling in same corner toward middle on each of the 4 wedges, sticking to glue dot.


- Add button or other decorative element to center. Done. So simple and so cute!

I love the feel that stitching adds, whether it be by hand or by machine. In this instance, I chose machine. With this paper collection and the layout I had in mind, I knew I wanted to be more playful with my stitching. So rather than create straight stitch lines, I moved my cardstock back and forth under the needle to create wavy lines. I went around 3 times to get the effect I wanted. It also serves to frame my layout.

The remainder of this layout is mostly just about cutting strips of
paper in varying widths and lengths and layering them. This created a
"foundation" for my photos and journaling block to sit on.

One thing I love about Echo Park collection kits is that just about everything you need is in the kit. Patterned papers, sticker embellishments and at least a couple of different alphas. All I added was a cardstock base, a few small buttons, dimensional adhesive, a bit of baker's twine, some lined paper for journaling and a decorative border punch. One thing I have learned about pre-made embellishments or stickers---don't be afraid to alter them. The "today" sticker on the clouds was embedded in a larger sticker embellishment. It didn't work for me, so I just cut out the part I wanted.
Here is the finished layout along with some close-up views...


I have enjoyed sharing my projects with you and I hope that I have inspired you to create TODAY!! Now go have some fun!!!
Visit Steffanie at her blog, Life of a Brown Eyed Girl, and follow her on Pinterest!
Another adorable project! Love the pinwheel and love the pops of color on the craft.
ReplyDeleteThis is fabulous! I love the kraft paper with the tones of the Eclectic. Thanks for great inspiration!
ReplyDelete