Thursday, July 18, 2013

Infinity Bracelet


Supplies:

6 inch piece 20G German silver wire (Beadalon)
12 inch piece of 0.8M diam.Elasticity
1/3 + of a strand of 4MM Shimmer crystal rondelles
2 4MM crimp covers
Additional supplies:
Bead Fix glue
Scissors
Chain nose pliers
Nylon covered flat pliers
Bail Making pliers
Side Cutters/ Flush cutters
Nylon and Steel bench block
Ball pin hammer

1.)    Begin by bending a large loop in one end of your German wire with your bail making pliers. Then do the same with the other end of the wire to form a figure “8”. Wires will bypass each other. 

2.)    Hold one end of the shaped wire with your nylon pliers and wrap one end of the wire around the center. 

3.)    Turn and hold the other side of the loop and wrap around center in the opposite direction.

4.)    Trim off excess wire. Place on your steel bench block and gently hammer with your ball pin hammer to shape the sides of the infinity shape flat. (Use caution, too much will cause it to break, or could begin to show different colored core of wire. 

5.)    Once you have your infinity symbol shaped, you will need to tie on the Elasticity using the recommended Surgeons knot. Once knot is secure dot a dab of Bead Fix glue onto the knot (being very careful not to get glue all over the infinity piece.

6.)    String aprox. 6 ¾ inches of 4M rondelles onto the Elasticity, tie the other end of the cord to the opposite end of the symbol using the same knot and glue technique.

7.)    To finish close a crimp cover over the knotted cord, gently with the nylon pliers and or the chain nose pliers, being careful not to cut through the cord with the sides of the crimp covers.

Tuesday, July 16, 2013

Day Glow Earrings


Supplies:

2 long kidney wire hooks (Beadalon)
2 ball tip head pins (Sweet Beads)
2 12M Miracle Beads
2 Small bead Caps (Sweet Beads)
2 pieces of rhinestone chain 8 crystals each
2 5in pieces of 24g German wire
2 6 inch pieces of coordinating embroidery floss

Additional Supplies:
Chain nose pliers
Round nose pliers
Side cutters
Scissors
Flat pliers

1.)    Begin by wrapping one end of the German wire around the outside (front) of one kidney hook. 

2.)    Then hold the tail end of the wire /hook and one end of a rhinestone piece of chain, begin wrapping the wire around the hook and rhinestone chain to secure the chain to the front of the hook. 

3.)    Finish other end of wrapped rhinestone the same way as you started. Repeat for other earring. 

4.)    Now you need to load your head pins with a small bead cap and a 12M round miracle bead. 

Then begin turning a wire wrapped loop at the top of each.

Slide finished dangles onto the factory loop of the kidney hooks, and tie and wrap a six inch piece of embroidery floss around the top of your wire wrapped loop, once tied and secure trim leaving small tails.

Friday, July 12, 2013

Braided "E" Bead Bracelet


Supplies:
63 E Beads (6/0’s rounds)
6.5 ft of TEX400 C-Lon cording
1 Tierra Cast Button
Additional Supplies:
GS Hypo Cement
Scissors
T-Pins
Foam Core board taped to a solid surface

1.)    Begin by cutting 2 pieces of TEX400 C-Lon cording into one 4ft length and one 2.5ft length. Fold the 4ft length in half, match the 2.5ft length to the bottom of one cord and fold at the same length as the longer cord, run both through the button shank.
       
2.)    Tie an overhand knot at the base of the button shank. You will have a short end to the one cord, using the GS Hypo cement add a dab of glue to the inside of the knot, and pull snug to secure.  Trim off excess short end, so that you have three working cords.
            
3.)    Load each of the three cords with 20 of the “E” beads, then one more to tie the end of the cording off so they do not slide off when braiding. (I recommend half knot so that you can untie when done.)
             
4.)    Pin button to your taped down foam core, and begin braiding (no beads) for a short little section (1/4in).

5.)    As you braid, you will need to slide one bead at a time to the top of the braid each time that cord is on the outside. As you do this hold the other 2/3rds of the braid with the opposite hand (this will help hold the braided beads in place as you work), cross over and hold the next 2/3rds with the over hand, as you slide the next bead into place. Continue until you have braided all of you r beads into the bracelet.

6.)    Once you have the beads in place, continue braiding for at least 8 inches more. Then you will need to tie an overhand knot with the braided section being careful to adjust to fit your wrist, making a loop large enough for the button to fit through once you have the knot in the location you like, add a dab of GS Hypo cement into the knot and pull snug to secure. (I recommend an additional amount of glue after the knot has been pulled snug).  Trim off the excess cord close to the knot to finish.

Tuesday, July 9, 2013

Echo Park's Here & Now Collection and a Silhoutte Tutorial


Hi there... Andrea Ancich here again to give you a little tutorial on the Cameo by Silhouette NOW available in our Salem, Gresham, and Vancouver stores!                                                            


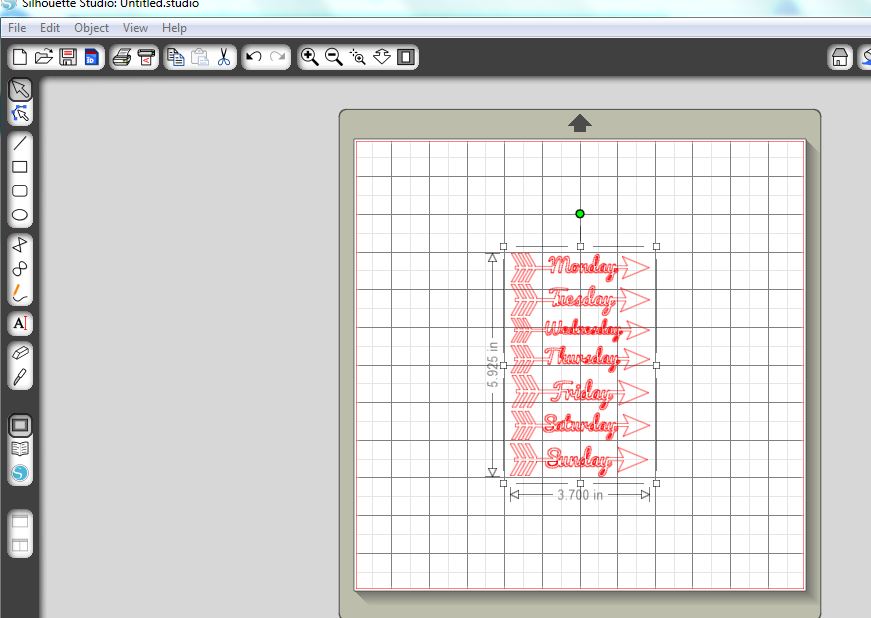
First: open a new workspace: When I work on mine, I make sure the grid is on there so I can measure things while I'm working. It's in the upper right hand corner. You can make your grid as big or as small as you'd like.


Second: Select the designs you would like to use. (Check out the Silhouette online store for lots of fun designs available).


I chose the arrows knowing I would eliminate all but the Monday arrow; I'll show you how to do that.

I moved them up to the corner of the 'mat' so i would maximize my cutting area.
 I right clicked on the design and "ungrouped" them. Next I deleted "Tuesday-Sunday".

I decided on a size that would work best for my project, knowing I could make it bigger or smaller if needed.


 Next, I selected a text to make my title.

I typed in my title with a default font that my program uses. (Keep in mind that all true type fonts should work as a font to be cut out).

I selected the font, centered it and changed it to a font that would compliment my pages.


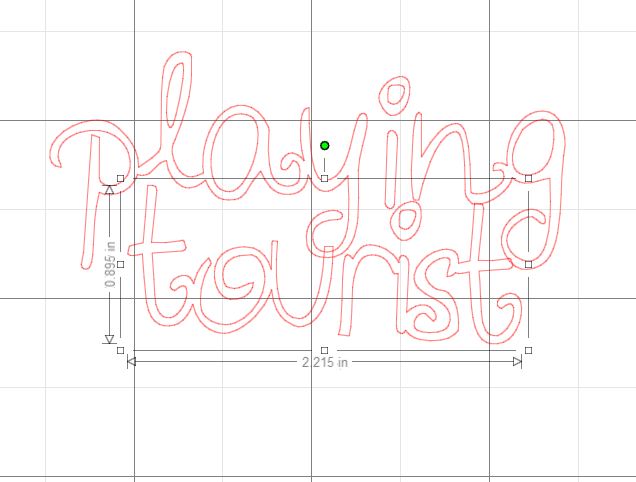
After I found the font I like, I right clicked on the words and ungrouped them. This will allow me to move them closer together.

So, I began moving them closer together. Having some of them overlap is ok. 

Next, right click and hit "weld". This action will weld your letters together like this one below. This will allow your machine to cut them together, kind of like cursive handwriting.
After you have done your first welding, highlight the bottom word and move it up to make your title more 'title friendly'. too much space is awkward.

After you move it into the place you want it, select it all and weld together again.
 You can see where the pieces were overlapping, they are now joined. This will cut out just as it looks on the screen. You can see that my title will be in 3 pieces: 1 - "playtou", 2 - "i" and 3 - "ngrist".

I made sure before I hit the cut button (at the top right of the screen - looks like a little blade) that I set the paper accordingly. In this case I selected cardstock, but i modified it by slowing the speed down to 1. Knowing some of the pieces of the designs were intricate, i didn't want them to get messed up. (This is all trial and error for me).

Next, I cut out my designs.

I placed the paper where it matched the designs on the computer. How fun you can use more than one piece of paper to cut out.... 

After you cut out your design, be very careful peeling it up.


Then, VOILA!

Finally, I set up my pages using my Photo Freedom page protectors.

Here is what I used for my project:


The Here & Now kit from Echo Park Paper, page protectors for the Photo Freedom line, my cameo and my pictures and ephemera from my day trip.

I added:
Cardstock (navy and red)
Washi tape

Next, I organized my pictures in the pockets.

Got the paper cut down.

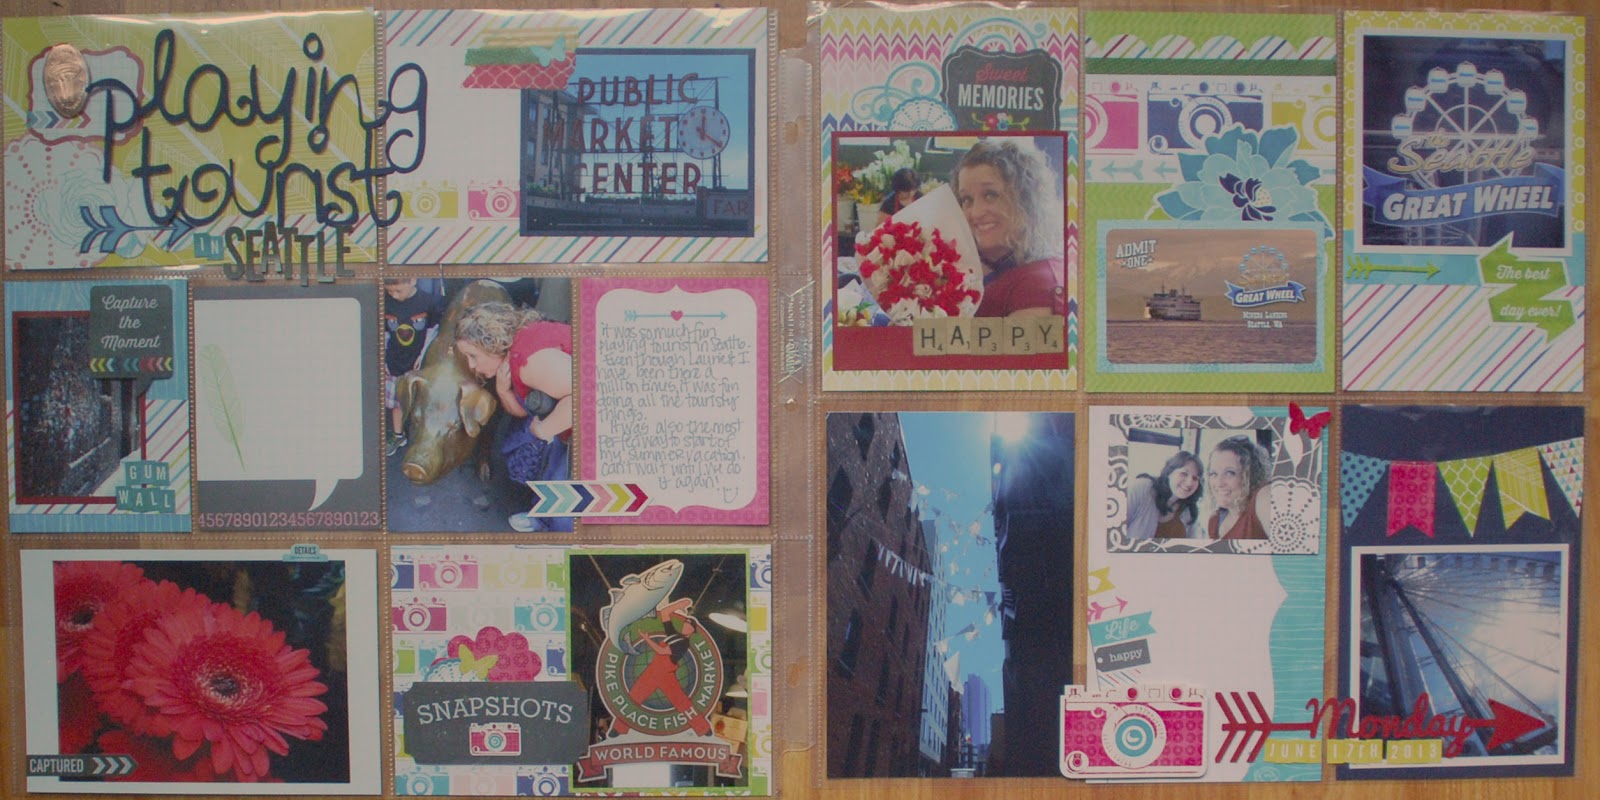
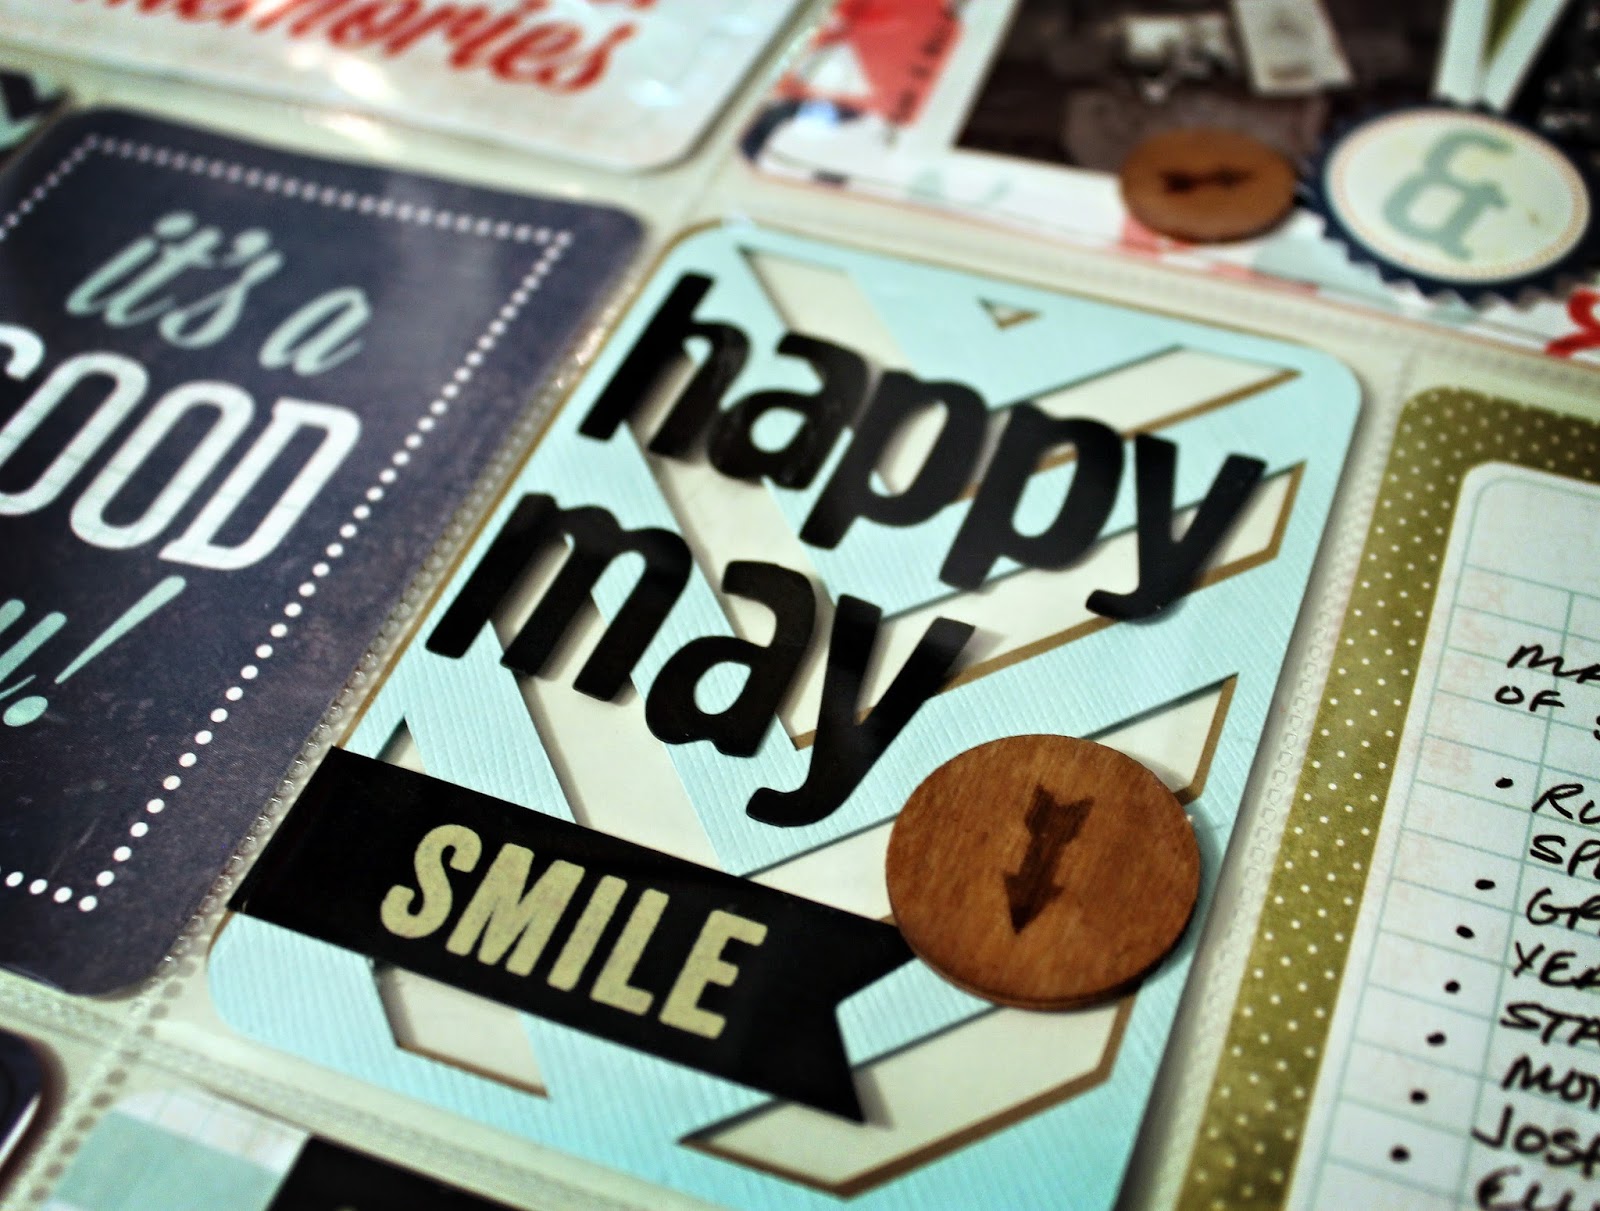
And created a fun layout for my "playing tourist" day trip to Seattle with my friend Laurie.
Here is the left side of the page:
Here is the right side of the page.

If you'll notice, I put the title on top of the page protectors. While the page protectors give us guidelines/structure to follow, try something new and out of the box next time you're doing a pocket divider page.
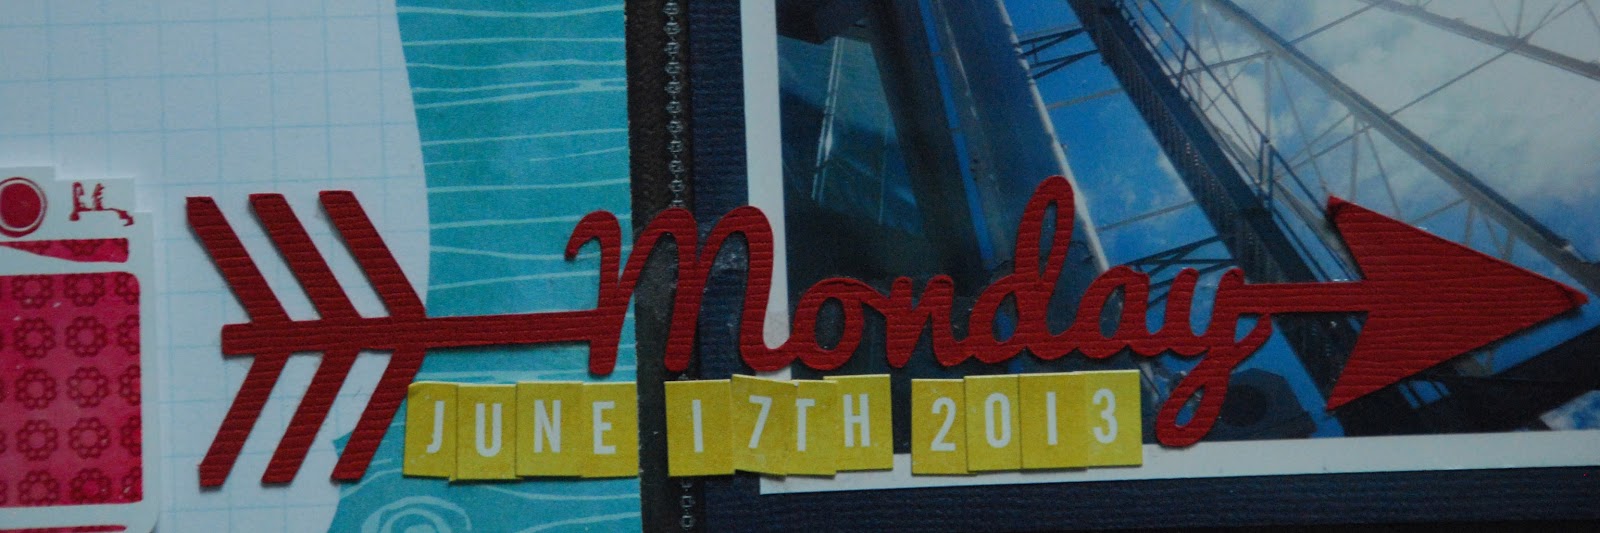
 I also put the arrow and date on top of the page protector.
 
I have an Instax camera that takes little Polaroid pictures, so I made a little frame on my Cameo with it so I can have fun frames around them. This picture and butterfly sit on top of the page protectors as well.

Good luck on your own adventures into Silhoutte land!

Happy Crafting,


Monday, July 8, 2013

Crystal Clay Ring


Supplies:
1 adjustable ring form (Zims Gems)
1 small piece of the clay (colored)
1 small piece of the hardener (neutral colored)
10-30 tiny chatons (SPC) Please provide only the crystal and black colors only-they will buy the crystal AB
Pearl colored mica powder

Additional supplies:
Wax tipped tooth pick
Rubber/latex gloves for mixing the clay
Alcohol based wet wipes
Soft paint brush for dusting on the powder

1.)    Slice off equal portions (small) of both the colored clay and the hardener; begin mixing the two together until they are all one color.

2.)    Gently tap the ball shaped mixed clay into the bezel ring form.

3.)    Begin adding crystal chatons starting with the larger ones first and filling in with the smaller ones. There will be wax residue left on the top of the crystals, wait until clay has hardened to polish and remove wax.

4.)    Once you have covered the clay surface with as many crystals, then give your ring a light dusting of pearlized mica powder using a soft water color brush.
  
5.)    Let your ring harden for at least 45 minutes (or as long as you can get the customer to let it harden before they leave the store), it will take about 2 hrs for the ring to harden enough to polish off the wax residue. In 24 hrs there ring will have cured and be hard and stable as a rock.

Friday, July 5, 2013

Echo Park Photo Freedom Tutorial by Design Team Member Elizabeth Wiederspohn


Hi, my name is Elizabeth Wiederspohn and I am very excited to design for Craft Warehouse! Today I get to share a new passion of mine with you-pocket scrapbooking.  Many people know it as Project Life, Project 12 , Photo Freedom, Snap, or many other types of page protector types of scrapbooking out there.  Crafters love this method of scrapbooking for the simplicity of telling their stories.  Not just a page of one event but of many different everyday moments and of course the special events as well.  This creates, in one simple place, the story of your life.  In one two page spread you can scrapbook seven to 15 different stories and it is so easy to put together.

Over the last few months I have collected many types of pocket page protectors.  Each have a different layout of how you can arrange photos on the page and embellishments.  I am hooked.  I have created a Disney Album using this method as well as a December Daily Album using this method.  There are no limits to what you can do with this type of scrapbooking.  Now add all the wonderful companies that are now selling specialty kits and papers to fit these pocket page protectors and we have magic.


Today I am working with the Echo Park: Volume One Photo Freedom papers.  They are adorable.  I love all the sayings and the bold colors.  I sat down one evening and cut out all the cards while watching a TV show and I was amazed at how much was in a kit.


Along with the cards they also include five different types of page protectors.   It's everything you need to get started and I have have laid it out for you in my video in four easy steps.

Supplies Used:
Echo Park-Volume One Photo Freedom Pack
Studio Calico-Wood Veneer Atlantic Burnished Circles
Pebbles-Lakeside Chalkboard ABC Stickers
Pebbles-Lakeside Chalkboard Stickers
Silhouette-diecutting machine
"Life Cards" Cutting Files from silhouetteonlinestore.com by Lori Whitlock
"Be Cool Stay Cool" Cutting Files from silhouetteonlinestore.com by Loni Leah
Tombo Mono Multiglue
ATG Scotch Adhesive
3D Foam Adhesive


To show you how to put together a Photo Freedom page, in four easy steps, I made a quick video.  Be prepared to move fast.  There was a lot of information to include.   Enjoy and I hope you have fun. 

Craft Warehouse: Photo Freedom in Four Easy Steps


or view it at YouTube http://www.youtube.com/watch?v=0XvdOTAub_s 

More photos and other projects at my blog http://scrappingappetite.blogspot.com/


Do you have a great idea to share with us? Would you like to design for Craft Warehouse? We would love to hear from you! Send an email with your name, blog address, and a sample of your work to jenevans at craftwarehouse dot com.  

Wednesday, July 3, 2013

Wire Wrap Ring


Miss out on this free Wire Wrap Ring make and take last weekend? Don't worry! We have the instructions for you to make your own from home!


Supplies:

7-8 inches of 20G German Wire (Beadalon)

Additional supplies:

Bail Making Pliers
Side cutters
Ring Mandrill
Rubber Mallet
Chain nose pliers

1.)    Begin by bending a 180 degree bend into the wire approximately 2.5inches from one end of the wire.  Gently squeeze into a hair pin shape.
         
2.)    Use your bail making pliers to gently bend the round portions of the heart with the small side of the pliers, being careful to leave the hair pin turn you made previously.
          
3.)    Bend an angle into the long side of the wire to create the heart point, run the short end of the wire past the point and shape heart. 

4.)    Carefully hold the heart with your chain nose pliers, and begin wrapping the short end of the wire around the shank of the ring. (Just like you would do a wire wrapped loop) Trim off excess wire –short side only!
           
5.)    Now you have created the focal portion of your ring, and it is time to gently shape the ring form around the ring mandrill. Wrap the heart and ring shank form as you go around the intended size you wish the ring to be, error on the side of too small, as we can gently stretch the ring to make it larger when done. (wire ring projects always seem to grow in size as you cerate them)
         
6.)    Once you have formed to the size you need, run the wire up through the center of the heart and back the direction of the ring shank. (careful so that you do not loose your shape and position of ring size.
    
7.) Now to complete the ring shape you will need to wrap the wire end around the ring shank just as you did on the other side at the base of the heart.  Trim off excess wire and gently tap with rubber mallet to shape the ring and size to desired finished size.

LinkWithin

Related Posts Plugin for WordPress, Blogger...
Blogging tips