Friday, November 30, 2012

Crate Paper's Acorn Avenue


This giveaway is now closed. Our winner has been picked via Random.org!

This would be perfect for my fall photos.


Scrapbook your Thanksgiving and Fall layouts with Crate Paper's Acorn Avenue! We are giving away 11 double sided patterned papers, 1 Chipboard Sticker Sheet, 1 sheet of Macaw Thickers Alphabet Stickers, 1 sheet of Mini Alphas, 2 different packages of Stand Outs stickers, and 1 package of Tape Stickers to one lucky winner! Valued at about $40!
To enter to win, you can...

1. Comment here! We need to be able to contact you if you win! If your email is not attached to your profile, please add an email address in your comments making sure to add spaces as shown: email (at) address (dot) com. Thank you!

2. Share our giveaway via Facebook by clicking "share" on our Facebook post, then come back here and tell us that you did.

3. Share our giveaway via Twitter, then come back here and tell us that you did.

4. Pin our giveaway via Pinterest, then come back and tell us that you did.

The winner will be picked via Random.org on December 3rd, 2012!

*We ship in the US only thank you.  

Simple Stories Christmas Cards by Guest Designer Michelle Wofford


Hey everyone, Michelle here to share some Christmas cards with you.  I was given the Handmade Holidays line from Simple Stories to work with.  I love the concept that Simple Stories has, it makes it super easy to make a bunch of cards in a few easy steps, especially if you buy the collection kit with all the papers and two sticker sheets. 


Let's start with a simple card like the one above.  The Simple Stories kit comes with sheets of 4"x 6" journaling cards.  These make the perfect base for a quick card.  You can either use a premade card or make one of your own by trimming a piece of cardstock to 6"x 8"  Then score your 6"x 8"piece at 4" on the long side and fold in half, you now have a card base that is 4"x 6".


Next, trim the journaling pieces so you have 6 individual pieces to choose from.  Each 12"x 12"piece has 6 journaling cards.  Select the journal card you'd like to use and attach it to the front of the cardstock card base you made.


Then select the stickers included with the collection to embellish and finish your card.  You can stick directly to the card, or if you are like me you'll add some pop up adhesive so the sticker pops off the card.  Layer the stickers however you like.  Add a little ribbon to a tag like this or leave as is.

 
One sheet of journaling spots from Simple Stories will make 6 cards and the sticker sheets have enough stickers to that and more.  So simple and quick you can have your Christmas cards made in no time.
 
Now I'd like to share with you a card that is a little more challenging but the result is a fun shaped card festive for Christmas.  For this card you can use a cardstock base or you can use heavy weight patterned paper for the base.  The Simple Stories papers are heavy enough to use for the base.  Without further delay here is a tutorial for a star fold card.


Above is the star fold card made using a piece of patterned paper from the Simple Stories, Handmade Holiday collection.  I'm going to show you how to make the card using a cardstock base.
 
 
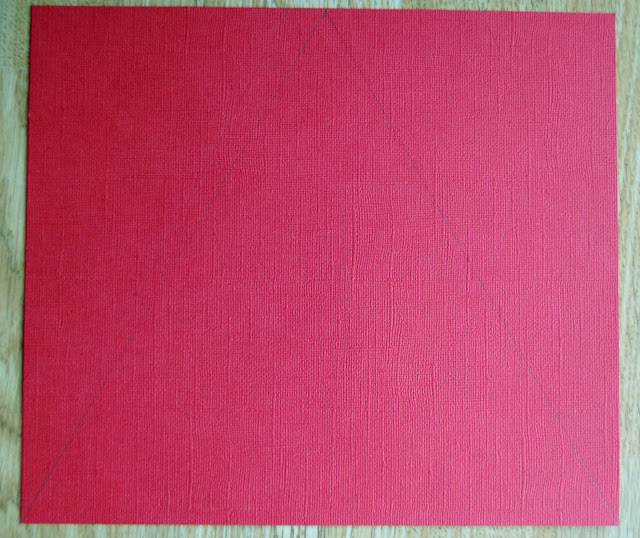
First start with a piece of cardstock trimmed to 8 3/4" x 10".  Use a ruler and pencil and lightly mark the center of one of the 10" sides (mark at 5").  Then take your ruler and line up the center mark to the bottom corner and draw a line lightly.  Repeat on the opposite corner, you should now have a triangle drawn on your cardstock. 


Line up the lines you traced on your paper trimmer on your paper trimmer and trim off the excess cardstock leaving you with just the triangle piece. 


Next using the Martha Stewart score board, line up one straight side of the triangle with the left side of the board and score at 4 3/8" and at 5 7/8".  Repeat for all three sides.
 
 
Use the bone folder to create a crisp fold along the score lines, folding the first score line in towards the base and the folding the second line out the opposite way, as shown below.


Now you'll want to trim some patterned paper triangles to decorate the base.  You will need three triangles with sides that are 3 1/4" long.  You can use your card base as a template and trace it so you know where to cut.  You will also need a larger triangle with sides that are 5" long.  Again, you can  use your base as a template.  (If you are making your card base with patterned paper you will skip this step).  Once you have all your pieces, attach the large one to the inside center and the smaller to the triangles on the corners.
 
 
Now your ready to embellish, add stickers and or a sentiment to the inside center of the card. 
 
 
The finishing touch I added to this card was to add a little bling in the form of Stickles Glitter Glue.  I used Star Dust Stickles and just ran the tip around the flourishes to add a bit of sparkle. 


Now fold your card up, to do this fold in one side at a time, take the third side and tuck one corner under the first side and it will hold itself together. 
 
 
Since the green on the red looks like a Christmas tree you could simply leave as is or you could continue to embellish the tree with ornaments and a tree topper.  The possibilities are endless. 
 
Be sure to check back tomorrow for another card tutorial!
 
Thanks for looking,  Michelle

Thursday, November 29, 2012

Guest Designer Spotlight Michelle Wofford


Welcome back this week's Guest Designer and Craft Warehouse Scrapbook Design Team Alumni, Michelle Wofford! We love Michelle's positive and talented personality! Not only is she a great scrapbooker, paper crafter, and cardmaker, but she explains her process so well that you want to learn from her! Some of our reader's favorite tutorials by Michelle have been her Shadow Box Card , Spring Time Banner, and Flower Tutorial.


How long have you been crafting?

I’ve been crafting as long as I can remember.  I have Aunts on both sides of the family that made crafty projects with me as a child.  Cross Stitch was one of the first crafts I started doing on my own.  I’ve been paper crafting for about 10 years.


What inspires you to be creative?

Inspiration can be found everywhere.  I enjoy art fairs and bazaars where you can see unique handmade creations in person.  I also love browsing online, I can type in a few words and see what pops up and now I can use Pinterest to save ideas to go back to.  If it’s scrapbooking I tend to be inspired by the patterns and colors. 


What Craft Warehouse products do you love to use?

Most of my scrapbooking supplies are purchased from Craft Warehouse.  There is a great selection of patterned papers, cardstock, adhesive, as well as a great selection of tools.  Craft Warehouse always seems to have the latest trends and tools available. 


How can you encourage others reading this column?

I hope to inspire others to create projects after they view my creations and tutorials.  I strive to create unique projects with detailed, easy to follow instructions so anyone can follow along and make their own. 


You can visit Michelle at her blog, Memory Garden Designs, Pintereset, and Facebook! Make sure you join us for the next two days, where Michelle will have three Christmas card tutorials to share with us!

Wednesday, November 28, 2012

Burlap Glitter Star Canvas

Supplies:
 
· Canvas 18”x24”
· 3 metal Stars (TIN 251)
· White Gold extra fine glitter
· Martha Stewart glitter glue
· Burlap Fabric 22”x28”
· Cream cardstock paper
· Tim Holtz Vintage Photo Distressed Ink Pad.
· E6000 glue


Directions:
 
· Wrap the burlap around the canvas and staple behind canvas to secure.
· Using a foam brush, cover star with glitter glue, then glitter.
· Then put cream cardstock paper in printer. Use a Word program to print the words “Live, Laugh, Love” on to paper. I used Kunstler Script size 55.
· Once printed I cut out words then used Tim Photo distressed ink around the edges.
· After glitter stars are dry, glue on to canvas using E6000 glue.
· Then add the words to each star using E6000 glue

Tuesday, November 27, 2012

Barn Wood Advent Calendar

 
Create a modern fun advent calendar. Fill with small gifts, perfect for little hands. Just as easy as clip and glue! Paper comes in pre-numbered squares.

Supplies:

· 16x20 Barn wood frame

· Americana Tuscan Red acrylic paint

· Burlap Banner (YOR-2836)

· Echo Park Countdown to Christmas paper

· Canvas Corp mini black clothes pins

· Push pins
 
 
Directions:

Paint frame. Cut up paper and clip onto Burlap Pouches. Cut banner to fit the inside of the frame. Use push pins to secure.

* 25% off regular priced Barn Frames until December 6, 2012.

Monday, November 26, 2012

Heidi Swapp Calendar Box


Create a stand up calendar box for close friends and family.
 
Supplies:

· Cigar Box Sch-40

· Americana Coral Blush acrylic paint

· Heidi Swapp “Vintage Chic” Collection 8x8 paper pack, statement stickers, mini tags, notes, trimmings and buzz word stickers.

· Accent paper calendar

· My minds eye embellishment dots

· Teresa Collins Rhinestones

· AC Thickers sliver glitter stickers

· Tim Holtz Ideaoligy large ring binder

· Mini white frame (NST/225)


Directions:

· Start by painting your cigar box with acrylic paint.

· Once dry, Choose a paper to fit inside your box. Cut out and glue to both sides of your box using Pioneer Glue Stick.

· Attach your 2 ring binder.

· Start creating your calendar. Choose 12 papers you would like to use. Cut 2 papers 5.5x5, 2 papers 5.5x5.1, 2 papers 5.5x5.2, 2 papers 5.5x5.3 and 2 papers 5.5x5.4. This will make it so you can see the layers of paper underneath.


· Also cut a paper 5.5x2, I cut the bottom like a pendent. Then added the year. Every month you can take off the month but always have the year hanging.

· Put a photo in the white frame, add embellishments and glue on to the opposite side of the box.
 
* 40% off Unfinished Wood Cigar Boxes (regular $5.99) until December 6, 2012.

Wednesday, November 21, 2012

Mixed Media Christmas Fairy Tray


Supplies

Tin Tray

Newsprint

Patterned Paper

Red Patterned Paper

Cardboard

Metal Hinges

Butterfly Filigree

Lace

Sticker Tags

Glitter

Aleene’s Tacks Glue

Directions

Cut the paper to fit in the bottom of the tray. Glue the paper down to the tray. Glue around the edge of the paper and sprinkle glitter into the glue before the glue dries. Cut of the top two butterfly wings and glue them to the top center of the tray. Cut the cardboard onto a dress top shape. Cover the cardboard with the red patterned paper. Glue the dress top on top of the wings. Glue gathered lace to make the bottom of the dress. Glue the hinges on as dress accents. Glue and sprinkle glitter onto the glue along the top of the dress. Add the sticker tags. Enjoy your project!

Monday, November 19, 2012

Glass Tile Projects


Supplies

Glass Tiles

Clear glaze - We recommend one of the following glazes:
Diamond Glaze
Ranger Glossy Accents
Mod Podge
Dimensional Magic

Bails for Jewelry
Ribbon

Beads (optional)
Chain & Clasps for Jewelry
Patterned Paper and/or Photos
Small Sharp Scissors


Directions
 
Lightly cover the backside of your glass tile with the glaze. Set the glued side on top of your paper or image. Let dry. Cut out the paper around the shape of your tile. Seal the paper with a layer of the glaze. Let dry. Glue your tile onto ribbon for an ornament or glue on bails and incorporate into a jewelry project. Give as a gift or enjoy for yourself!

Friday, November 16, 2012

Crate Paper's On Trend Collection


This giveaway is now closed. Our winner picked via Random.org is :
 
Pretty collection!
 
We are On Trend with this weekend's giveaway! We have Crate Paper's vercitile On Trend Collection to give away to one lucky winner, valued over $50!
 
To enter to win, you can...

1. Comment here! We need to be able to contact you if you win! If your email is not attached to your profile, please add an email address in your comments making sure to add spaces as shown: email (at) address (dot) com. Thank you!

2. Share our giveaway via Facebook by clicking "share" on our Facebook post, then come back here and tell us that you did.

3. Share our giveaway via Twitter, then come back here and tell us that you did.

4. Pin our giveaway via Pinterest, then come back and tell us that you did.

The winner will be picked via Random.org on November 19th, 2012!

*We ship in the US only thank you. 

Thursday, November 15, 2012

Hoop Wall Art


Create one-of-a-kind wall decor with your choice of fabric and embroidery hoops! Mix and match patterns and colors to create art! Would look perfect in a craft room, bedroom, or nursery. 


Wednesday, November 14, 2012

Crossword Home Decor

created by Sarah Owens for Craft Warehouse

Make a crossword all your own by creating wall decor that's unique to your family. Spell out your favorite words or your last name!

* 6"x6" Crossword Tile Blanks $1.99 and Crossword Vinyl Letters $1.99 each (reg. $2.99) on sale until December 6, 2012.

Monday, November 12, 2012

Traditional Advent


For centuries the church has set aside the four Sundays prior to Christmas as the season of Advent - a time to prepare for the holiday and the second coming of Christ.

The Advent wreath is traditionally a circle of evergreens with five candles. The circle symbolizes the wholeness of God, and the greenery represents eternal life. Traditionally the colors to be lit on the first two Sundays are lavender, symbolizing Hope and Peace. The pink third candle represents Joy and the fourth lavender candle symbolizes Love.

The lighting of the Advent candles is a time when families are encouraged to read a passage of Scripture, sing a hymn and pray.

Craft Warehouse carries all the supplies to create your own tradition this holiday season!

LinkWithin

Related Posts Plugin for WordPress, Blogger...
Blogging tips