


Our last design team assignment included the use of fun transparencies, from Simple Stories Awesome Line. I was excited to see these and new just what I wanted to create with it. Today I'm going to show you how to make your very own Shadow Box Card.

Here's what you'll need:
2 sheets of coordinating Patterned Paper
Cardstock
Transparency Sheet
Paper Trimmer
Scoring Tool
Circle Cutter
Adhesive
ScissorsEmbellishments
For the card I'll be making today I chose the Alora line from Bo Bunny Press. I LOVE this line, Such bright fun colors and lots of great patterns.


Once you've selected your paper select a coordinating color of cardstock to use as the card base. Trim two pieces of cardstock to 4 1/4" x 5 1/2". Next score both pieces of cardstock at 1/2" & 1" on both short ends using a scoring tool.

Next trim two pieces of patterned paper to 4 1/4" x 3 1/2", one for the front of the card and a second for the inside of the card. Adhere patterned paper to cardstock inbetween the 1" score lines. Once adhered use a circle cutter to cut cut a 2 3/8" circle (or whatever size desired) out of the center of one of the pieces of cardstock, this will be the front of your card.

Next trim a 3" x 3" piece from a transparency sheet and adhere to the inside back of the front of your card.
Now is a good point to fold those score lines. Fold towards the inside of the card at the 1" score lines and out at the 1/2" score lines. Your card should look like this from the top.

Your next step is to add embellishment or a sentiment to the back of the card that will be seen through the window you've made. For this card I fussy cut a shape from one of the sheets of patterned paper and attached using pop dots so it's not flat on the paper and adds dimension. Make sure to line it up with the window so it shows how you want it to.

Once you have the inside complete adhere the 1/2" flaps together. You can use a wet or dry adhesive for this, I recommend a wet adhesive, like Beacon's 3 in 1 available at your local Craft Warehouse, because you can make adjustments and line up the ends before the glue dries.
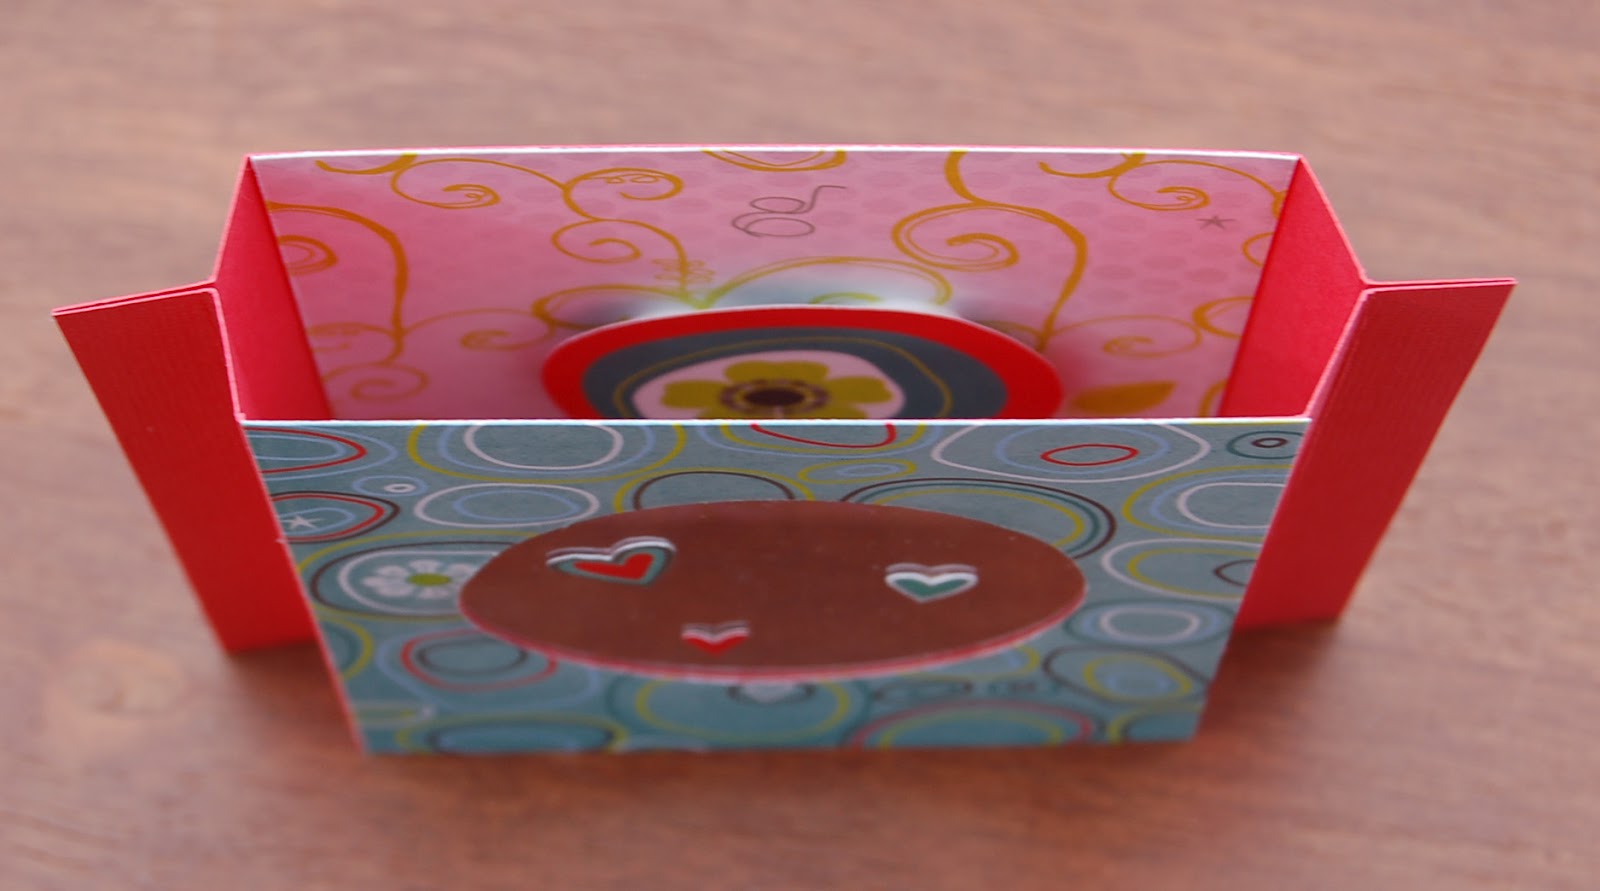
Complete your card by adding any finishing touches and embellishments you'd like to add. For this card I just cut out a few small hears from some of the patterned paper and attached on top of the transparency and also a couple larger pieces to the front of the card.

And here's another using the same line.

Thanks for looking. If you create any shadow box cards be sure to share.
~ Michelle ~

No comments:
Post a Comment
Thank you for your feedback! We love hearing from you!