Showing posts with label bo bunny. Show all posts

Wednesday, September 25, 2013

Echo Park's Reflections Fall Scrapbook Page by Design Team Member Erica Thompson


Hello Everyone!  My name is Erica Thompson and I am so very excited to be posting for the very first time here on The Craft Warehouse blog!  I had some great products to create with from The Craft Warehouse store and was able to scrap some recent photos of one of our boys using Echo Park's Reflections Fall  line.
 

I had four photos that I planned on using but then decided after going through the collection that I wanted to only use the two photos of my son and his acorns.  We had recently gone to the park and the boys had a blast finding acorns!  We had to keep a close eye on my youngest because he kept trying to eat them.  I knew this collection would be a perfect match for these photos and had so much creating my layout!

After I decided what photos I was going to use it was time to chose a background paper for my layout.  I normally take my photos and put them against each paper I have out and decide what I like best.  I ended up choosing one that matched the acorns my son had found and it also matched the football helmet on his sweatshirt.

Now that I have my background I like to start choosing pieces to layer my photos on.  I do tend to use a ton of layers but for some reason I was not feeling it with this layout.  I knew I had to use the patterned paper with the acorns on it so I went ahead and cut that down to a good size.  I am not one to measure so I just eyeball just about everything!  Once I had that paper cut down and placed it against a few of the other patterned papers and ended up picking out a great chevron paper that I thought went well with the other two papers.

When I scrap I do not follow any certain design rules I just have fun and do what I think looks good to me.  I have fun with it and just enjoy being creative.  Since my photos are going to have a light patterned paper behind them I decided to mat them with a dark brown paper from the collection to help them stand out. 

Now that I have my layers and my photos are matted I went ahead and adhered these pieced down to my background paper.  I only add adhesive to the centers of everything so that if I want to tuck in more layers and embellishments I can do it easily.  Once my layout is complete I will go back and add more adhesive to hold it all together or my favorite thing to use is staples!  Now that I have these temporary adhered to my layout it is start to add embellishments and bring this layout to life!  I start with a border strip from one of the collections sticker sheets.  I always take the stickers and stick them to the back of my hand a few times to remove some of their stick so they are easy to remove in case I change my mind after placing them on my layout.

This just happen to be the case with this border sticker and even though I liked the boarder strip I ended up removing it from my layout.  I continued to embellish my layout and I did alter a couple of the embellishments from the layered stickers.  I found a great layered sticker with some leaves and acorns on it but only wanted to use one of the acorn so I removed it and kept the dimensional with it and added it to this fabulous Bo Bunny flower.

Next I added a few embellishment clusters to my layout.  I tend to have at least one cluster somewhere on my layout.  I did keep this layout pretty clean but still had to add some clusters!


And that's it my layout is complete and I did it all while keeping my 3 year old busy with scrapbook paper, punches and markers and my 1 year old in his high chair eating his cereal!  Busy moms have to fit creative time in our schedules whenever we get the chance!  Here is a look at my completed layout!

I hope you enjoyed my layout and if you love this collection from Echo Park as much as I do make sure you visit Craft Warehouse where you will find everything you need to get your creative juices going!  Have a fabulous day!!

Tuesday, May 14, 2013

3 Little Angels Canvas Art


 Designed and Created by Connie Richardson for Craft Warehouse

Supplies:
  • 11x14 Canvas
  • Mod Podge
  • Bo Bunny Paper
  • Petaloo Color Me Crazy Flowers
  • White  Magnetic 3x3 Mini Frames
  • White Zipper
  • Silver Acrylic Pearl Paint
  • Iva pearls on a string
  • Martha Stewart Butterfly Embellishments
  • Cheese Cloth
  • Gesso
  • Golden Gel Med (Art Dept)
  • Flower Stencil
  • Tim Holtz Angel Wing Dye cut (need a big shot)
  • Tim Holtz Distressed vintage photo ink pad and dabber
  • Tim Holtz Distressed Stains: Broken China, Tumbled Glass
  • Tim Holtz idea-ology tissue wrap
  • Vintage patina
  • Spell Binders Flower Die
Directions:
  1. Paint sides of canvas with silver paint and let dry.
  2. Apply gel medium then lay in pearls.
  3. Distress Bo Bunny paper
  4. Spray canvas with tumble glass shimmer mist - Spritz preparation as follows: In spray bottle - shake together - 2parts simmer acrylic pearl paint along with 3 parts water & then add some distressed stain. Shake well, play with ratio until you get the desired consistency.
  5. Apply mod podge to tissue wrap - let dry
  6. Tear paper into a V - adhere zipper with adhesive - following the V.
  7. Cut out wings using the Big Shot and dye cut. Distress with ink Vintage photo ink pad and dabber.
  8. Cut out flowers using Spellbinders Dye & Big Shot.
  9. Glue all components to canvas

Join us for our National Scrapbooking Month! To help celebrate there will be in store giveaways, make and takes, and special sale prices!

You can also enter to win prizes the entire month of May on Instagram! This is how to play:

1. Take a photo in Instagram while you are in Craft Warehouse anytime during the month of May (no purchase necessary).

2. Tag your photo by typing "@craftwarehouse" and "#craftwarehouse" so we can see your photo!

3. Each time you post a photo between May 1st - May 30th and tag us, you can be entered to win prizes!

Thursday, May 9, 2013

Home with Friends Canvas


With Mother's Day right around the corner, we will be featuring quick and easy Mother's Day gift ideas all week long! All you will need are the few supplies listed below and some love to create them for the Mother in your life!


Supplies:
  • 12x12 White Canvas
  • Bo Bunny "Prairie Chic" paper collection
  • Decorating Your Life "May your Home always be...." vinyl
  • 1 Yard of burlap ribbon
  • Metal flower (Yor/2739)
  • Mod Podge matt or gloss finish
  • E6000 glue

To find more canvas inspiration, visit our ad on our website here!

Sunday, April 28, 2013

Bo Bunny Isabella Giveaway


This giveaway is now closed! Thanks for playing along! Our winner is:
LOVE this. would be perfect for crops
 
We love our customers and are so thankful every day for the support you continue to give Craft Warehouse! Craft Warehouse always takes pride in building relationships with our customers! Some of our devoted customers are some of our best friends! They are the first to come to use with their latest art project about their family event, children, or even grand children! We feel like we are a part of one big family! 

That's why we are so grateful and excited to reach 9k Facebook Fans! Whoohoo! To celebrate, we are having one HUGE GIVEAWAY in addition to the Weekend Giveaway and National Scrapbook Giveaways we are having right now on Instagram!


For our 9k Giveaway, we have Bo Bunny's Isabella Collection to giveaway!


This prize pack includes 12 12x12 double sided pattern papers, 1 12x12 Chipboard Sticker Sheet, 1 package of Large Doilies, 1 package of Medium Doilies, 1 package of Small Doilies, 1 sheet of Cardstock Stickers, 1 sheet of Cardstock Scripted Alpha Stickers, 1 package of Isabella Buttons, 1 package of Isabella Trinkets, 1 package of Isabella Jewels, 1 package of Isabella Brads, 1 package of Isabella Petals, 1 package of Isabella Noteworthy, 1 package of Isabella Layered Chipboard Stickers, 1 package of Isabella Dimensional Stickers, 1 package of Licorice Jewels, 1 package of Chocolate Jewels, 1 package of Frosting Jewels, and 1 package of Glaze Jewels! That is a prize package valued over $100!


Not only can you win this prize package, but you will ALSO win this amazing Bo Bunny tote that matches the collection!


To enter to win, you can...

1. Comment here! We need to be able to contact you if you win! If your email is not attached to your profile, please add an email address in your comments making sure to add spaces as shown: email (at) address (dot) com. Thank you!

2. Share our giveaway via Facebook by clicking "share" on our Facebook post, then come back here and tell us that you did.

3. Share our giveaway via Twitter, then come back here and tell us that you did.

4. Pin our giveaway via Pinterest, then come back and tell us that you did.

One winner will be picked via Random.org on May 7th, 2013!

*We ship in the US only thank you.


You can also enter to win prizes the entire month of May on Instagram! This is how to play:

1. Take a photo in Instagram while you are in Craft Warehouse anytime during the month of May (no purchase necessary).

2. Tag your photo by typing "@craftwarehouse" and "#craftwarehouse" so we can see your photo!

3. Each time you post a photo between May 1st - May 30th and tag us, you can be entered to win prizes!


Friday, March 1, 2013

Bo Bunny Ribbon and Flowers


 Thanks for playing along! This giveaway is now closed. Our winner picked via Random.org is:
Oh, heck ya, these are awesome!

It is Weekend Giveaway time again with this Bo Bunny Flower and Ribbon Giveaway! You will get all the packages shown above about $40 value!

To enter to win, you can...
1. Comment here! We need to be able to contact you if you win! If your email is not attached to your profile, please add an email address in your comments making sure to add spaces as shown: email (at) address (dot) com. Thank you!

2. Share our giveaway via Facebook by clicking "share" on our Facebook post, then come back here and tell us that you did.

3. Share our giveaway via Twitter, then come back here and tell us that you did.

4. Pin our giveaway via Pinterest, then come back and tell us that you did.

One winner will be picked via Random.org on February 18th, 2013!

*We ship in the US only thank you.

Sunday, February 3, 2013

Valentines Inspiration!


Projects Created by Racheal Ziesemer for Craft Warehouse


These notebooks were realy simple, just cut paper to fit and use our Pioneer embellishment glue stick, and some pop-dots to add dimension.


The frame with the clothes pins comes with the clothes pin already in the frame just add you favorite paper & photos.
"i love you because..." frame is a vinyl applied to a 8x10 frame use a bistro marker to express all the things you love....change it daily or weekly.


Cones! Love these cones!
Here are 4 different ways to decorate:
1. Use Martha Stewart punch and glue on hearts using glue gun.
2. Cut patterned paper .5" x 3" make into a loop and glue on cone
3. Paint your cone with white acrylic paint and wrap with bakers twine.
4. Wrap with ribbon!


Valentines Gift Card Holder Created by
 Danielle Cohen for Craft Warehouse


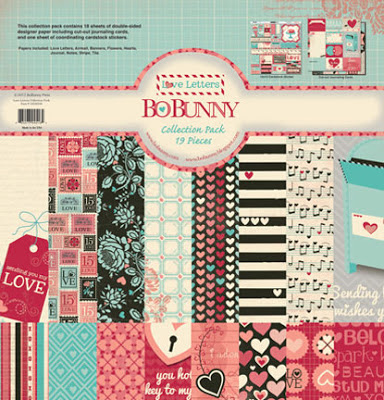
Bo Bunny "Love Letters" Collection

Sunday, January 27, 2013

Echo Park Love Story


Designed by Danielle Cohen for Craft Warehouse

 
Every little one would love to have a cute mailbox like this! Start a new tradition of leaving a little note for your kids every morning....or have them create one for their teacher. What ever you plan to do with this project it will be a memory keeper! 

Supplies:

Cardboard paper mailbox (CPL 1004420S)
Candle stick base (Cal/45)
Plaque (Darice)
Paper of your choice
Pioneer Glue Stick
Black Acrylic Paint


Friday, January 25, 2013

Bo Bunny Love Letters


Just arrived!


Designed by Danielle Cohen for Craft Warehouse


Take mini buckets and chalk board vinyl, use a die cut or punch to create a circle or design.
Place chalk vinyl on the front of each bucket and use bistro chalk marker to spell out your message. Cut paper to fit the inside of the buckets.

 
This Bucket was created using a 3x3 wood block and a mini candle stick glued to the bottom of the block. Paint block and add paper and photos!
 
 
This is the perfect bucket for a gift. Homemade cookies would fit perfectly!
Paper was cut to fit inside the bucket then a knob was glued to the top of the bucket, add a fabric flower by Canvas Corp to the front and you are done!

Friday, November 9, 2012

Open House Giveaway!


This giveaway is now closed. Thanks for playing along! Our winner is :
 

PICK ME! PICK ME!!

Get inspired this holiday season and attend our annual Holiday Open House, Saturday November 10th at 5pm-10pm! Enjoy an evening of deals, door prizes, make and takes, and lots more! To kick off our celebration, we have this HUGE Bo Bunny prize pack to giveaway to one winner, valued over $60 worth of product!
 
 
To enter to win, you can...

1. Comment here! We need to be able to contact you if you win! If your email is not attached to your profile, please add an email address in your comments making sure to add spaces as shown: email (at) address (dot) com. Thank you!

2. Share our giveaway via Facebook by clicking "share" on our Facebook post, then come back here and tell us that you did.

3. Share our giveaway via Twitter, then come back here and tell us that you did.

4. Pin our giveaway via Pinterest, then come back and tell us that you did.

The winner will be picked via Random.org on November 12th, 2012!

*We ship in the US only thank you. 

Thursday, April 12, 2012

Shadow Box Card Tutorial by Design Team Member Michelle Wofford

Michelle Wofford, from the 2011 Design Team, is back to share a tutorial on how to make a fun 3-dimensional card!

Our last design team assignment included the use of fun transparencies, from Simple Stories Awesome Line.  I was excited to see these and new just what I wanted to create with it. Today I'm going to show you how to make your very own Shadow Box Card. 


Here's what you'll need:

2 sheets of coordinating Patterned Paper
Cardstock
Transparency Sheet
Paper Trimmer
Scoring Tool
Circle Cutter
Adhesive
 Scissors
Embellishments

For the card I'll be making today I chose the Alora line from Bo Bunny Press.  I LOVE this line, Such bright fun colors and lots of great patterns.


Once you've selected your paper select a coordinating color of cardstock to use as the card base. Trim two pieces of cardstock to 4 1/4" x 5 1/2".  Next score both pieces of cardstock at 1/2" & 1" on both short ends using a scoring tool. 


Next trim two pieces of patterned paper to 4 1/4" x 3 1/2", one for the front of the card and a second for the inside of the card.  Adhere patterned paper to cardstock inbetween the 1" score lines.  Once adhered use a circle cutter to cut cut a 2 3/8" circle (or whatever size desired) out of the center of one of the pieces of cardstock, this will be the front of your card. 


Next trim a 3" x 3" piece from a transparency sheet and adhere to the inside back of the front of your card. 

Now is a good point to fold those score lines.  Fold towards the inside of the card at the 1" score lines and out at the 1/2" score lines.  Your card should look like this from the top.


Your next step is to add embellishment or a sentiment to the back of the card that will be seen through the window you've made.  For this card I fussy cut a shape from one of the sheets of patterned paper and attached using pop dots so it's not flat on the paper and adds dimension.  Make sure to line it up with the window so it shows how you want it to.


Once you have the inside complete adhere the 1/2" flaps together.  You can use a wet or dry adhesive for this, I recommend a wet adhesive, like Beacon's 3 in 1 available at your local Craft Warehouse, because you can make adjustments and line up the ends before the glue dries.  


Complete your card by adding any finishing touches and embellishments you'd like to add.  For this card I just cut out a few small hears from some of the patterned paper and attached on top of the transparency and also a couple larger pieces to the front of the card. 


And here's another using the same line.


Thanks for looking. If you create any shadow box cards be sure to share.

~ Michelle ~ 


LinkWithin

Related Posts Plugin for WordPress, Blogger...
Blogging tips