Showing posts with label photography. Show all posts

Thursday, August 15, 2013

Pedistal Photo Calendar Display


This photo holder could have a dual purpose! One side a photo/memo holder and the other side a calendar! Or create three to give you a great mantel or shelf center piece!


Supplies:
  • Wood hollow board 5"x5" (don-92)
  • Unfinished wood curtain finial
  • Unfinished wood candle stick (don-132)
  • Metal sheet & Burlap fabric
  • Black acrylic paint
  • Sanding block
  • Extra strong mini magnet
  • Elmer's wood glue
  • Beacon 3in1 glue
  • Beacon fabric glue
  • American Crafts medium black brads
  • Tim Holtz 1"binder rings
  • Canvas Corp paper
  • Paper Accents mini calendar paper
Directions:
  1. Start with connecting all your wood surfaces together using Elmer's wood glue. (finial to wood board & wood board to candle stick base) Let dry for 6 hours.
  2. Paint wood surface using acrylic paint. Let dry
  3. Sand wood around edges to give it a worn look.
  4. Drill small holes in the inside of your wood board to hold your binder rings.
  5. Install binder rings.
  6. On the front of your board glue your metal sheet using Beacon 3 in 1 glue. Press down while it dries. (this with cover up your binder ring brads)
  7. Cut burlap to fit the front of the metal, place brads in all 4 corners. Glue fabric to metal using beacon fabric glue. Let dry.
  8. Create your calendar by cutting small pieces to fit on the binder rings. Then glue calendar on each piece of paper. Punch holes in the top to go through the rings. 
  9. Use a super strong mini magnets to hold your memo or photo on the front of your metal sheet.

Monday, April 29, 2013

Canvas-on-Canvas Display


We all love Pinterest, but it's time to stop searching for ideas and start creating in real life!

Use our projects as a tool: replicate the project entirely, tweak it with your favorite colors and embellishments or use it as a starting point for something even more amazing! No matter what your 'crafting' skill level, there's a project here for you!

Stack 2 canvases for a layered look and add a drop-in frame for a professional finish! 

Supplies:
  • 12"x12" White Canvas
  • 8"x10" Black Canvas
  • 12"x12" drop in canvas frame
  • Fat quarter of fabric
  • "Family is Everything" Plaque
  • Easy Shot staple gun
  • Double sided Scotch tape
  • E6000 Glue
* Canvas 50% off regular prices, Fat Quarters $2.25 each (reg. $2.99), and 12x12 Drop in Frame $11.99 (reg. $19.99). Sale prices good until May 30, 2013.

Get our free Canvas-On-Canvas Display project sheet on our website here!

Friday, April 26, 2013

Heartfelt Instagram Canvas Art


We all love Pinterest, but it's time to stop searching for ideas and start creating in real life!

Use our projects as a tool: replicate the project entirely, tweak it with your favorite colors and embellishments or use it as a starting point for something even more amazing! No matter what your 'crafting' skill level, there's a project here for you!

Supplies:
  • 20"x20" White Canvas $10.99 (regular $21.99)
  • 11 - 2x3 Mini Canvas $1 (regular $1.99)
  • 14 - 2x2 Mini Canvas $1 (regular $1.99)
  • Black Acrylic Paint
  • FolkArt Black Chalk Paint
  • White Chalk
  • Glitz "Uncharted Waters" Paper Collection 6x6 paper pad, What Knots, Rhinestone Stickers, peek-a-boos & Title Stickers
  • Pioneer embellishment glue sticks
  • Glossy accents
  • Metal plaques (YOR/3018)
  • TomBow Permanent Tape Runner
  • Easy Shot Staple Gun
Do you use Instagram? Turn your favorite Instagram photos into a work of art. We put each photo onto a mini canvas for dimension! Add keepsakes for even more sentimental value!

Did you know Craft Warehouse is now on Instagram? Follow us @craftwarehouse and tag #craftwarehouse through the entire month of May to enter to win prizes all month long! Check out more details here!

Get your free Heartfelt Instagram Canvas Art project sheet on our website here! Sale prices good until May 30, 2013

Wednesday, April 24, 2013

Faith Hope Love Photo Canvas


We all love Pinterest, but it's time to stop searching for ideas and start creating in real life!

Use our projects as a tool: replicate the project entirely, tweak it with your favorite colors and embellishments or use it as a starting point for something even more amazing! No matter what your 'crafting' skill level, there's a project here for you!

Black canvas really makes everything stand out! Wouldn't this look great as an entryway display in your home?

Supplies:
  • 9 - 8"x10" Black Canvas
  • 6 - 8"x10" Photos
  • Decorating Your life "faith hope love" Vinyl
  • TomBow permanent adhesive tape runner
* Hope, Faith, Love Vinyl $6.99 (regular $9.99) and 8"x10" Black Studio Canvas $4.65 (regular $9.29) on sale until May 30, 2013

Get our free Hope, Faith, Love Photo Canvas project sheet on our website here!

Monday, July 30, 2012

State Fair


1. My Mind's Eye The Sweetest Thing Collection Coming Soon!;
2. Echo Park Paper Company Eclectic Collection;
3. The Gingham Owl 4. Studio Calico Mister Huey's Mist Sunshine

Tuesday, June 12, 2012

Picture Perfect Week


Welcome to Picture Perfect Week, where we will inspire you to fill your bare walls with backless frames!


Use a variety of ornate wood backless frames and group them up for a picture perfect look in any space! Ideal for any bare wall that needs a fresh new look. You can also use the frames as a border for smaller items to create a focal point.


To create this amazing wall display for your own home follow these easy steps below.

1. Apply chalkboard paint to your wall following the manufacturers instructions.

2. First lay out your frames on the floor to see how you would like to arrange them. Move them around until you like your layout. Then start hanging the frames on the wall (as seen below).

3. Frame a photo.


4. Add another framed photo.


5. Hang a backless frame and personalize the center with chalk.


6. Hang art under the backless frame. These are available at your Craft Warehouse too!


7. Use a backless frame to frame art, also available at Craft Warehouse.


8. Hang a backless frame and write a quote or note to the family.


9. Fill in the rest of the space with smaller frames. Use chalk around the frame to make one stand out more than the rest.


You can find a variety of backless frames at your local Craft Warehouse and are 50% off through June 17th! Stay tuned in this week with more ways to use backless frames!

Friday, December 30, 2011

Baking Holiday Goodness by Design Team Member Steffanie Seiler

Hi, Design Team Member Steffanie, here! If you are anything like me, you take a lot of photos of food. I take them with the full intent of one day incorporating them into a scrapbook page. Until now though, that hasn't really happened. I seem to always have so many people photos that take precedence over these non-people ones. Well, I decided to change that and create my first ever just food layout---and what better subject than all those holiday treats I've been baking! On a recent trip to Craft Warehouse, I picked up some new scrappy goodies from one of my favorite manufacturer's, Echo Park. This is their Season's Greetings collection. I love it!

I did some hand-stitching between the recipe card pockets, trimmed around one of the journal cards to give it some interest and displayed one of the photos like a wall-hanging. Title letters are primarily from the Echo Park collection with the exception of the cream colored velvet ones. These are American Crafts Thickers I had in my stash.


I thought it would be fun to include the recipes of these cookies so that in case someone (in the future) wants to make these beauties, they'll be able to!


Thanks for taking a look at one of my favorite layouts of the season!

Monday, November 21, 2011

Thankgiving Project by Design Team Member Jennifer Evans

Family is pretty important to me. I love the memories that I have of my late grandparents and wish that I could hear them tell me just one more story of their growing up in England or their adventures coming to the United States on the Queen Mary. Growing up, we always had photos and stories to share about our family's history.

When I got married, I asked my in-laws about pictures of them or their family and they told me they didn't have any pictures of them as babies. I was shocked! No photos?

A couple of years ago, I was in the spare room helping my mother-in-law. She came across a few boxes in the closet. She said they were her mother-in-law's and she didn't know what was in them. She opened them up and inside was envelopes. I asked if I could take them home to look through them and she said it would be fine.

Needless to say, I found a gold mine. My husband's grandmother was quite the scrapbooker at heart. She had organized every envelope down to each month since her marriage. Inside each envelope were negatives! They were still in perfect order including the negatives of my father-in-law as a baby in sealed envelopes! I was the first one to crack open the envelope sealed with a 1950's date, hold up the negative to the light, and squeal at the treasure I had found. Some of these photos had been lost at what was thought forever. She had preserved them by sealing the envelope and keeping them in a dark closet for years!


Layout by Jennifer Evans
Using Crate Paper's Farmhouse line


I purchased a professional negative scanner and began preserving my family's history. I then decided, that my son should know the story of his family and wrote up questions for my family to answer. I emailed these questions to family members ahead of time and asked them to email me the answers before Thanksgiving. (You could give them a date before Christmas too).

I didn't tell the family my real reason for collecting these answers; they all thought they would be just reading the answers on Thanksgiving. What I really did, was compile the answers and gave every family member their own page in a scrapbook. I added recent and the new photos I found hidden away in the album.

I will never forget the look my in-law's had when they opened their Christmas gift that year. There were pictures of their wedding that they hadn't seen in over 20 years on the front cover. Their eyes were filled with tears and they were speechless. Now, that was the best gift I could have ever given them! A collection of memories to pass down through the years.

Some of the questions I gave the family are as follows. Feel free to use them in your own scrapbook album. The more questions the better because they may not want to answer some of them if they don't want to.

What was it like growing up as a small child?


What was your favorite part of school?

What was your favorite memory of your grandparents? Your parents?


What did you like to do as a child? What was your favorite game?

What was your favorite food?


What was your favorite childhood toy?

If the album is for a specific person add What is your favorite thing about ___________?

What is your favorite holiday memory?


What was your favorite family vacation?

What do you love about being a __________ (mom, dad, aunt, uncle, etc.)


Tuesday, July 19, 2011

Design Team Blog Challenge - Mini Top Hat Tutorial

Do you ever see a collection of papers and embellishments and think, "I know exactly what I want to make with that!" One of our first assignments on the design team was to create something with this kit. What a challenge! There was muslin, paper, chipboard stickers, paint, and even a zipper! With this collection (and seeing the gorgeous new feathers at my local Craft Warehouse) I knew what I wanted to create! In fact, it was such a detailed project, I knew I wanted to share with Craft Warehouse readers how to make it! Below, you will find the pattern to make this project and also a detailed video tutorial. 

As a photographer, I am always looking for fun and cute ideas that will help style my photo shoots. Plus, as the only female in my family I am always looking for excuses to make sweet things in pink. ;) I decided to make a mini top hat hair accessory, something similar to Alice and the Mad Hatter in Alice in Wonderland. This darling hat clips on to a stretchy head band. How great would this be for your little princess, tea party, or birthday?

Here's a photo of the original kit that I got to work with...


All of the papers were double sided.

Here a some photos of the finished project...


The sweet girl above is my niece. It was her birthday last weekend so made one with a "K" on it in the front. I also created a flower with muslin in the back. She posed for me so I could get some photos of her in the little hats. Then, she took hers home.

I created two others with the kit and two more to show you. 


This is the one I created for the video tutorial (see videos below)...


Have fun watching these detailed video tutorials so you can create your own!


Click here to get the pattern for this project.

If you decide on creating a mini top hat I would love to see it! Comment and leave a link to an online photo of it to share with others!

Enjoy!

Jen Evans
Craft Warehouse Design Team Leader

Friday, May 20, 2011

Scrapbooking Blog Party: Photography Challenge

Hello friends! I hope you are excited about this weekend's blog party and are ready to play along! I am Jennifer, a wife, mom, artist, and photographer. My husband and I have a small photography business, where we capture memories for others. I wanted to share some photography tips today, because, well… scrapbooking and photography go hand-in-hand. Don’t they?

When I am teaching other scrapbookers about photography, I ultimately ask them, “What is the story you are trying to tell?” When you look through the view finder of your camera, during that “moment” what do you want to capture forever?

I have to admit, I use to snap away hundreds of photos a day and then I was overwhelmed with what I was going to put into my album. Now, I think ahead. Yes, while I am actually looking through the lens I am already deciding what story I want to tell!

Let me show you an example of what I mean.

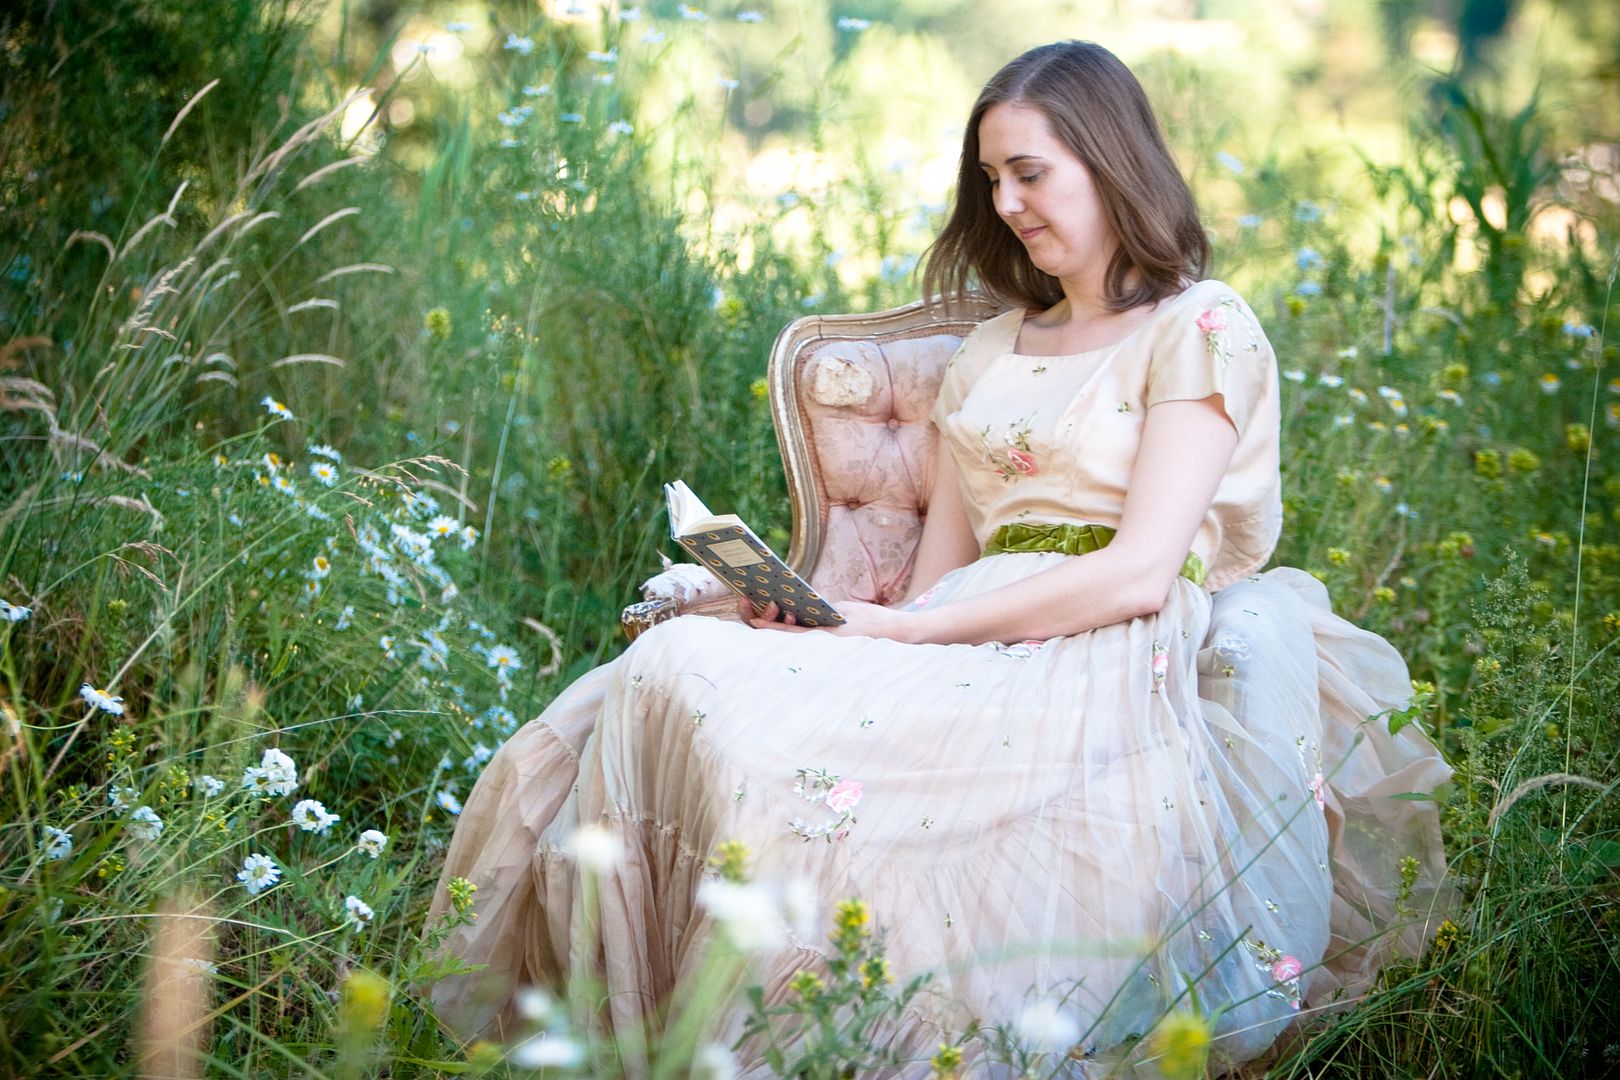
I actually planned a sisters evening photo shoot just for fun last summer. I have a wonderful friend who let us borrow her vintage gowns to take photos in. When I saw the below dress, I knew I wanted some kind of “Jane Austen” photo. Yes, I actually planned these pictures around a dress! ;) I know you do the same thing… you bought that dress for your little girl because it was just {too cute!} and it would make the best photos or match that paper you just bought! ;)

I want to show you the sequence of photos I took of my sister and a vintage copy of Pride and Prejudice. All the photos are lovely but I when it came down to me picking one for the story I wanted to tell, I picked the last one.


For this story that I wanted to tell, I needed to crop in closer to the book when I was taking the picture.

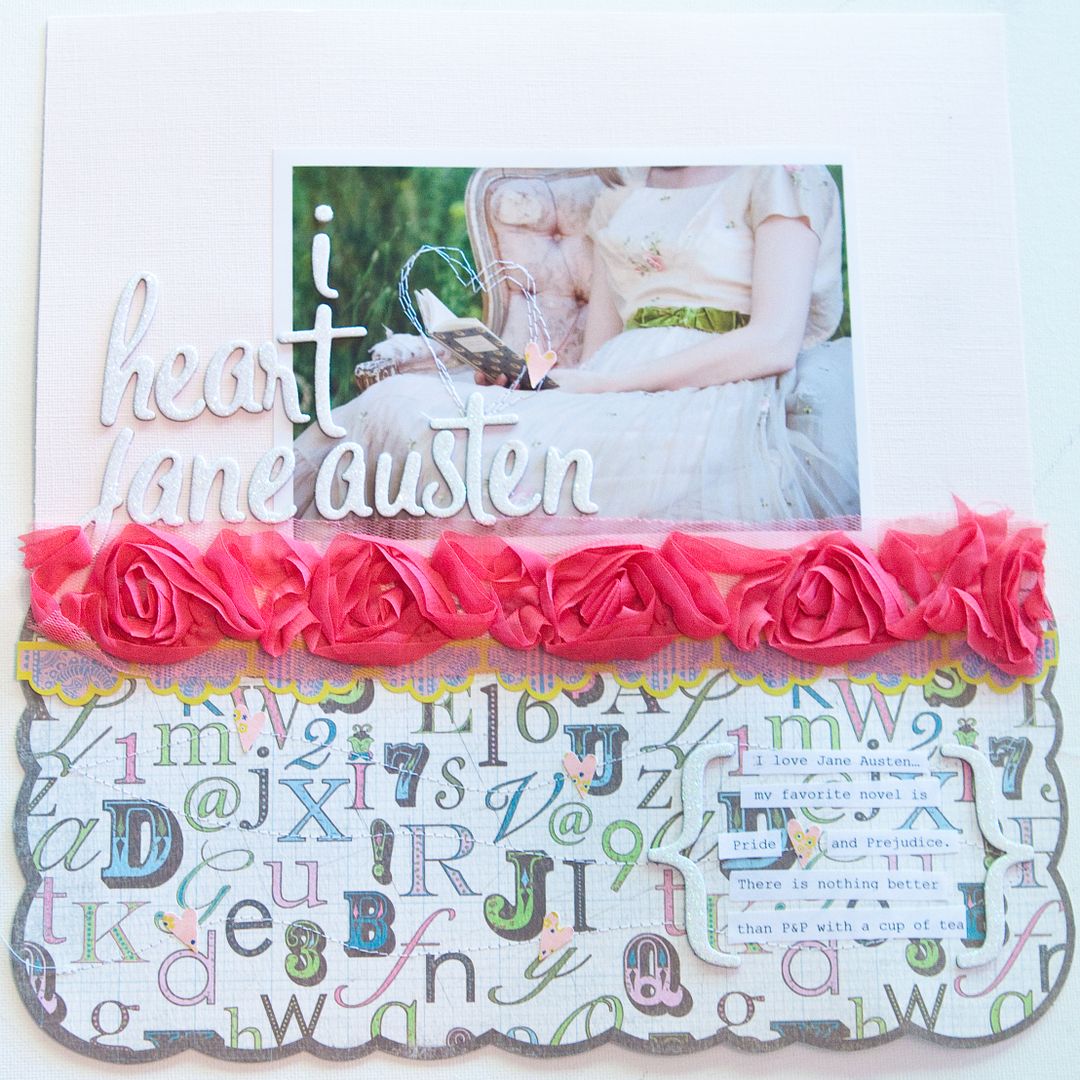
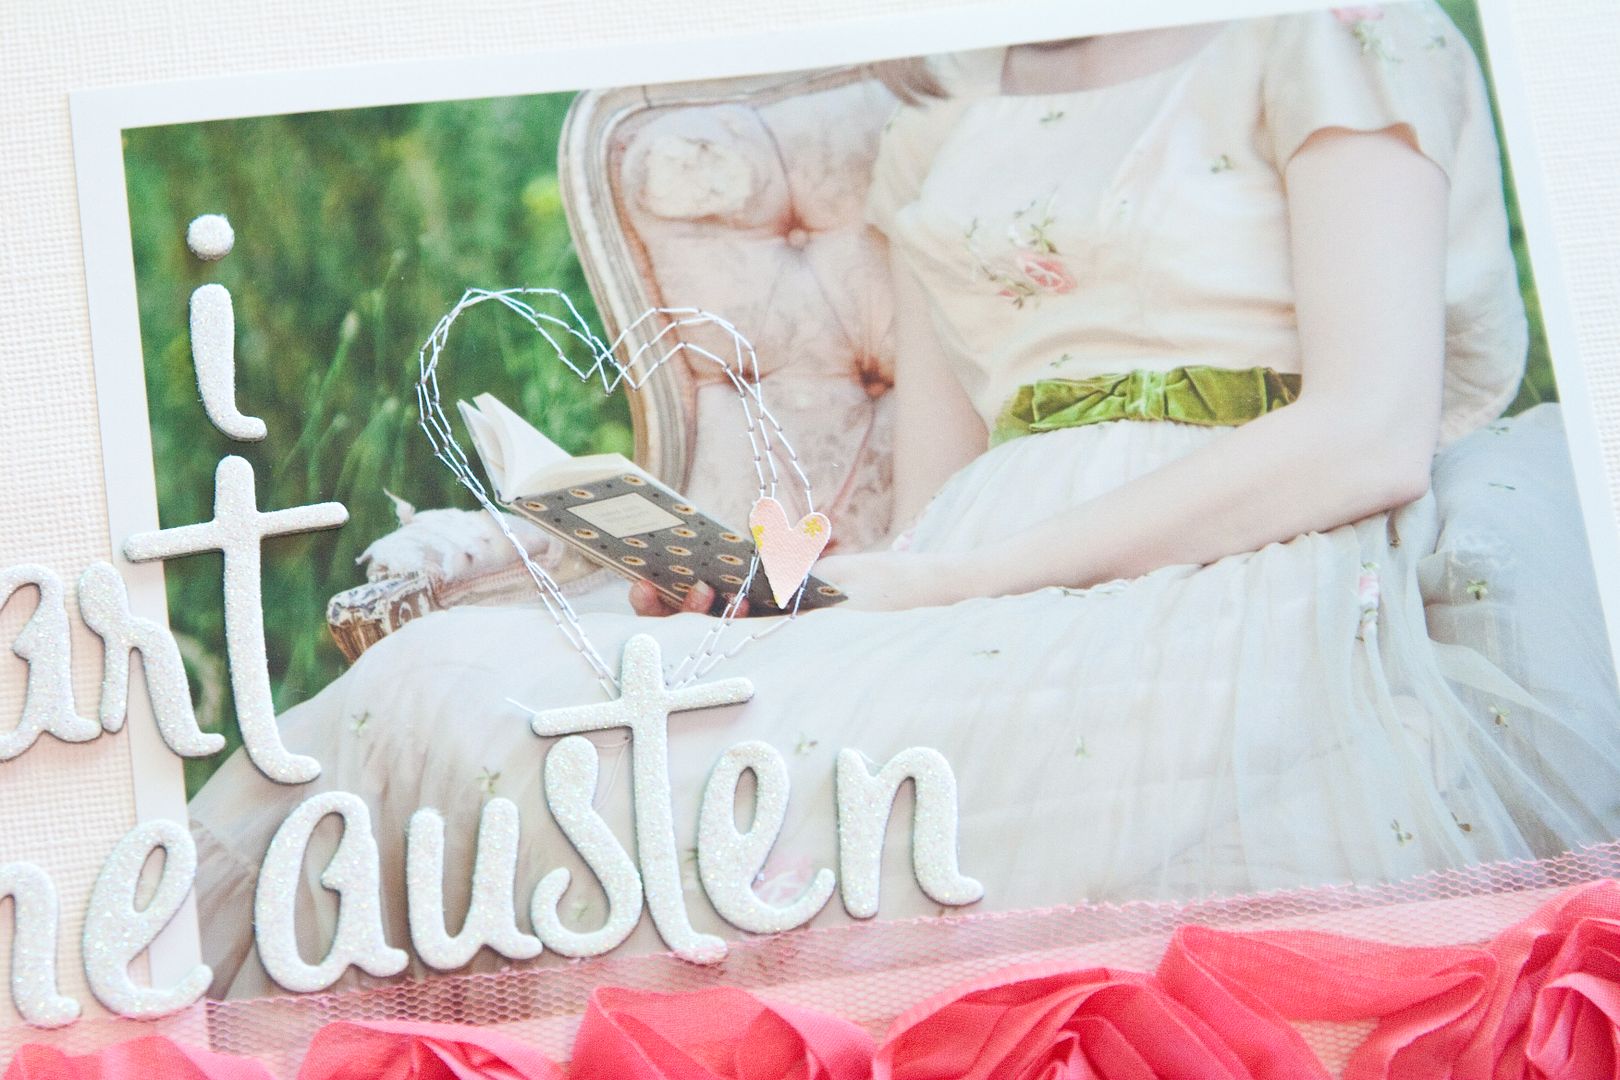
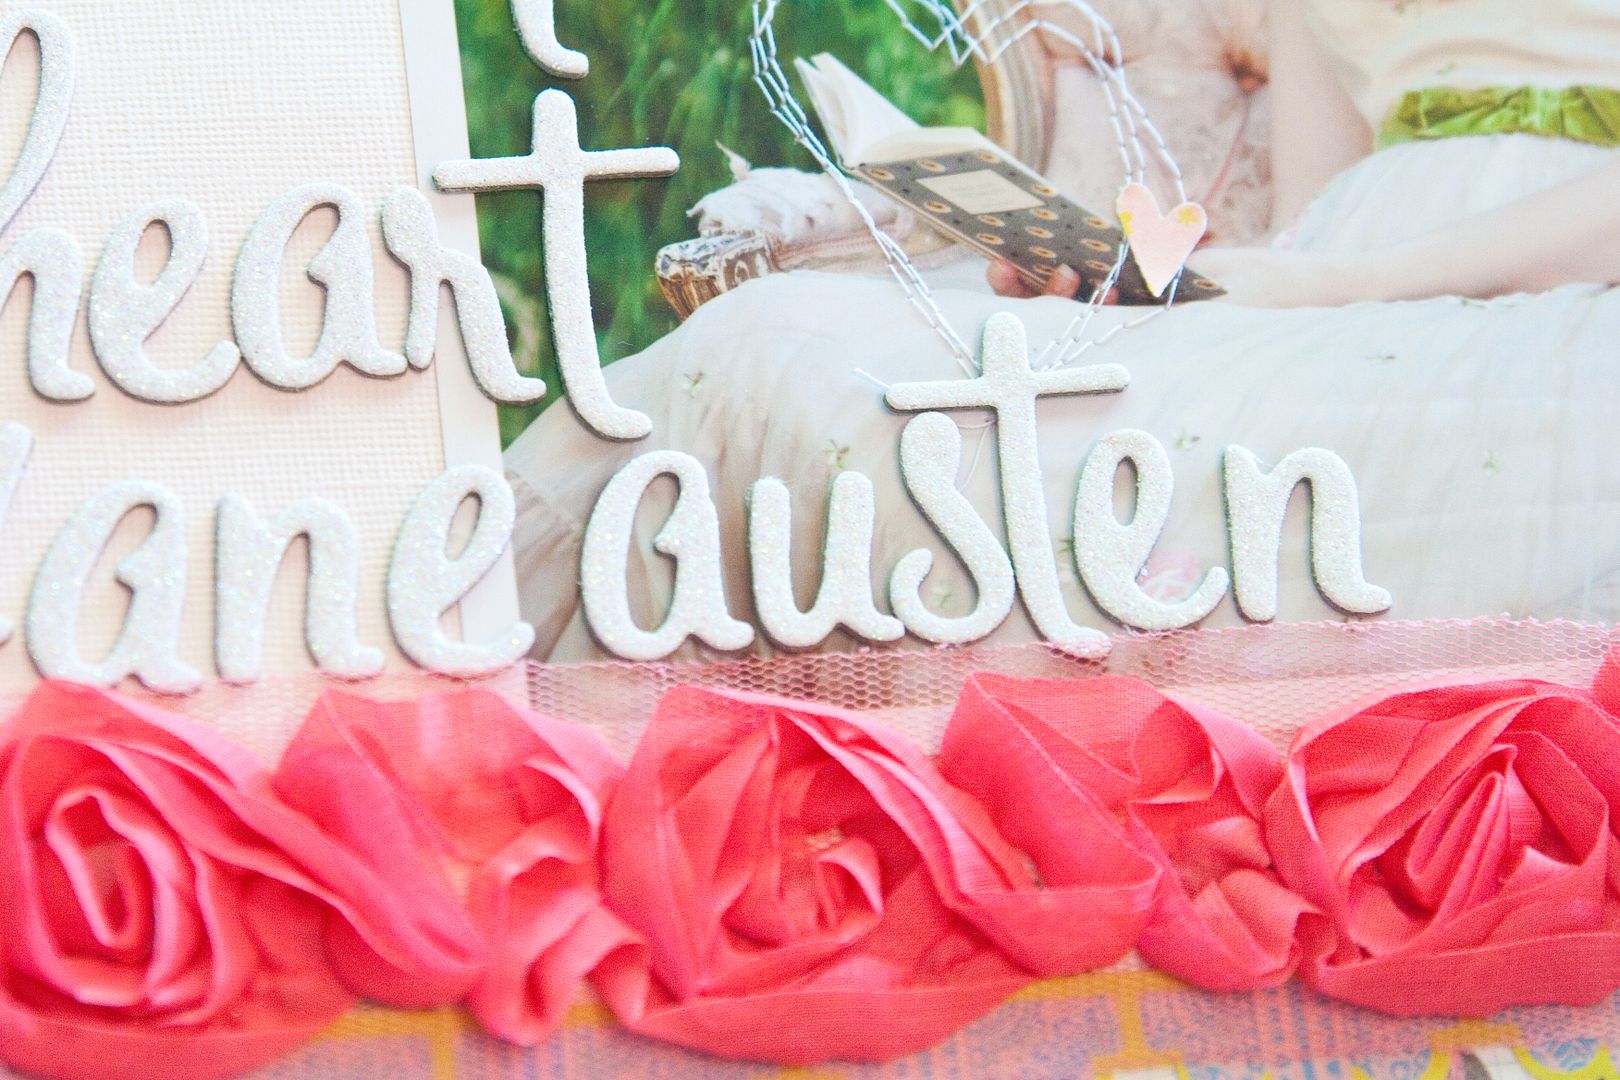
Then, I created my layout and journaling around the story about my love for Jane Austen.


Now, it is your turn! Look through the lens in a new way and capture the story you want to tell on your next layout!

Did I mention there would be another giveaway? It is a JOLEE’S EMBELLISHMENTS PRIZE PACKAGE from EK Success.


More then 40 dimensional embellishments including a number of scrapbook page titles. All different themes including summer, fall, beach, sports, Disney, wedding, baby, kids, outdoors, and more!
Retail value over $100.00

All you need to do to win is 
  • Comment on this post. 
  • Post about our party on Facebook and/or Twitter and copy and paste the link to the post in the comments. 
  • Become a follower on this blog and comment that you have done so. 
  • Become a follower on our Facebook page and then comment that you have done so.

That is FIVE chances to win this prize!

Comments will be closed Tuesday at midnight PST. Remember only those in the contiguous United States can play along. The winner will be randomly picked from Random.org and announced Wednesday on the blog! Good luck! See you tomorrow with four more challenges and more chances to win!

LinkWithin

Related Posts Plugin for WordPress, Blogger...
Blogging tips