Showing posts with label shadowbox. Show all posts

Friday, June 7, 2013

Crate Paper {The Pier} Shadow box

                                   
Have you seen the NEW The Pier Collection by Crate Paper? It screams "It's summer time!" Create this simple shadow box frame by collecting sand or seashells from your favorite beach! Then add your Instagram photos to display through out the season along the mini clothes pins.                                                   

Supplies:
  • Unfinished frame (cal-24)
  • Wood candle stick (cal-44)
  • Acrylic knob (yor-1794)
  • Acrylic paint: Americana sea glass
  • E6000 Glue
  • Elmers wood glue
  • Embellishment glue stick
  • Crate Paper {The Pier} paper collection, Poolside 12x12 paper, Ephemera cardstock die-cuts, Chipboard stickers & layered stickers
  • Jute String
Directions:
  1. Glue wood candle stick base to the bottom of your shadow box frame using Elmers wood glue. let dry for a couple hours.
  2. take glass out of the shadow box frame and paint entire frame and wood candle stick base.
  3. Cut paper to fit the back of the shadow box then glue to the backing of the frame using glue stick.
  4. Add cardboard sticker & die cuts to the back paper you just glued.
  5. Clean glass and place back into shadow box frame. 
  6. Add photos and die cuts to the close line using mini clothes pins.
  7. add sand to the shadow box and close up the back of the frame. Use tape if sand is coming out of the sides.
  8. Wrap the base with jute string and tie a knot.

Friday, March 29, 2013

Easter Family Nest


Happy Easter! All week we are celebrating by inspiring you with fun, simple, and creative holiday projects! This project is from our creative vault that we knew you would love to see again

This desktop display is a perfect Easter gift or Spring decor! It is an easy project that will wow the person you give it to


I started out with a simple 8x8 pine box and painted it black with acyclic paint. Then, I took sand paper and distressed the edges.


I love these curio knobs! I'm putting them on everything.


To make the "our" pendant. I cut 6 pendants and then sewed them together so that the fabric is double sided. (You could also purchase a Canvas Corp Mini Burlap Banner found in the scrapbooking department). 

Then, I stenciled on the letters using Tim Holtz Distressed Ink and I also distressed the pendents.

Next I spray painted the mini clothespins in black. Using jute twine and tacks I tacked up the pendant. Brads were placed in each corner of the photo and glued into the box. On this side of the box I cut a piece of burlap 7 1/2" x 7 1/2" when I used Mr. Huey's Mist to give it the bright blue color.
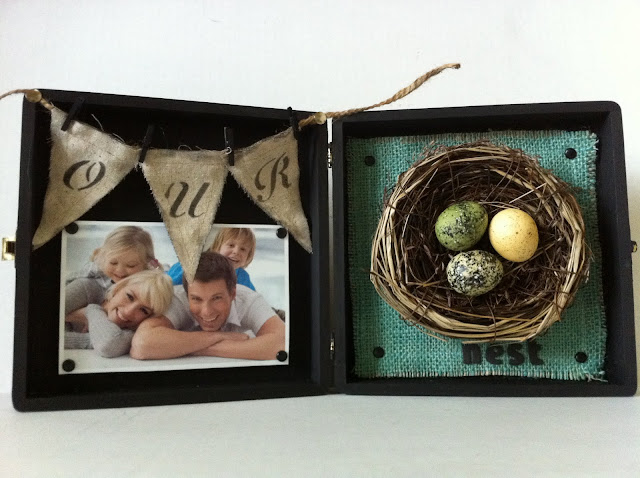
After the burlap dried I added 4 black brads to each corner and glue it into the box using E6000 glue. I used Thickers stickers to spell out "nest" and glued my nest in with E6000.


Now you have it a home for your treasured photo!


Friday, February 22, 2013

Kaiser Craft Tropicana Shadow Box


Now In Stores!


Created by Racheal Ziesemer for Craft Warehouse


Add real sand to this project! You could make your project special by collecting sand from your favorite beach and adding a photo to the shadow box.


Supplies:
  1. 12x12 shadow box
  2. KaiserCraft Tropicana Horizon 12x12 paper
  3. KaiserCraft Tropicana Acetate Specialty Beach
  4. KaiserCraft Tropicana Sticker Sheet
  5. Sand from our floral department or your favorite beach

    *Shadow Boxes on sale until February 24th, 2013. Black or White colors. 8x8 $4.49 (reg. $8.99) and 12x12 $8.49 (reg. $16.99)

Thursday, February 21, 2013

Kaiser Craft Secret Admirer Shadow Box


Now in stores!

Kaiser Craft Secret Admirer paper collection

Kaiser Craft Secret Admirer die cut paper
Kaiser Craft Secret Admirer Collectibles


Designed and created by Racheal Ziesemer


Shadow Boxes on Sale Now! 12x12 - $8.49 reg $16.99; 8x8 - $4.49 reg $8.99; Choose from white or black until February 24, 2013.

Monday, November 26, 2012

Heidi Swapp Calendar Box


Create a stand up calendar box for close friends and family.
 
Supplies:

· Cigar Box Sch-40

· Americana Coral Blush acrylic paint

· Heidi Swapp “Vintage Chic” Collection 8x8 paper pack, statement stickers, mini tags, notes, trimmings and buzz word stickers.

· Accent paper calendar

· My minds eye embellishment dots

· Teresa Collins Rhinestones

· AC Thickers sliver glitter stickers

· Tim Holtz Ideaoligy large ring binder

· Mini white frame (NST/225)


Directions:

· Start by painting your cigar box with acrylic paint.

· Once dry, Choose a paper to fit inside your box. Cut out and glue to both sides of your box using Pioneer Glue Stick.

· Attach your 2 ring binder.

· Start creating your calendar. Choose 12 papers you would like to use. Cut 2 papers 5.5x5, 2 papers 5.5x5.1, 2 papers 5.5x5.2, 2 papers 5.5x5.3 and 2 papers 5.5x5.4. This will make it so you can see the layers of paper underneath.


· Also cut a paper 5.5x2, I cut the bottom like a pendent. Then added the year. Every month you can take off the month but always have the year hanging.

· Put a photo in the white frame, add embellishments and glue on to the opposite side of the box.
 
* 40% off Unfinished Wood Cigar Boxes (regular $5.99) until December 6, 2012.

Friday, June 8, 2012

Chromatix Blending Markers Weekend


Chromatix, by American Crafts, are new inexpensive alcohol-based blending markers that add color, shading and detail to stamps and other paper crafting projects. There's no hard-to-understand numbering system — it's 1-2-3 easy!


They've matched the most popular colors in light, medium and dark, making it a no-brainer when choosing which shades blend together.


Buy in pre-matched three packs of only $7.88 on sale (reg $11.99).


Chromatix come in 22 hues, plus the essential Colorless Blender that lightens, fades and pushes color. Plus, Chromatics are acid-free and archival safe!

Use them for coloring stamped images, craft projects, or they are even perfect for maga and cartoonists.


Make sure to join us Saturday, June 9th, for our free in store make n take using Chomatix Blending Markers! See the details here.

Stay tuned into our blog this weekend with more Chromatix Blending Marker inspiration!

Tuesday, December 6, 2011

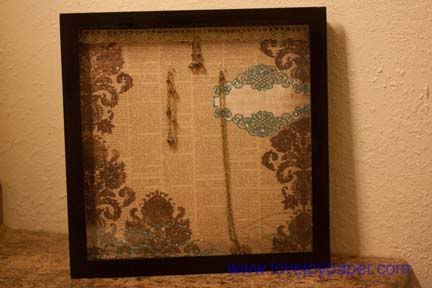
Jewelry Frame by Design Team Member Amanda Sherman

Hi! I'm design team member Amanda here again. I hope you're having a delightful Christmas season. I've had a wonderful season so far. It's a blast watching Christmas through the eyes of my kids and the magic they see in everything.

Part of Christmas to me is making gifts for family and friends. When I received a recent circular from Craft Warehouse, I saw something in it that I just knew I had to do!! It was a hinged frame jewelry "box". I thought it would be the perfect gift for my hard to shop for mother in law. So I hightailed it to Craft Warehouse in Wenatchee and got my quick little hands on one of the frames. I absolutely love this idea because you can interpret it any way. The possibilities are endless.

Photobucket

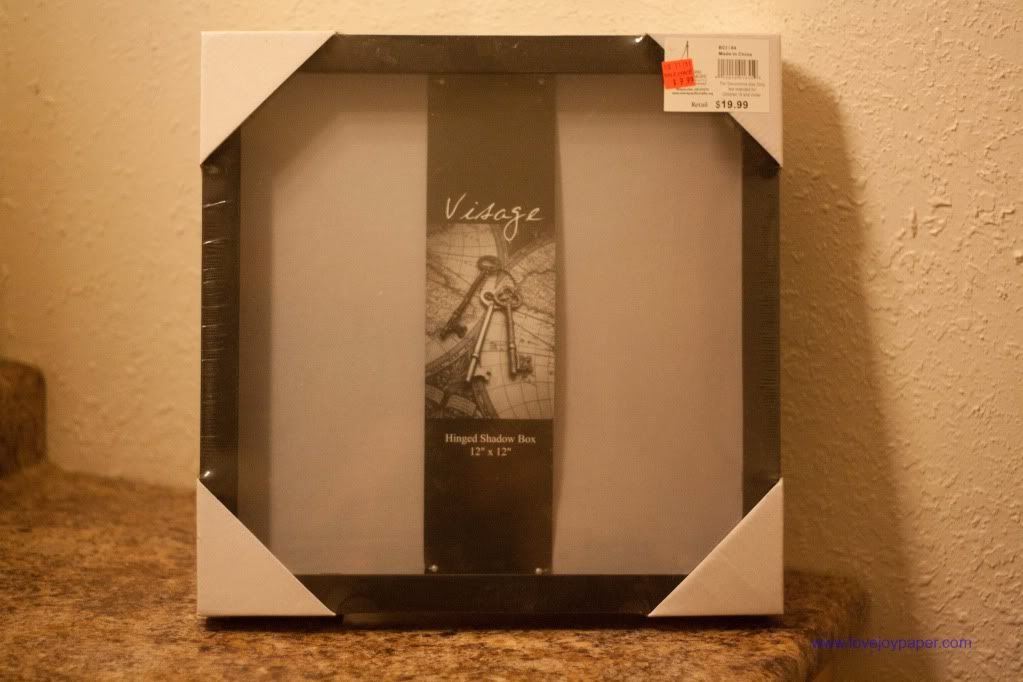
This is the frame I picked up. I bought the 12x12.

Photobucket


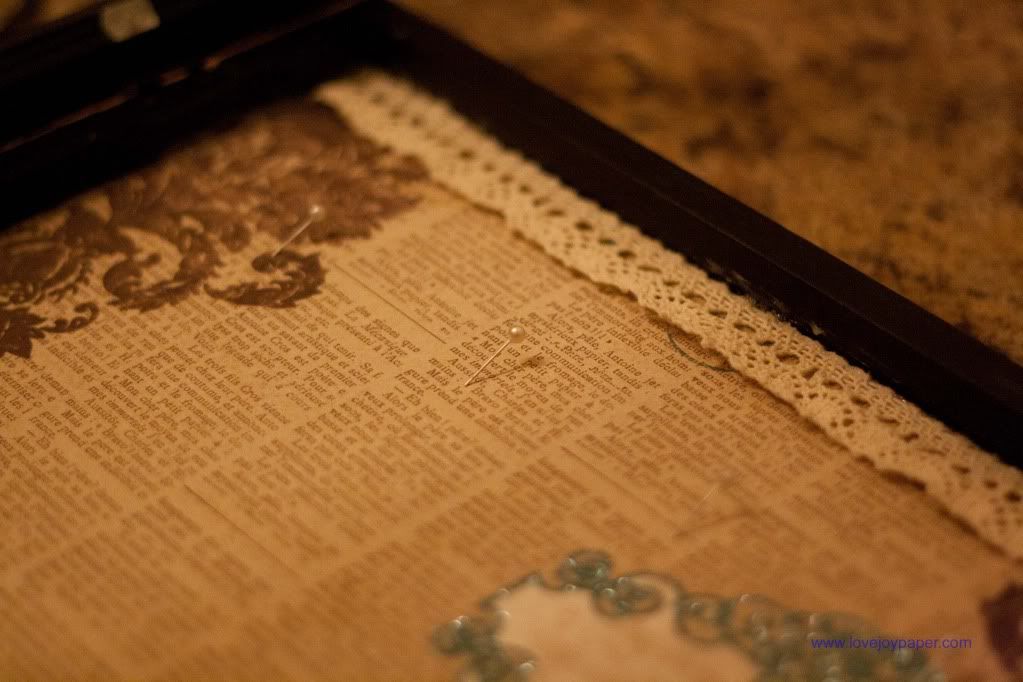
First, open the back of the frame and pull out the piece of foam. I used this in my project, I just flipped it around so the cloth was in the back. Then I adhered my piece of 12x12 paper to it.
I put it back in the frame, closed the back and began to work on the front.

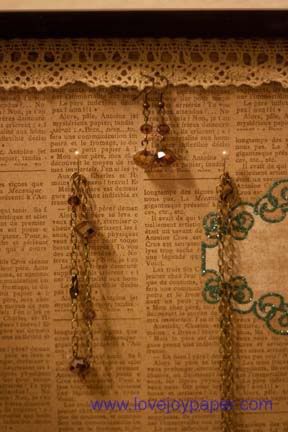
For the earrings (and to add some decorative touches) I used my favorite adhesive, Beacon 3 in 1 quick dry adhesive to apply a crotcheted ribbon. (Yes, the jewelry is made from elements and crystals from Craft Warehouse as well)

Photobucket

I then measured equal distances and use the same 4 pins that came in the frame as the "hook" for the necklaces. I put them in at an angle equally spaced.

Photobucket


Supplies:  Hinged Frame, My Minds Eye Laundry Line Two paper, American Crafts Crocheted ribbon

The finished project came out just as I had expected. And if my mother in law doesn't like it, she's always welcome to give it back to me because I'll gladly put it to use!

Have a Merry Christmas, and Happy Crafting!

Friday, November 25, 2011

"Santa's Key" Shadow Box Project


Every Santa needs a key


Shopping List:
8x8 white shadow box
Tim Holtz idea-ology Curio Knob
1/2 yard red ribbon
12x12 My Minds Eye "Lost & Found Christmas" Santa Glitter paper
12x12 My Minds Eye "Lost & Found Christmas" Bright Glitter paper
Santa Poem (find poems on the Internet or come up with your own)
8.5 x11 cream card stock paper
Pioneer extra strong embellishment glue stick
Key (you can find old fashion keys in our frame shop department or use Tim Holtz idea-ology keys in scrap booking)
Fiskers Detail Knife

1. Start with cutting your Santa paper  8x8. then glue to the front of the cover sheet using your glue stick.
2. Then trace the striped Christmas paper to fit the front of your shadow box frame. Cut out paper using a Fiskars knife


3.  Then glue the striped paper to the front of your shadow box frame.
4.  Glue the Santa paper to the advertisement paper. Punch a hole through both papers to attach your curio knob.
5.  After curio knob is attached glue paper to the back of your frame back. This will give it more security to hold your key.


 6.   Then print out a poem on cream paper. Here is the poem I used:

 It's the night before Christmas & we're excited as can be.
We're leaving this out for you...it's a very special key.
You can shimmy down the chimney, or tiptoe through the door.
Just use this key we left for you to find cookies, milk & more!
7. I cut the poem in a tag shape and used Tim Holtz distressed photo ink to make the paper more vintage looking.
8. Tie the ribbon, tag and key together and hang it on your curio knob.

 9.  Close up your shadow box.


Tuesday, April 5, 2011

Keys + Burlap = Art

I'm so excited about this project!


You can create yours in a matter of minutes....

I Started with a 12x12 Black Shadow Box and a 5x5 black frame.

Take the glass out of your 5x5 frame and discard.

Cut scrap booking paper to fit 5x5 frame. In this sample I used My Minds Eye "Stella & Rose" collection.

Glue a key or any small item to the center of your scrap booking paper and assemble the 5x5 frame together with out the glass front.

Next cut out your burlap 14x14 to fit the back of your shadow box frame.

Then wrap the burlap around your backing and tape down using double sided tape.

Place your 5x5 frame in the middle of your covered burlap and glue using E6000 glue.

After about an hour, put the back on the shadow box and you have finished your framed art!

LinkWithin

Related Posts Plugin for WordPress, Blogger...
Blogging tips