We welcome Craft Warehouse's 2010 Scrapbooking Design Team Member,
Elizabeth Wiederspohn, who is guest blogging with us today. Elizabeth is sharing a step by step tutorial of this paper bouquet project, perfect for any season! Whether you make it for yourself, a baby shower, or Mother's Day, you will want this Spring Bouquet for your table's center piece.
Supplies:
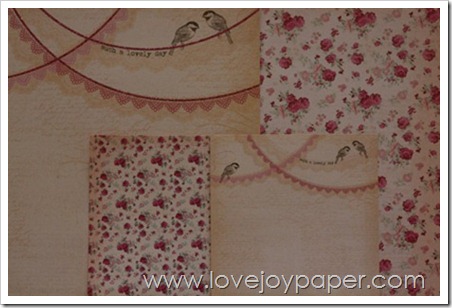
• Double Sided
Patterned Paper
- 5
sheets for flowers
- 1
sheet for leaves
- 1
sheet for hearts for rosette backs
• Tim Holtz
Rosette Die
• Wooden Dowels
• Buttons/Center decorations
• Square Punch
• Heart
Punch
• Strong Adhesive or Hot Glue
• Ribbon
• Vase
• Coffee Beans, Glass beads, sand, or kidney Beans
Step #1:
Die Cutting Rosette Strips
Using the Tim Holtz Rosette Die and
your favorite die cutting system, cut out 25 rosette strips for flower
rosettes. (Five from each piece of paper set aside for flowers.)
Step #2: Making Small Rosette Flowers
Using
the strips you just die cut, make seven regular rosettes. (First
time making a rosette? See directions below for “Assembling a
Rosette Using a Tim Holtz Die.”)
Step #3: Making
Medium Rosette Flowers
Using nine of the remaining die cut
strips, overlap and glue two strips together making sure all the
perforations line up with each other and allowing the top scalloped edge
of the strip to stick out around a quarter of an inch. Flip the
strips over. Using a third rosette strip glue strip to back of the
other two to make a “rosette sandwich.” Since both sides will
show, it is important to make sure you have patterned paper on both the
front and the back of the new “sandwich.” Assemble rosette with
all three layers like you would a normal rosette. This will make three
rosettes.

Step #4: Making Large Rosette Flowers
Using the last
nine strips make three more “rosette sandwiches” this time allow the
middle strip to stick out approx. half an inch above the other two
strips. To prevent tearing cut the tops of the top strip every
forth perforation making sure not to cut the bottom two layers.

Assemble the rosettes like the
others. The outer edge of the flower will fan out to make flower
petals. This will make three large rosette flowers.
 Step #5: Decorate Flower Centers
Using buttons, flair or any other embellishment decorate the
centers of the fronts of each rosette. Since both sides of each
flower will be seen you will want to make sure to decorate both
sides. Using patterned paper punch thirteen hearts and glue to the
back of each rosette center.

Step #6: Adding Dowels and Ribbon Leaves
Carefully slide dowels into one of the folds on the back of the
rosettes sliding the dowel under the center of the glued circles.
Tie ribbon onto the dowels of both the small and medium rosette flowers
to make leaves.
Step #7: Making Large Flower Paper Tags/Leaves
Out of
the paper chosen to make leaves cut three 1x4” strips. Fold strips
in half and using a square punch, punch a “v” banner shape out of the
end of each strip.

Glue onto the dowels of the large paper rosettes and write
messages and/or decorate.
Step #8: Prepping the Vase
Using ribbon, tie a
bow around the neck of the vase. Pour coffee beans into the
vase. (You can also use small rocks, glass beads, sand or kidney
beans in place of the coffee beans if you like. I just like the
smell of coffee.)
Step #9: Finishing
Touches
Arrange flowers into vase making sure it is viewable
from all sides. ENJOY!
Assembling a Rosette Using a Tim Holtz Die
Step #1
Using your favorite die cutting machine die cut
the rosette strip and center circle from the Tim Holtz Rosette
Die.
Step #2
Using a fan fold, fold every perforation on
the rosette strip
 Step #3
Staple or glue the ends of
the strip to each other making a circle.
 Step #4
Gather the center of the flat edge of the
strip and push downward. Holding firmly, glue down center paper
circle, or button, with strong adhesive or hot glue gun on both the
front and the back. Decorate if desired.