Showing posts with label craft warehouse. Show all posts

Wednesday, September 16, 2015

Doily Transformation


Did you know you can color doilies with Alcohol Inks?
 
 Simply place doily in a plastic bag with a zipper top- add a few drops of the Alcohol ink color of choice, close zipper and then 'smoosh' and knead the doily inside the bag until fully coated. Dries instantly.

 This same process can be used to color sand or glitter!


Doily Transformation @craftsavy, #craftwarehouse, #doiley, #alcoholink, #timholtz

Tuesday, September 15, 2015

Paper Mache Pumpkin

 
The Paper Mache Pumpkin crop is in!
 
Love vintage?- decoupage them with newsprint!
Prefer your pumpkins glamorous? (and shiny) Spray paint them with mirror paint spray.
Traditionalist? Paint them orange with craft paint.
OR- what if you painted them with chalkboard paint!!! - Whoa!...


Paper Mache Pumpkin Diy @craftsavy, #craftwarehouse, #diy, #chalkypaint, #papermache
 
Here we painted the Paper Mache Pumpkins with Americana Black Chalkboard Paint.
 
Then "Seasoned" the pumpkin ( this is when you take a piece of white chalk and rub it all over the surface, then lightly whip off the extra chalk flakes, this makes it look like a chalkboard instead of just black paint)
 
Then we used a white Bistro Marker to add the white lines.
 
Finish off with a burlap ribbon tied to the top!
 
Tip: You can also use regular chalk and right words like "SPOOKY" for Halloween and "THANKFUL" for Thanksgiving.
Or if you are a Zentangle Art Doodle fan you could Zentangle it!
 
 
Paper Mache Pumpkin Diy @craftsavy, #craftwarehouse, #modpodge, #diy, #glitter
 
For a Vintage Look: we decoupage newspaper on to the Paper Mache Pumpkin.
 
Rip your newspaper or tissue into 1" squares.
 
Paint a layer of Mod Podge all over the pumpkin and allow to dry.
 
Then place another layer of  Mod Podge and place paper over the wet Mod Podge adhesive.
 
Continue this technique until your pumpkin is covered.
 
If you would like it to look a little more rustic add Tim Holtz distressed ink with a distressed dabber.
 
 
Or Glitter It! Just cover sections with Mod Podge and glitter it! We used super fine glitter but any glitter is sure to sparkle!


Monday, September 14, 2015

Lanterns, Lanterns, Lanterns!


We have made decorating for the Fall a breeze!
 
 Start with choosing one of our metal or reclaimed wood lanterns, add a candle and floral filler then set in a tray! Makes an easy center piece or shelf display. Keep all year around just change out the foliage!


Friday, June 20, 2014

Americana Chalky Paint Lamps DIY


Transform mismatched lamps into a matching pair using our new DecoArt Americana Chalky Paint! No priming or sanding just paint.
Americana Chalky Paint Lamp DIY @craftsavvy #craftwarehouse #diy
   
 1. Start by cleaning both surfaces with a damp cloth.
Americana Chalky Paint Lamp DIY @craftsavvy #craftwarehouse #diy
2. Paint your first layer of a chalky color of your choice. I used "Relic" Chalky Paint. 

3. Dry brush a second color of chalky paint to add dimension. I used "Serene" Chalky paint to complete step 3
    
Americana Chalky Paint Lamp DIY @craftsavvy #craftwarehouse #diy

* Americana Decor Chalky Paint $6.99 in 29 colors (reg $8.99) until June 22nd, 2014

Sunday, June 15, 2014

Doodle Bug "Patriotic Parade" Mini Sign


4th of July is around the corner! Here Danielle created this adorable plaque with clothes pins to change out photos. Samples are also displayed at each of our Craft Warehouse locations


She created the USA by using Hazel and Ruby Handmade Mask Stencils.


She used mini clothes pins so you could change out photos.


I love the detail of using red acrylic paint and then distressing with white acrylic paint.

Saturday, June 14, 2014

6 Father's Day DIY Gift Ideas


Great DIY gifts for dad on fathers day!
I'm so excited to share 6 different gift ideas even your kids can make.

#1. Transform a simple pane window into a photo holder.


Choose from our new selection of Americana Deco Art Chalky Paint! It adheres to almost any surface without sanding or priming!
Directions:
  1. Tape off window pane with painters tape. 
  2. Paint frame with Chalky paint 1-2 coats.
  3. Sand areas you would like to rough up to give it a weathered look or put a matt or gloss sealer over the top for a cleaner look.
  4. Place vinyl on the front of the glass by Decorating Your Life.
  5. place 8x10 photos behind the glass and use 8 mini magnets to hold photo in place. 4 magnets on the front and 4 behind the glass for each photo.


#2 Personalized photo frame


 Not Everyone has artistic handwriting so here is a great way to create this project stress free!

Directions:
  1. Start by painting the unfinished frame with Chalk Paint.
  2. Print out what you would like to say on a word document.
  3. Place tracing paper under your word document and trace over each letter or image with a pencil.
  4. Lift up paper and you should have an out line of your image.
  5. Use a Bistro Marker to fill in your image.
  6. Last take a white piece of chalk to season your frame.
  7. Wipe off extra chalk and you are done!

#3 Chalky Frame "I love that you're my father"


Get The Chalk Board Look With Out Chalk!

Directions:
This is super easy! Just paint your frame with black acrylic paint, add "I love that you're my father" vinyl, then season your frame with white chalk!

 #4 Decorative Pails


Dad Loves Treats! Create these mini pails with treats and personalized gifts!

These are very fun to make, some of the ideas we used were:
"Daddy's Stache" - filled with chocolate
"We are Nuts about you" filled with peanuts
"We love you to pieces" filled with Reeces Pieces
"Dad, good for 1 round of golf" filled with golf balls and markers

#5 Customized Shadow Box Frame


Directions:
  1. Choose a 5x7 or 8x10 shadow box.
  2. Take out the white matting and replace it with scrapbook paper of your choice.
  3. Add a sticker or embellishment plaque to the front of the frame.
  4. Place in your favorite photo and close up frame!

#6 Wall plaque with mini plaques


Directions:
  1. This wood plaque comes unfinished with 3 hanging mini plaques.
  2. Choose a acrylic paint color and paint the plaques.
  3. Once dry cut down photos to fit and glue on plaques using Beacon 3in1 glue.
  4. For the center plaque we used Decorating Your Life Vinyl "Family Holds it all together"


Paper Bow using We R Memory Keepers Envelope Punch Board

 
 Once I made one bow I was sold! This is such an easy project and I love that I can use my punch board for other things! Thanks to our Gresham store that had this figured out the moment they got the board. Here I have listed simple steps on how to create your own paper bow!
Paper Bow Tutorial using We R Memory Keepers Envelope Punch Board by Sarah Owens for @craftsavvy #craftwarehouse #wermemorykeepers #punchboard #diy #scrapbooking
Supplies:
  • We R Memory Keepers Envelope Punch Board
  • Paper Cutter
  • Scrapbook or Cardstock paper
  • Beacon 3in1 Glue
 Directions:
  1. Collect everything on your supply list.
  2. Cut paper into 3 strips: 1 - 1"x6" and 2 - 1"x5" strips
  3. Match up your 6" strip to punch board at the 3" mark and punch.
  4. Flip over and punch the other side.

     5.  Take the ends of the paper and trim edges like shown in photo 5
     6.  Repeat steps 3-5 for one 5" strip
     7.  Repeat steps 3-4 for the other 5" strip. Then punch a notch in each end shown in photo 7
     8.  This is what your pieces should look like in photo 8
 
    9.  Place dot of glue on the back side of large strip, then fold over to adhere paper
   10.  Repeat this step for the smaller strip
   11.  Glue one bow on top of the other and glue paper strip to the bottom
   12.  A perfect bow!


Sunday, January 27, 2013

Echo Park Love Story


Designed by Danielle Cohen for Craft Warehouse

 
Every little one would love to have a cute mailbox like this! Start a new tradition of leaving a little note for your kids every morning....or have them create one for their teacher. What ever you plan to do with this project it will be a memory keeper! 

Supplies:

Cardboard paper mailbox (CPL 1004420S)
Candle stick base (Cal/45)
Plaque (Darice)
Paper of your choice
Pioneer Glue Stick
Black Acrylic Paint


Friday, January 25, 2013

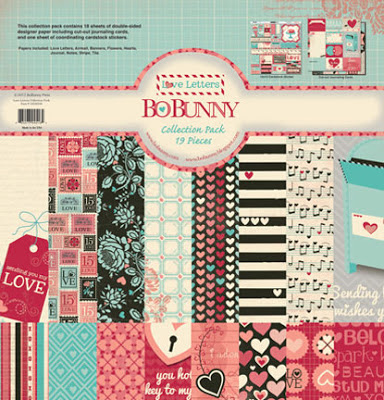
Bo Bunny Love Letters


Just arrived!


Designed by Danielle Cohen for Craft Warehouse


Take mini buckets and chalk board vinyl, use a die cut or punch to create a circle or design.
Place chalk vinyl on the front of each bucket and use bistro chalk marker to spell out your message. Cut paper to fit the inside of the buckets.

 
This Bucket was created using a 3x3 wood block and a mini candle stick glued to the bottom of the block. Paint block and add paper and photos!
 
 
This is the perfect bucket for a gift. Homemade cookies would fit perfectly!
Paper was cut to fit inside the bucket then a knob was glued to the top of the bucket, add a fabric flower by Canvas Corp to the front and you are done!

LinkWithin

Related Posts Plugin for WordPress, Blogger...
Blogging tips