Showing posts with label embossing. Show all posts
Showing posts with label embossing. Show all posts
Friday, October 17, 2014
Embossed Santa Card
There is nothing like getting a handmade card! Handmade cards are something different. After all, what makes a more beautiful keepsake than a personalized handmade holiday card? This darling Santa card is a favorite with all our customers! It will be sure to be a favorite with anyone you send it to!
Supply List
• PA-White A2 cards and envelopes
• PA- white, red, skintone, and black cardstock
• Darice- Sparkle Christmas pom poms (mixed bag)
• Tape runners and foam tape
• Scissors
• Fiskars- scallop edger scissors
• Wilton/ EK success Mustache/bowtie punch
• Uchida/Marvy- 1” circle punch
• Corner rounder
• Darice-1218-39 snowflakes and flourishes embossing
folder
• Ellison/Sizzix- Texture Boutique embossing machine
• C2F- uniball signo white gel pen
• C2F- micron black pen
• Ranger- distress ink spun sugar
• Darice- foam blending pods
• OPTIONAL- Ranger- Stickels glitter glue-Diamond
Directions
1. Cut skin tone cardstock to 4 1/4” x 2”
Cut red cardstock to 4 1/4” x 1 1/2”
Cut white cardstock to 4 1/4 x 2 1/2”
Cut white cardstock to 4 1/4 x 1”
Punch skin tone cardstock with 1” circle punch
Punch 2 black cardstock with 1” circle punch
Punch white cardstock with mustache/bow tie punch
2. Use a white 4 1/4” x 1” cardstock strip and use the Fiskars scallop edger to cut a decorative edge along 1long side of this strip- this will be the trim on Santa’s hat.
3. Fit the edged trim white cardstock, the punched out mustache, and the white 4 1/4” x 2 1/2” cardstock into the snowflake embossing folder all at the same time by arranging the pieces so they are not overlapping or hanging out the sides of folder. Then run through the Texture Boutique to emboss.
4. Use 1 white A2 Card, 1 skin tone 4 1/4” x 2” strip cardstock,and 1 strip of red cardstock 4 1/4” x 1 1/2”. DRY FIT the skin tone strip, the red strip, and the embossed larger strip of
cardstock onto the front of the card before they glue- so they can see how it’s going to come together. Glue the red strip at the top of the card first. Then but the skin tone cardstock right up next to the red cardstock already on card and glue in place. finally layer the larger embossed snowflake white cardstock to bottom of card- this will overlap the skin tone layer a
little.
5. Use the 2 black circle punches, 1 skin tone circle punch and DRY FIT these along with the embossed mustache and hat trim. BEFORE GLUING the face in place- give Santa some color! Use foam blending pod to apply a little pink ink to the apples of his cheeks, and go ahead and dust one edge of the skin tone circle punch out with the pink ink as well. The black circles get adhered with tape runner. Placing them close together helps with the cute factor- wide set eyes will give Santa a
‘crazed’ look. Add the nose and mustache with foam tape.
6. Use tape runner to add embossed trim to hat. This may overlap the eyes slightly.
7. Apply tape runner to the 2nd piece of red cardstock 4 1/4” x 1 1/2 and lay this over the top left corner of card at an angle- this is to be the long pointed end of Santa's hat- so adjust into an elongated triangle. Turn card over and use scissors to cut away the excess red cardstock hanging over the edges.
8. Finish- Glue dot a pom pom to end of stocking hat. Use black micron pen to add lashes, and use white gel pen to add highlights on eyes, and a couple of white freckles in the pink cheeks.
9. OPTIONAL- Add Stickels glitter glue here and there on embossed snowflake areas.
Thursday, July 24, 2014
We R Memory Keepers Indian Summer Collection Tutorial
Today's tutorial will help you create a fast and simple layout using our new products from We R Memory Keepers! Their new Indian Summer collection is perfect for summer photo as well as feminine and masculine projects! I loved the turquoise, black and white, along with the gold hues that I decided to also use their new dies in gold too! Grab your supplies and let's get started!
Supplies:
We R Memory Keepers Indian Summer 12x12 Collection
We R Memory Keepers Indian Summer Wood "Life Is Beautiful"
We R Memory Keepers Indian Summer Wood "Doily"
We R Memory Keepers Indian Summer Wood "Feather"
We R Memory Keepers Indian Summer Chipboard Alphabet Stickers
We R Memory Keepers Embossing Folders "Feather"
LifeStyle Crafts Cutting Dies "Feathers"
White Cardstock
Gold Vellum
American Crafts Gold Glitter Paper
Tombow Xtreme Adhesive Runner
Scallop Punch 2"
Big Shot Die Cutting Machine by Sizzix
Rhinestone Stickers
Directions:
1. Cut two pieces of patterned paper to 10"x4" (black with white dots) and another 10"x5" (feathers). Glue them down on a 12x12 piece of paper about 3/4" from the top. Punch three scalloped circles from a piece of patterned paper and set aside.
2. Cut 10"x1/2" of turquoise paper and glue to the bottom of the feather paper. Cut 10"x1 1/4" strip from pattern paper and add it to the bottom of the page. Mat your photo on white cardstock and place at the top left hand corner.
3. Using scissors, cut the peg hole off the "Life is Beautiful" Wood Veneer and glue it with the Xtreme adhesive to the top of the Wood "Doily". Make sure the peg hole is facing down on the doily. Add more adhesive and place at the bottom right corner of the photo.
4. Emboss a 3"x4" white cardstock with the "feathers" embossing folder. Die cut feathers from gold vellum and gold glitter paper.
5. Layer at the bottom left corner of the photo and page the 3"x4" embossed card, wood feather (remove peg hole with scissors), scallop circle, and feathers. Add a number to the card.
6. Place two more scallops on the page and add three rhinestones.
7. Use the dots in the Alphabet set to create bullet points on the page for your journaling.
Would you like to design for Craft Warehouse? Who we are looking for: Artists (including scrapbooking, pocket page scrapbooking, card
making, stamping, jewelry making, paper crafts, quilting, fiber
artists, fine artist, painter, or DIY crafter) within the contiguous
United States. Click here to find out how to apply!
Friday, September 21, 2012
Christmas Burlap Garland by Guest Designer Rebecca Grinder
I *heart* burlap and Craft Warehouse has loads of fun new burlap perfect for the upcoming holiday season! A new addition to stores is a burlap pocket garland.
Craft Warehouse gave me the challenge to create a Christmas banner using this new garland and the already popular winter release by Authentique called "Peaceful".
Shopping List
- 1 - Burlap Garland, 24 pockets
- 1 Authentique "Peaceful" Collection Pack
- 2 - Snippets Chipboard Mini Pennants
- 2 - Snippets Chipboard Pennants Mini 2 Point
- 1 - Paper Accents Chipboard Micro RectScallop Pennants
- Making Memories White Pearl Brads
- 1 - Silver Tinsel Stems
- 1 - Studio Calico Wood Veneer Stars
- 1 - Sierra Pacific Crafts Unfinished Wood Stars
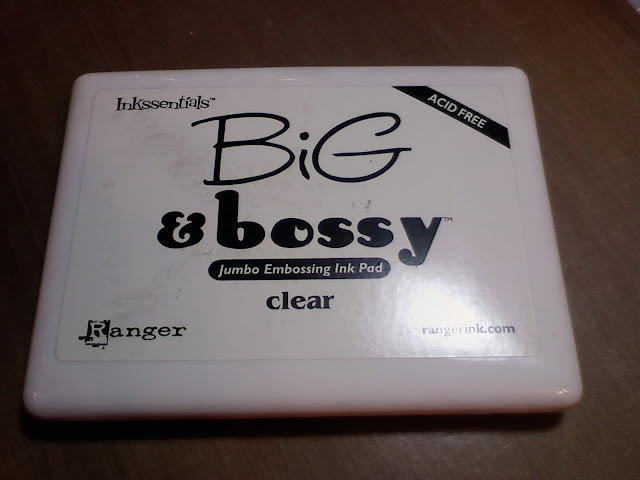
- Clear Embossing Ink, Clear andf Glitter Embossing Power, Clear Snow-like Glitter
- Star Dust Stickles
- Silver and Red Paint
- Bottle Caps
- Small Clothes Pins
- Small Circle Punch
- Ranger's Sage Distress Ink
- Heat Gun
- Queen and Co Rhinestones and Twinkle Goosebumps
- Pioneer Embellishment Glue Stick, Modge Podge, E6000 Glue, Glossy Accents, Glue Gun
- White Sheer and Cream Ribbon
Directions
Authentique "Peaceful" Burlap Christmas Garland/Banner
How to transform the pockets into stockings:
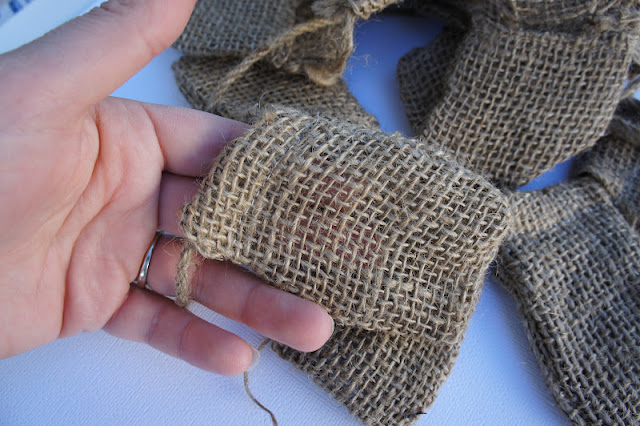
- Shape the burlap pocket into a stocking by folding and tucking the left corner in.
- With a towel underneath the burlap to protect your ironing board, spray starch and iron the burlap in order to hold its shape and prevent fraying.
- I preferred my stockings sewen closed. I used my sewing machine and some red thread to add some color to the top.
These burlap pockets are 2.5" x 3.5". Small enough to hold mini candy canes, peppermint sticks, or toffee. Gift cards or tags could fit nicely too. The garland has 24 pockets perfect for an advent calendar or 12 days of Christmas banner.
I chose to pull off a few pockets from the garland to later make Christmas ornaments. For this project, I added a few banner pennants. I plan on tucking this garland in my Christmas Tree or hanging it from a fireplace mantel.
How to give your paper project an icy look:
1. After using a Pioneer Embellishment Glue Stick to adhere patterned paper to the chipboard pennant, use a blending tool and apply clear embossing ink. Sprinkle on the clear and glitter embossing powder and use a heat gun to set.
2. Use a sponge applicator and brush on some Modge Podge the edges of your pennant. Sprinkle some Snow Glitter. The Modge Podge dries clear and holds the glitter well!
3. For the bottle caps, after adhering a small circle of patterned paper to the inside bottom of the cap, use a thin layer of Glossy Accents to coat the paper. Then, sprinkle a pinch of glitter to give the appearance of an icy window.
How to make your own tinssel star:
1. Wrap a Silver Tinsel Stems/Pipe Cleaner around a pencil. Shape the spiral into a star. Glue the brad into the center.
These stars were painted using mettalic silver and red paint. A quick and fast little embellishment!
Saturday, June 23, 2012
Vintaj Big Kick Weekend
Welcome to Vintaj Big Kick Weekend! This weekend you will be inspired with unique jewelry projects that you can do right at home!
Jewelry has a brand new friend! The BIGkick works with our smallest dies to our big 6" wide plastic-backed treasures and embossing tools. If that wasn’t big enough, this portable roller machine cuts and embosses many different materials. Now that’s a big deal!
Watch this video to see how to use this special machine made to emboss and etch designs on brass metal blanks.
Stay tuned in this weekend with special projects and inspiration using Vintaj products!
Thursday, March 1, 2012
Stamping Technique by Design Team Member Jules Aviles
 Welcome Design Team Member, Jules Aviles, who would like to share a very simple stamping technique that anyone could do....it's a way to add a theme to any card stock for any occasion!
Supply List:
Textured red card stock from Bazzil
(You can find tons of colors and shades at your local CW)
For clear stamps like these, you will need a stamping block, like this one
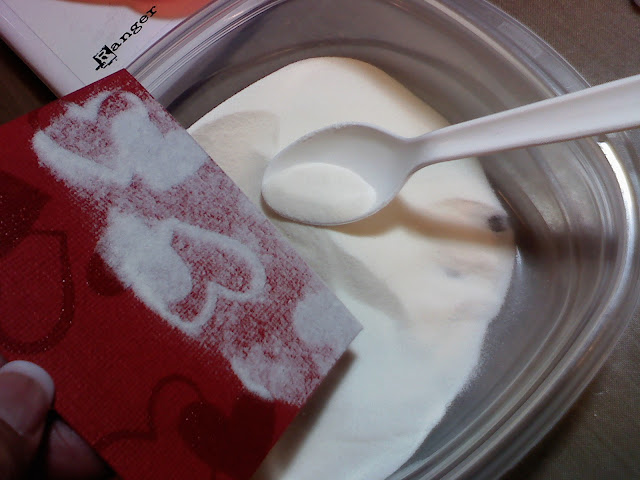
What I like to use is clear embossing powder for a "Tone on Tone" look....
so it looks like a shiny red stamp on a red piece of card stock! But of course you could use a different color if you want!
I store embossing powders in a Rubbermaid container with a
plastic spoon in it to scoop the powder onto the paper.
So, now you wet your stamp and stamp your image randomly on your
card stock.....kind of making it look like it's a large background stamp!
Now....stamp it all over.....
make sure to do this kinda fast so it doesn't dry,
you want it nice and wet so the powder sticks really well!
After coverage, tap on the backside to shake the loose powder off.
Now...the fun part!!! Using a heat gun, (CW carries a couple different kinds). These are not hairdryers and the heat is SUPER HOT!!!
Please be careful!!!
The heat will melt the powder keeping the image solid and crisp but make sure you
constantly move the heat gun around so the powder and card stock don't burn.
Watch for a wet shiny look then let it cool.
I did end up placing the red card stock on my spiral notebook so my mat won't warp!
See it melt!!??? Cool huh??
....and voila! Easy Peasy!
Now, You can use this for a card or a photo mat.
I hope I was able to share a cool tip with you that you could try!
It really is pretty and fun and so versatile!
Leave a comment or question below, I'll be happy to answer them!
Have a great day!!
Wednesday, February 29, 2012
i love to create - day 29 - Hero Arts Stamp + die combo sets
 Happy Leap Day! Today is the last day of our I love to Create series of blog posts. 29 days of some of our favorite scrapbook and stamping products. Stuff we use, adore, and recommend!
 We're ending with one of my personal favorites...
Today's pick: Hero Arts + Dies and embossing folder combo sets.
Today's pick: Hero Arts + Dies and embossing folder combo sets.
here is a look at a couple of each...


Watch this video to see how they work!
Monday, February 27, 2012
I love to create - day 27 - Texture Boutique
 Every day is a great day to create! Each day in February we are sharing with you one of our favorite products. We actually craft ourselves, so these items are our 'picks' , things we use and recommend. Check back each day in February to see the daily pick.
Today's pick:
The Texture Boutique by Sizzix. This cutie is designed to look like an adorable handbag, but it packs a real punch! Use with embossing folders to impress a design into cardstock (or vellum, or other papers, works on chipboard and foil too)


see how it works in this video:
We have dozens and dozens of embossing folders for you to choose from. Here are just a few...


Here are a few cards- made with embossing folders.


Subscribe to:
Posts (Atom)


