Showing posts with label framing. Show all posts
Showing posts with label framing. Show all posts
Tuesday, December 31, 2013
Scrapbook Picture Frames
Choose from five different styles of unfinished frames and then personalize it to make it your own!
Directions:
1. Trace your frame on scrapbook paper of your choice and cut out. You could also use a craft knife to trace the frame on the paper using a craft mat.
2. Glue to your frame using Pioneer's Embellishment Glue Stick. It is perfect for this project!
3. Add stickers and bling!
Thursday, March 28, 2013
Spring Moss Monogram and Frame
Happy Easter! All week we are celebrating by inspiring you
with fun, simple, and creative holiday projects!
A Moss Monogram & Frame is just one way to personalize your front door or would look great on a wall or bookcase!

Start with a MDF Letter from your local Craft Warehouse. Then, you will need a package of Super Moss. I love this stuff because it comes in bright colors & is already flattened.
Then I picked out a white frame that measured 11x14. I chose to leave it white but it would look great also if you painted the frame a fun color!
Saturday, February 16, 2013
Open Back Ornate DIY Frames


Marti Barta Created and designed for Craft Warehouse
Top left:
Here are examples of the different techniques to use on each frame.
Top left:
You can add scrapbook paper to a 12x12 frame then layer a 10x10 frame over the top. Then add a banner and photos. Then add "Rub n Buff" on the corners to add color.
Top right:
Use a 12"x12" & 5"x7" white frames.
Bottom left & right:
Spray the frames with Montana Gold Paint.

For the frames above:
Spray paint with Montana Gold spray paint.
The top two projects use "Rub n Buff" in black on the frame.
* Black and White Open Back Ornate Frames 50% off Regular Prices until February 24th, 2013.
Labels:
distress,
frame,
framing,
gift,
home decor,
kaisercraft,
mixed media,
paint,
paper,
scrapbooking
Saturday, February 9, 2013
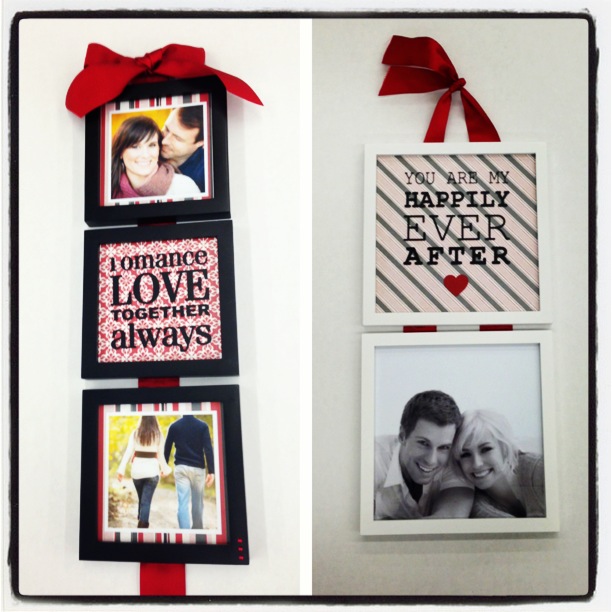
Valentine's Framed Memories
All week we are going to share with you
Valentine Inspiration! Whether you are creating something special for a loved
one, your kids, a teacher, or even for yourself there will be plenty of
creative inspiration to help you along!
Supplies:
Choose 3 - 4"x4" or 2 - 10"x10" frames
Add scrapbooking paper of your choice.
Choose vinyl to fit your frame
Glue dots permanent glue dots
1 yard of ribbon
Instructions:
Place paper and photos in frames.
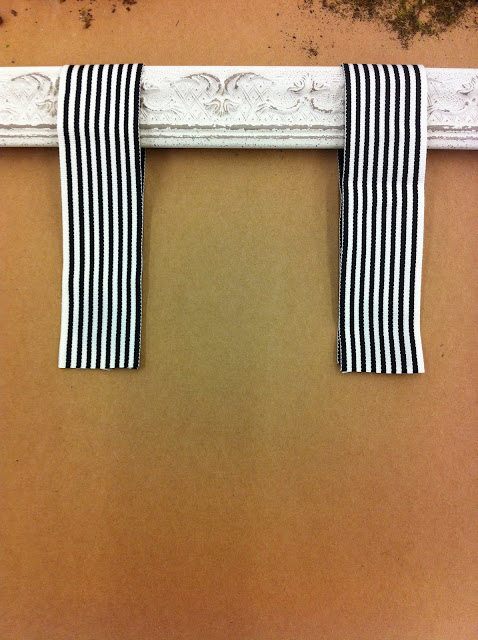
Flip frames over and add glue dots where you want to attach your ribbon.
Press ribbon firmly into glue dots
Tie a bow or knot at the top.
Use embellishments to complete your project!
Friday, December 21, 2012
10 Days of Ideas: Gift of Memories
What's the best last minute gift idea for someone that's hard to shop for: the gift of memories!

We're
only
6 days away from Christmas... do you still have no clue what to get
certain people on your list? We have the perfect gift that is guaranteed
to be a hit!
Got a favorite photo
memory or souvenir that has special meaning to your gift recipient?
Visit our Frame Shop with your ideas and treasures; we are here and
ready to create a masterpiece for you! From shadowbox
projects to framed photos of loved ones to artwork with meaning; nothing
is too big or small!
Thursday, June 14, 2012
Picture Perfect Week
Welcome back to Picture Perfect Week, where we are featuring backless frames as trendy home decor inspiration!
Today's wall display is simple and perfect for that bare wall screaming to have something special on it!
With prices of these frames 50% off until June 17th, you can't beat picking up a few large sizes, like Marcy did for her home, as shown below.
Photo and Project by Marcy Williams
These professional spray paints are perfect for even coverage for your frames. They are easy to spot because the cans are gold, but the colors are on the top of the can (as seen in green below).
Here are some other Picture Perfect ways you can hang backless frames.
Source: Talia Christine
Source: Living with Lindsay
Source: House of Fifty by Janell Beals
Wednesday, June 13, 2012
Picture Perfect Week
Welcome back to Picture Perfect Week where we are featuring backless frames with trendy home decor inspiration! Our backless frames are available in 8"x10" up to 24"x36".
Group frames on a bare wall or use them to create a one of a kind piece of art to hang next to other frames already hanging in your home. Check out theses creative ideas.
2. Place multiple backless frames inside each other along with an ornate key.*
3. Place a letter or number inside a frame to personalize your display.*
4. Staple twine or jute to the backside of your frame and use a clothes pin to change out current photographs.*
5. Use burlap to hang a wreath from the top of a backless frame. Change the wreath out seasonally.*
Ornate Wood Backless Frames are 50% off through June 17th!
*Note: Keys, Letters, Numbers, Twine, Jute, Clothes Pins, Wreaths, Art, and Burlap Ribbon all available at your local Craft Warehouse!
Tuesday, June 12, 2012
Picture Perfect Week
Welcome to Picture Perfect Week, where we will inspire you to fill your bare walls with backless frames!
Use a variety of ornate wood backless frames and group them up for a picture perfect look in any space! Ideal for any bare wall that needs a fresh new look. You can also use the frames as a border for smaller items to create a focal point.
To create this amazing wall display for your own home follow these easy steps below.
1. Apply chalkboard paint to your wall following the manufacturers instructions.
2. First lay out your frames on the floor to see how you would like to arrange them. Move them around until you like your layout. Then start hanging the frames on the wall (as seen below).
3. Frame a photo.
4. Add another framed photo.
5. Hang a backless frame and personalize the center with chalk.
6. Hang art under the backless frame. These are available at your Craft Warehouse too!
7. Use a backless frame to frame art, also available at Craft Warehouse.
8. Hang a backless frame and write a quote or note to the family.
9. Fill in the rest of the space with smaller frames. Use chalk around the frame to make one stand out more than the rest.
You can find a variety of backless frames at your local Craft Warehouse and are 50% off through June 17th! Stay tuned in this week with more ways to use backless frames!
Wednesday, December 21, 2011
Memo Board by Design Team Member Michelle Wofford
Hello, I am design team member, Michelle. Today I wanted to share a functional project that anyone can make.
You will need a picture frame in the size of your choice, patterened scrapbook paper / cardstock, a blank calendar template, ribbon, paper flowers and adhesive back pearls.
Start by selecting the size frame you'd like to use. Craft Warehouse has a large selection of frames in a variety of sizes and looks. I used a simple 16" x 20" frame.
You can create the memo board with or without a calendar. If you want to use a calendar there are two options available at your local Craft Warehouse - a clear acrylic calendar sheet or 12" x 12" decorative boardered paper calendar bases. Which you choose will depend on the look you want to acheive.
I've used the clear acrylic sheet so the patterened paper is visible below it. Trim your paper to fit in the frame. If you are using the acrylic sheet like I did you'll need enough paper to cover the entire frame. I usually lay the frame upside down on a table and lay my paper inside the frame so I know I have the best fit. Adhere any overlapping paper so they don't move once they are in the frame.
Trim your ribbon to the desired length. I used used ribbon both vertically and horizontally, this helps camoflage any visible paper seams and adds some decorative dimension to your board. Adhere the ribbon to the paper using glue dots or other adhesive. Once the ribbon is on add any other embellishments you'd like to use - flowers, buttons, bling...
I used paper flowers in two colors and adorned each with a white pearl center. I made this particular board for my sister in law and it just so happened that the colors she chose matched the colors of the outfits my daughters were wearing in a portrait taken around the time I made this board. I added the photo to give this board an extra personal touch.
Once you have everything assembled and your glass is clean insert your paper into the frame the right way and attach the back. If giving as a gift include a dry erase pen so it's ready to use.
Happy Crafting and thanks for looking ~ Michelle
Subscribe to:
Posts (Atom)


.JPG)


