Showing posts with label Flowers. Show all posts

Monday, July 7, 2014

DIY Flower Arrangements and Gold Glitter Vases


I love flower arrangements. Fresh flowers during the summer is something I wish I could have all the time! They can be really expensive to buy at the store so I make my own as often as I can!

Another thing I also love is glitter. I just don't love it all over my hands, face, and home. So when I heard about Krylon's Glitter Blast I had to try it. It is glitter in a spray can. The can is filled with adhesive and glitter - all you have to do is point and spray! I like that!

For this handmade vase, I just grabbed a mason jar and got to work! Scroll down to find out how to make your own vase and then how to create your own flower arrangement for less!

DIY Flower Arrangments and Gold Glitter Vases @craftsavvy @createoften #craftwarehouse #diy #vases #flowers #glamping

Supplies:

Mason Jar
Krylon Gold Spray Paint
Krylon Gold Glitter Blast
American Crafts Twine
Flowers

Vase Directions:

1. Spray the outside of the jar with gold spray paint. Do a couple of coats for a good application.

2. When dry, spray the outside of the jar with gold Glitter Blast. Make sure the jar is completely covered. Let dry.

3. Tie a piece of twine around the lip of the jar.


One of my favorite DIY projects is creating my own flower arrangements! I got several bouquets of flowers from my local Trader Joe's for only $20!  Here is how you can create your own flower arrangements using your own handmade vases!

Flower Arrangement Directions:

1. Open up all the bouquets and remove the flowers from the rubber bands and packaging.

2. If your flowers come with flower food, disperse the food out evenly to all your vases. Fill your vases up half way with water.

3. Sort your flowers on the counter so you can see what you have.

      1 - Foliage
      2 - Place smaller groupings of flowers together (like smaller Daisies, Asters, etc).
      3 - Large flowers will be used last, so place them on their own.

DIY Flower Arrangments and Gold Glitter Vases @craftsavvy @createoften #craftwarehouse #diy #vases #flowers #glamping


4. Using the foliage (branches of leaves) first, cut to desired length (for a mason jar I cut between 9"-10"). Putting one branch into the jar at a time criss-cross the stems into the vase. You are going to be creating a homemade frog this way. You should have about four or more pieces crossed into the vase.

5. Use smaller flower stems next (labeled 2 in the picture above) and make sure all the leaves are removed before adding them to the vase. Cut to the same length as before. Add one stem at a time twisting the stem into the jar so that it will slide into your homemade frog. Place the stems evenly around the vase.

6. For stems that have a lot of flowers attached (like a bunch of Daisies), remove them from the main stem so that you get more bang for your buck! Tuck these into your arrangement by twisting the stem again into the homemade frog.

7. Lastly, pick a favorite large flower (labeled 3 in the picture above) and cut to the same length as your other flowers. Find the front of your vase and twist the stem into the vase at the focal point of your arrangement. Make sure if you are using any Roses that all the leaves are removed before adding them to the vase.

*Note: For mason jar arrangements 1 large flower is enough. For large arrangements, you can add several large flowers to draw attention to the front of the arrangement. Have fun with it! This is a great way to make beautiful floral displays around your home for less!

Thursday, October 24, 2013

Hot Trend Chicken Wire!


Chicken Wire is all a hot trend this fall! But our chicken wire is not your typical chicken wire! This small scale version is perfect and easy to use for crafting! Here are some ideas to inspire your next fall project!


Wrap your candle holder with chiken wire and burlap ribbon for a country chic look at your table.


Wrap a mason jar with wire and add a chalk board clip. Reuse the clips and jars for your table decor year after year!


Place chicken wire in the lid of the mason jar as a floral frog. This will keep your stems upright and looking beautiful on your table scape!


Do the same at your beverage station! Add chalkboard labels for an even more classic look!


Our pre-sized 12x12 chicken wire slips right into a frame! Just add clips and photos to personalize it!

* Chicken Wire on sale 12x12 $2.99 (reg $3.99), 11x14 $3.99 (reg $4.99), and 16x20 $4.99 (reg 5.99) until October 27th, 2013

Friday, May 31, 2013

Mixed Media Frame by Guest Designer Candy Rosenberg


I loved using this wood frame, plastic letters, rub ons, cardstock and much more to make this wonderful gift for my bestie!

Supply List: 
Cardstock, Rub ons, Letters, Alphabets, Ink by Tim Holtz
Pocket Watch by Melissa Frances
Fabri Tac, Zip Dry Adhesives by Beacon Adhesives
Burlap Ribbon
Buttons
Sanding Block
                                                                                    Flower Punch


Twopeas
Instructions:

1. Place the frame down on the paper with paper face up and trace.  Do not worry about the lines, they will not show when you are done.
2. Adhere the cardstock to the front of the frame.
3. Sand off the edges as well as you can to remove as much excess paper as possible.
4. Tear off the remaining paper that would not come off with the sanding block.  Does not have to be perfect.
5.  Sand the edges to make them appear to be a part of the frame.
Cwframe

6.  Cut the burlap ribbon in half.
7. Add wet adhesive the entire length of the ribbon, then roll up.  Put aside

8.  Apply the rubons directly onto the paper on the frame.
9. I used only ink to add color to the pocket watch.  It was enough to bring out the detail that I wanted without being too much

10. Using flower punch of your choice, punch out flower.  Turn over to expose the kraft side of the cardstock and use the rubons to add pattern to the flower.
11.  Place the newly patterned flower on top of another that is the colored side of the cardstock using 3D foam squares.  Add a button for the center.
Cw-rubonflowers

12. Punch out different styles of flowers, stack them with 3D foam squares.  Use buttons for centers.

Dimensionalflower

13. Remove your desired letters and numbers and add to the face of the frame.
     Plasticletters

Lettering

14. Start adding all your pieces and assemble flowers, pocket watch and flowers to create the effect shown.
Assemblage

And you are done.  I hope you are inspired to make your own frame using all the wonderful available products at Craft Warehouse.

Friday, March 1, 2013

Bo Bunny Ribbon and Flowers


 Thanks for playing along! This giveaway is now closed. Our winner picked via Random.org is:
Oh, heck ya, these are awesome!

It is Weekend Giveaway time again with this Bo Bunny Flower and Ribbon Giveaway! You will get all the packages shown above about $40 value!

To enter to win, you can...
1. Comment here! We need to be able to contact you if you win! If your email is not attached to your profile, please add an email address in your comments making sure to add spaces as shown: email (at) address (dot) com. Thank you!

2. Share our giveaway via Facebook by clicking "share" on our Facebook post, then come back here and tell us that you did.

3. Share our giveaway via Twitter, then come back here and tell us that you did.

4. Pin our giveaway via Pinterest, then come back and tell us that you did.

One winner will be picked via Random.org on February 18th, 2013!

*We ship in the US only thank you.

Friday, August 3, 2012

Canvas Corp Mixed Media Canvas by Guest Designer Mendi Yoshikawa


Hi there! Mendi Yoshikawa is here today to share a Canvas home decor project using a few of the fun, new goodies from Canvas Corp and Tim Holtz available at your local Craft Warehouse!

Alphabet Foam Stamps $5 (reg. $12.99); Canvas Flowers $2.99;
Entire Stock of Artist Canvas 50% off white tag;
Tim Holtz Idea-Ology Embellishments 25% off regular prices
Distress Stain $3.88 (reg. $5.99)*

For this project you will need the following supplies:

-12x12 White Canvas (Sierra Pacific)
-Creative Cafe 4" foam alphabet stamp set
-Canvas Corp. burlap flower embellishment
-Canvas Corp. burlap & canvas tags
-Canvas Corp burlap ribbon, jute cording & clothespin
-Ranger Fired Brick Distress Stain
-Tim Holtz idea-ology Numeral Plaquettes
-Tim Holtz 12x12 Kraft Resist Paper Pad
-Bazzill 12x12 Black Cardstock
-American Crafts Pearl Brad
-American Crafts Foam Alphabet Stickers
-American Crafts White Crocheted Lace
-Beacon's 3-in-1 glue
-Scotch Foam Tape
-DMC white embroidery floss
-Ceramcoat Black paint (and other color of choice for background)
-Versafine Onyx Black ink
-1" wide Scotch Painter's Tape
These tools are also helpful:
-Sizzix Tim Holtz Mover & Shapers Heart Die/Cutting Tray
-Spellbinders Circle Dies
-Martha Stewart border punch
-Foam brush(es)
-Ranger Craft Mat
-Scissors
-Heat gun
-Paper piercer


Unfortunately I didn't manage to take pictures of me creating it along the way, but I thought I would share with you some step-by-step instructions on how you can re-create your own canvas. 

Instructions:

1. Paint the a 12x12 canvas using tan acrylic paint.  Two coats may be necessary, but make sure to let canvas dry completely before continuing to next step.

2. Apply 1" wide painter's tape to the bottom portion of the canvas, pressing down the edges firmly.  To do this I laid my first piece down and then used another piece to temporarily leave a 1" space and give me a guide to lay my next row straight.  I did this until my entire canvas was covered with the painter's tape mask.  Next you need to paint the exposed areas with black paint using a foam brush.  Keep in mind that it won't matter how perfect the lines are at the top because this will be covered by the punched borders with burlap ribbon later. 

3. For the canvas and burlap tags, cut them apart so you are working with just a single layer.  Generously apply the Red Fired Brick Distress stain to a 3" strip of Tim Holtz Resist Kraft paper of your choice and 2 halves of the red canvas tags.  Set aside to dry.  Next generously apply black versafine ink to one portion of the burlap tag (for the flower center) and set aside to dry as well.  These both may take a LONG time and can sort of be sped up with the help of a heat gun, although I found it nice to do this step at a time when I could walk away and leave it for a long period of time). 

4.  When the items have all dried, you are ready to diecut.  Diecut a heart from part of one of the stained canvas tags using Sizzix mover and shapers Heart die.  From the other side of the canvas tag, diecut a 1-3/4" circle.  Save the leftover scraps to use behind the openings of the letter "o" and "e" in the title.  Diecut the Black inked burlap tag into a 1-1/4" circle.  You will need to add a shim when using Spellbinders and it will most likely not cut all the way through, but will give you a nice cutting line to go back over with scissors.  Otherwise punching out a cardstock circle to use as a cutting pattern is another easy option.

5. Using the 3" strip of Resist Kraft Paper that you stained earlier, punch out a decorative border on either side using the border punch of your choice. Adhere strip to canvas above black stripes as shown using Beacon's 3-in-1 glue.  Layer with 12" long Burlap ribbon and white crocheted ribbon as shown.

6. Layer the diecut circles onto the burlap flower applying a bit of the beacon's glue between each layer. Add a bead of glue around the red canvas circle and adhere the jute cording, cutting off excess. Using the remaining single layer natural colored burlap tag (that you cut apart in step 3), cut it into 2 tails to be glued beneath the flower. Top the flower embellishment with a pearl brad and adhere to the canvas as shown using more of the Beacon's 3-in-1 glue.
7. For the main portion of the title, using the foam stamps, stamp the word home with the versafine black ink on the backside of a piece of Tim Holtz Resist Kraft Paper, making sure to leave enough room around each letter so that you can cut them out with a bit of a natural kraft border.  After they have dried (it doesn't take long with this ink), cut them out as shown.

8. Glue the red canvas fabric scraps saved in step 4 to the backs of the openings for the letters "o" and "e".  Using the Beacon's glue, glue the letters H, O & E directly to the canvas, making sure to leave room for the letter M.  Clip the clothespin onto the letter "m" as shown, adding a little beacon's glue inside the clothespin for a permanent bond.  Next, using 3 to 4 layers of foam tape, build the letter "m" up so that it is can stand at the same height and thickness as the clothespin.  Tie a jute bow onto the clothes pin and adhere the number plaquette to the center of the letter "o".  Use a paper piercer to polke directly through the canvas background, creating small holes to insert the plaquette brads into.                                


9. For the remainder of the title, use American Crafts black foam alphabet stickers to spell out "is where the is".  Leaving room for the canvas heart, apply words once again with a small amount of Beacon's glue (this is more permanent than relying on the stickiness of the actual letter stickers).  Underline words with a 1/8' x 9-1/2" black cardstock strip. 

10. For the heart, adhere with Beacon's glue and then using a paper piercer, pierce stitching holes around the perimeter of the heart.  Using embroidery floss, sewing a running stitch around the heart, going through the canvas and all.  This is easier than dealing with the edge of the heart unraveling by stitching it beforehand. 

There you have it!  A finished canvas to enjoy in your home.  I hope you will visit your local Craft Warehouse and check out all the cool Canvas Corp items they now have in stock!  :)

* Sale ends August 19th, 2012

Saturday, April 28, 2012

Paper Spring Bouquet Tutorial


We welcome Craft Warehouse's 2010 Scrapbooking Design Team Member, Elizabeth Wiederspohn, who is guest blogging with us today. Elizabeth is sharing a step by step tutorial of this paper bouquet project, perfect for any season!  Whether you make it for yourself, a baby shower, or Mother's Day, you will want this Spring Bouquet for your table's center piece. 

Supplies: 

•    Double Sided Patterned Paper
     -    5 sheets for flowers
     -    1 sheet for leaves
     -    1 sheet for hearts for rosette backs
•    Tim Holtz Rosette Die
•    Wooden Dowels
•    Buttons/Center decorations
•    Square Punch
•    Heart Punch
•    Strong Adhesive or Hot Glue
•    Ribbon
•    Vase
•    Coffee Beans, Glass beads, sand, or kidney Beans


Step #1:  Die Cutting Rosette Strips
Using the Tim Holtz Rosette Die and your favorite die cutting system, cut out 25 rosette strips for flower rosettes. (Five from each piece of paper set aside for flowers.)

Step #2:  Making Small Rosette Flowers
Using the strips you just die cut, make seven regular rosettes.  (First time making a rosette?  See directions below for “Assembling a Rosette Using a Tim Holtz Die.”)

Step #3:  Making Medium Rosette Flowers
Using nine of the remaining die cut strips, overlap and glue two strips together making sure all the perforations line up with each other and allowing the top scalloped edge of the strip to stick out around a quarter of an inch.  Flip the strips over.  Using a third rosette strip glue strip to back of the other two to make a “rosette sandwich.”  Since both sides will show, it is important to make sure you have patterned paper on both the front and the back of the new “sandwich.”  Assemble rosette with all three layers like you would a normal rosette. This will make three rosettes.


Step #4: Making Large Rosette Flowers

Using the last nine strips make three more “rosette sandwiches” this time allow the middle strip to stick out approx. half an inch above the other two strips.  To prevent tearing cut the tops of the top strip every forth perforation making sure not to cut the bottom two layers.


Assemble the rosettes like the others.  The outer edge of the flower will fan out to make flower petals.  This will make three large rosette flowers.


Step #5:  Decorate Flower Centers
Using buttons, flair or any other embellishment decorate the centers of the fronts of each rosette.  Since both sides of each flower will be seen you will want to make sure to decorate both sides.  Using patterned paper punch thirteen hearts and glue to the back of each rosette center.

   
Step #6:  Adding Dowels and Ribbon Leaves

Carefully slide dowels into one of the folds on the back of the rosettes sliding the dowel under the center of the glued circles.  Tie ribbon onto the dowels of both the small and medium rosette flowers to make leaves.


Step #7:  Making Large Flower Paper Tags/Leaves
Out of the paper chosen to make leaves cut three 1x4” strips.  Fold strips in half and using a square punch, punch a “v” banner shape out of the end of each strip. 


Glue onto the dowels of the large paper rosettes and write messages and/or decorate.


Step #8:  Prepping the Vase
Using ribbon, tie a bow around the neck of the vase.  Pour coffee beans into the vase.  (You can also use small rocks, glass beads, sand or kidney beans in place of the coffee beans if you like.  I just like the smell of coffee.) 

Step #9:  Finishing Touches
Arrange flowers into vase making sure it is viewable from all sides.  ENJOY!


Assembling a Rosette Using a Tim Holtz Die

Step #1
Using your favorite die cutting machine die cut the rosette strip and center circle from the Tim Holtz Rosette Die. 

Step #2
Using a fan fold, fold every perforation on the rosette strip


Step #3
Staple or glue the ends of the strip to each other making a circle. 


Step #4
Gather the center of the flat edge of the strip and push downward.  Holding firmly, glue down center paper circle, or button, with strong adhesive or hot glue gun on both the front and the back. Decorate if desired.
 

Tuesday, April 10, 2012

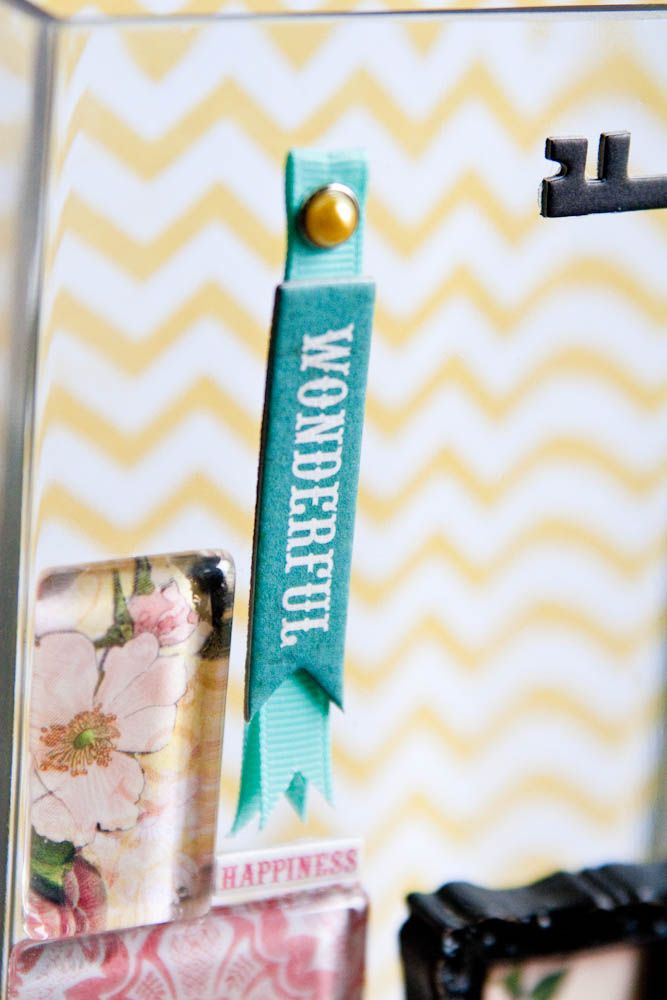
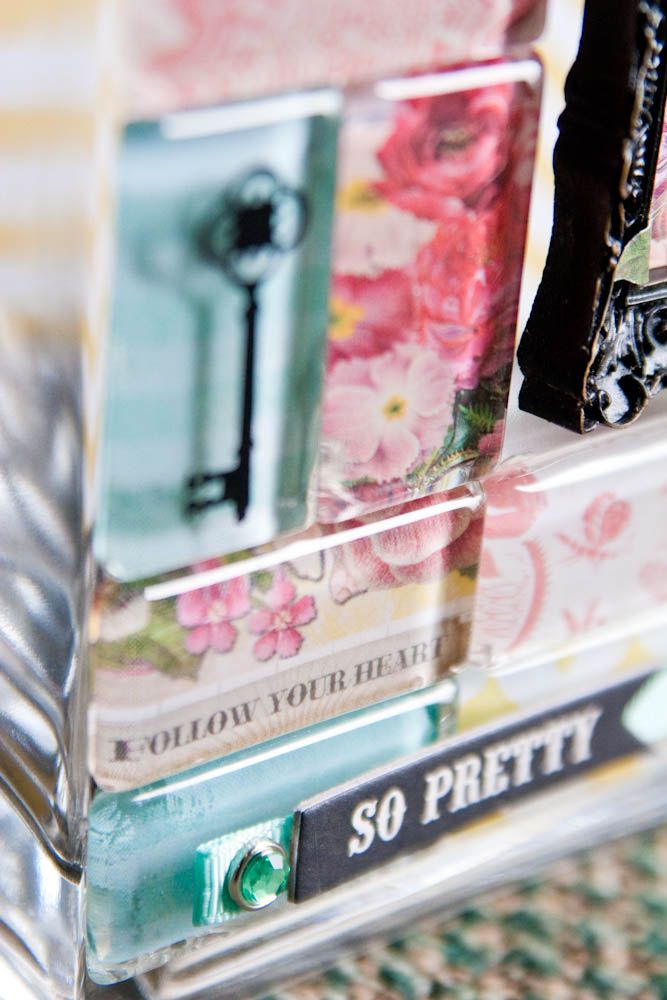
Decorative Glass Vase by Design Team Member Julie Zweig


Today Julie Zweig, Craft Warehouse Design Team Member, shares with us a unique way to dress up a vase using basic scrapbooking supplies. Can you imagine filling it with spring and summer blooms?!

Hello, today I am sharing a paper craft twist using a glass vase.  It’s crisp, shiny and takes on the freshness of spring and combines scrapbooking supplies with a vase.  


Supplies used:

  • Patterned paper from My Mind's Eye
  • Chipboard accents from Echo Park
  • Brads from Echo Park
  • Ribbon by American Crafts
Additional supplies I discovered and purchased at Craft Warehouse:

  • Glass vase with a flat surface
  • Small frame
  • Little glass tiles - comes in a packet of 10
  • Key shape rub on - found in the magnet display/section
  • Rhinestones
  • Big glass crystals - found in the bead section
  • E-6000 glue (use with good ventilation)
How to decorate the vase:

Make and assemble your embellishments


  •  Trace with a pencil around the items you want as a background for each glass tile.  Cut and trim until it fits the back of the tile.  This is my favorite step.  It is amazing what you can discover in a patterned paper when you glide the glass over the different areas. 
  • Glue paper to the back of the glass tile - let dry. 
  •  Assemble various pieces of ribbon, with brad and sentiment. 
  •  Select part of a patterned paper to use in the mini frame.  I cut out the little leaves from some of the paper and made them three dimensional. 
  •  Pull apart the big crystal beads, hook part of the crystals into cardboard key. 
  •  Add rhinestones where desired.

Plan out the layout before using adhesive:


Trace around the vase on a white sheet of paper and use this as a guide for the exact size you have to work within.
Glue embellishments onto the glass vase:
  • Clean and dry the glass vase.
  • Glue on embellishments.
  • Let dry - lay flat
  • Place and glue a background patterned paper on the back of the vase, in case you want to use it for real flowers and enjoy!


My youngest son (9) assisted with the placement for this particular photo.  He found some wildflowers and thought it would be perfect to frame the vase.

Enjoy Spring!

LinkWithin

Related Posts Plugin for WordPress, Blogger...
Blogging tips