Showing posts with label tags. Show all posts
Showing posts with label tags. Show all posts
Tuesday, July 8, 2014
Lawn Fawn S'more Party Favors
Get in the mood for summer S'mores with this darling new set of stamps by Lawn Fawn! When I saw this set, I freaked out. Really. I think it is my favorite set of all time. It has the cutest sentiments that can be mixed around for a variety of cards and tags. I created S'more favors (really, aren't they cute?) using Tim Holtz Distress Markers to color the stamps in!
Supplies:
Lawn Fawn Love You S'more Stamp Set
Kraft Tags with Twine
Archival Black Ink by Ranger
Watercolor Paper
Tim Holtz Distress Markers - Rusty Hindge (gram cracker) and Vintage Photo (chocolate)
Foam Popup Dots
Treat Bags
Gram Crackers
Chocolate
Marshmallows
Directions:
1. Stamp s'more image and smile on to watercolor paper. Color in with Distress Markers. Cut out.
2. Stamp sentiment on to Kraft Tag. Place s'more on the tag using a pop up dot. Place string on the finished tag.
3. Fill treat bag with two gram crackers, a square of chocolate, and a marshmallow. Tie the bag closed with the string.
4. Try to give them away before they are consumed.
Monday, March 18, 2013
Guest Designer Andrea Ancich

Welcome back Craft Warehouse Scrapbooking Design Team Alumni, Andrea Ancich, as this month's Guest Designer! We love Andrea's fun personality that definitely comes out in her scrapbooking! She loves to put bold patterns along with some of her favorite embellishments - like washi tape!
How long have you been crafting?
I started crafting when I was freshman/sophomore in high school when my mom taught me how to sew. I’ve been scrapbooking since 1996 when my high school boys basketball team made it to the state tournament. I then attended a home scrapbooking party. I loved being able to put all my pictures down and add stickers, etc. But that was NOT enough for me. I soon found craft stores and was hooked. And have been ever since. I still create projects with fabric and paper; sometimes incorporating both together.
What inspires you to be creative?
I get inspiration from absolutely everywhere. I love looking at my pictures, scrapbooking/creative magazines, getting new product (always a favorite), Facebook, and of course, Pinterest.
I have an inspiration book so that when I lose my mojo, I can flip open the book and find inspiration from there. It has pictures of layouts, cards or sewn projects that I like because of the colors, the details, or flat out just the idea itself: lifting it straight up. I always am sure to give credit though if I post it on my blog or any social media location as to wear I got the inspiration.
What Craft Warehouse products do you love to use?
I love that Craft Warehouse gets in the latest and greatest for scrapbooking stuff. I don’t have to buy online I can head there and know they are going to have fun stuff to play with. Their fabric section is to die for as well. Love me some Moda fabric! Since I live where a Craft Warehouse isn’t super close, I make sure to have a stop at Craft Warehouse so I can shop shop shop when I’m traveling.
How can you encourage others reading this column?
Everyone once in a while (as I stated earlier), it’s hard for me to get my mojo flying. This column is a great place to find motivation, or mojo to get your creative juices flowing. If you haven’t tried scraplifting someone or picking details off their layout or project that you like to make a page or project, go ahead and give it a try!
Check out Andrea on her blog, Just Me Today and at her challenge blog The Bossy Scrapper where she helps inspire your next scrapbooking layout!
Saturday, September 29, 2012
Advent Frame
Supplies
16x20" frame any color or style
Red Acrylic paint
Foam Paint Brush
Twine
Advent Numbered Clothes Pins (or make your own with wood shapes glued on clothes pins)
Manila Tags
Patterned Paper
Ribbon, Rosettes, etc Hot Glue Gun & Hot Glue Sticks Reg. Glue Stick
Directions
Paint the frame and let dry. Cut three strands of twine to go across your frame. Glue the ends of the twine onto the backside of the frame with the hot glue gun. Also glue twine on the top corners of the frame to hang the frame. Decorate the frame with ribbon, rosettes, etc. Decorate your manila tags with the patterned paper. Decorate your clothespins. Clip the tags onto the twine string.
Tip– On the backside of your manila tags write a message to your kids or a treat they get for that day as you countdown to Christmas!
Labels:
frame,
holidays,
home decor,
tags
Monday, June 11, 2012
Canvas Love
1. Pugly Pixel; 2. Canvas Corp Kraft and White French Script Patterned Paper; 3. Studio Calico, Abroad Line*; 4. Simple Stories Mix & Match Memorabilia Pockets*; 5. Canvas Corp Muslin Canvas Mini Tags
*Note: 25% off Studio Calico & Simple Stories products through June 17th.
Friday, April 27, 2012
Create a Smash Page
Welcome to our blog video series called Back 2 Basics!
Let's face it, we are busy. We don't always have two hours to spend on a layout or project. Back 2 Basics will help teach those that either want to learn how to scrapbook or want quick and fast tips to help you get your project done in 30 minutes or less! Each video in the series will be less than 5 minutes long; which gives us more time to create and less time in front of the computer!
Today we have a Smash Book page to share with you! If you are new to Smash books or want to know what they are, check out this thread on our forum with the video on what it is to even more inspiration!
Here is the supply shopping list. Feel free to drag this to your desktop and print it off for your shopping trip to Craft Warehouse.
2. Cut your paper 3" x 9" inches and tuck it under the magazine clipping (or photos).
3. Make tags or journaling cards from dies. I used Spellbinders' Labels Four and paper from the Smash pads. Layer them in the bottom right hand corner and add a paper clip. Then glue on a mini envelope from Studio Calico on the top tag.
4. Use Spellbinder's Blossom die by Samantha Walker and glue it down behind the tags, making sure it peeks out from the top. You can use all these journaling spots to write notes on.
5. Cut out your paper to look like Polaroids and use foam squares to add lift.
6. Place the "Take Note" badge on the corner of one of the Polaroids.
7. Add Smash tape. Cut the end of the red Smash tape to make it look like a flag.
8. Use a "Make It" Smash tag to add to the top Polaroid.
9. Glue a Smash clip to the top of the page. This makes sure it doesn't fall off while traveling with your book.
10. Color your Studio Calico Wooden Veneers with a American Crafts Slick Writer pen. This pen will make coloring these shapes fast and easy! Use a paper piercer to hold the shape still while you color. The pen also will not smear on your pages. Glue them down on your page. I like to keep them in odd numbers.
11. Glue a bracket down from American Crafts' Thickers alphabet stickers. Also, collect the periods from the package and glue them randomly around the star veneers.
Watch the video tutorial below! Enlarge and click on high definition to watch it in the quality it was shot in.
Thursday, December 1, 2011
12 Days of Christmas with Design Team Member Amanda Sherman
Hi again! I’m Amanda Design Team member!!
Every year for Christmas, I like to do something that really says “I’m thinking about you.” I’ll admit, we’re not a millionaire family and sometimes we can’t afford to buy the gifts that’d we’d like to give. But I think that the specialness (wait, is that a word? LOL) of a gift is the thought that goes into it.
As well as having a limited budget, I know there’s more in that we’d love to spend the holidays with our parents, for the kids to spend it with their Grandparents. However, the many miles and states between us keep that from happening. So this year, I wanted to put a little extra thought & effort into Christmas in a way that didn’t cost a lot of money. Something though that really says “wish we could be together.”
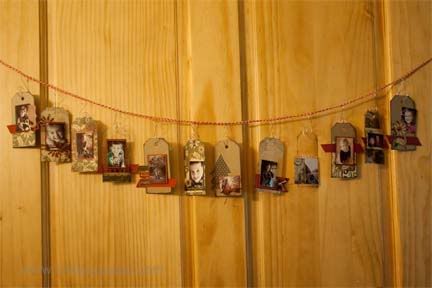
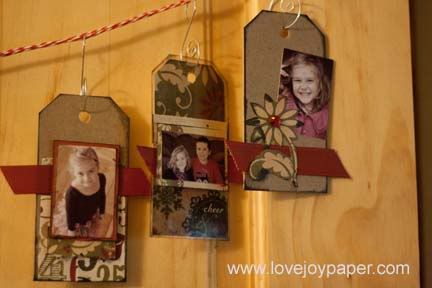
Many of you may know about Tim Holtz’s 12 Tags of Christmas. Well, this is my tag on that…okay, bad play on words. This is my take on that. While his work is gorgeous, it’s much more time consuming than I have to spend on it.
So I’m doing the 12 Days of Christmas. ♫♪On the first day of Christmas my true love gave to me a partridge in a pair tree♪♫. (be glad you can’t hear me singing because, well, I’ve been “complimented” in some not so nice ways about my singing. Let’s just say Simon only wishes he was still on American Idol so he could unleash his British snarkiness on me and my not so talented voice).
Okay, I digress. Back to the subject on hand. This was a project I went into with the intention of it not being exceptionally time consuming, and it wasn’t. About 2 hours for 3 sets (I have three sets of parents to send to).
My idea here is that each day I will mail one tag to our parents. Each day, while we can’t be with them this holiday season, they’ll still receive a bit of cheer in the mail. And who doesn’t love happy mail instead of bills? I know I do!!! They can hang them on the tree or wherever tickles their fancy. Before Christmas, they will have an array of different heart warming tags to do something with. I’m leaving that to them. Actually, I think I’ll send a binder ring in the last envelope so they can make a “mini album” when Christmas is over.
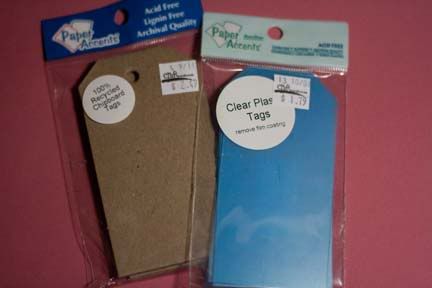
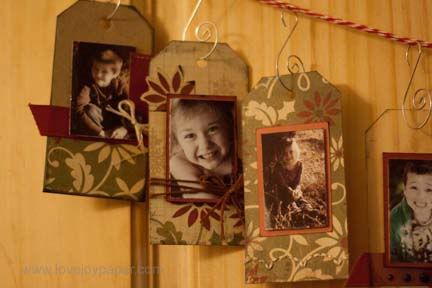
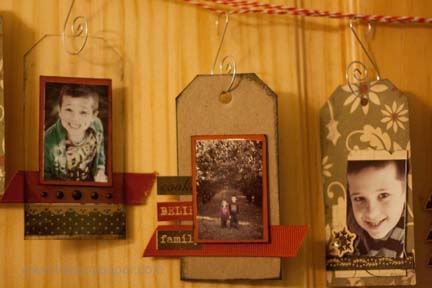
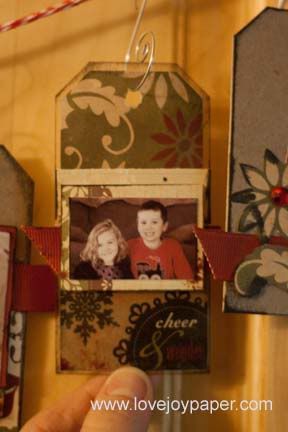
I found these tags at Craft Warehouse. I bought two packages of chipboard and one of clear (because there are only 5 per package, you need more than 2 packs).
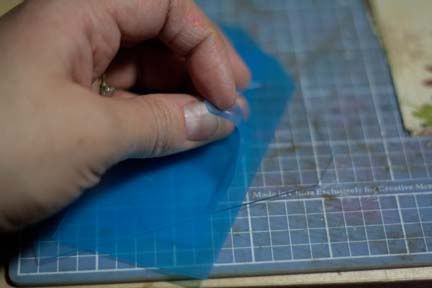
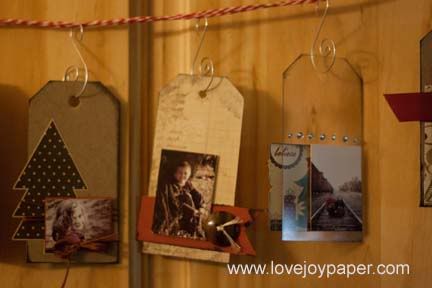
On the clear ones, be sure to remove the blue film cover.
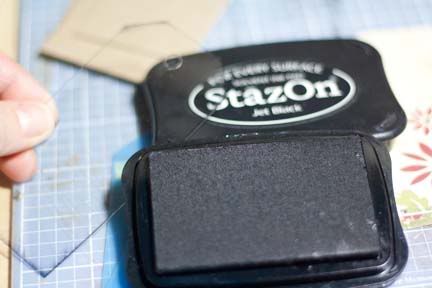
I used StazOn ink (especially on the acrylic).
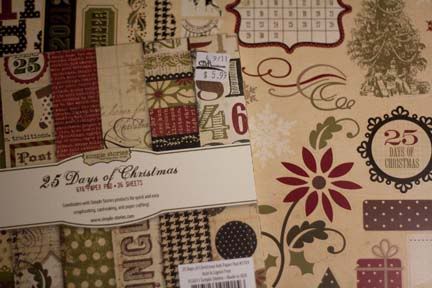
But the best part..... the complete goodness of Simple Stories 25 Days of Christmas. I think this is my favorite Christmas line of all time. Really.
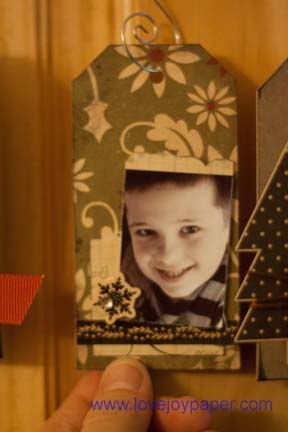
I printed of small pictures, about 1.5 x 2 inches. You could also probably print off contact pictures from your photo gallery if you aren't comfortable using Photoshop. Then I set to work. I didn't really do anything special or consistent, I just put together what seemed appropriate for each picture.
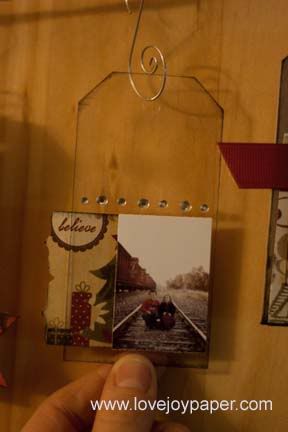
This was my favorite tag of all of them. I think it was just as much because of the picture. Let me just suggest to you all to not take pictures on the railroad tracks. Let's just say we had a visit from some law enforcement and I'll leave it at that....:p I do also really like the acrylic because you can have more dimension. You can have dimension in front and you can build dimension behind for a really awesome look!
I’m off to go drop these bad boys in the mail! Enjoy your day.
Subscribe to:
Posts (Atom)


.jpg)


