Showing posts with label doodlebug designs. Show all posts

Thursday, September 4, 2014

Halloween Paper Cones


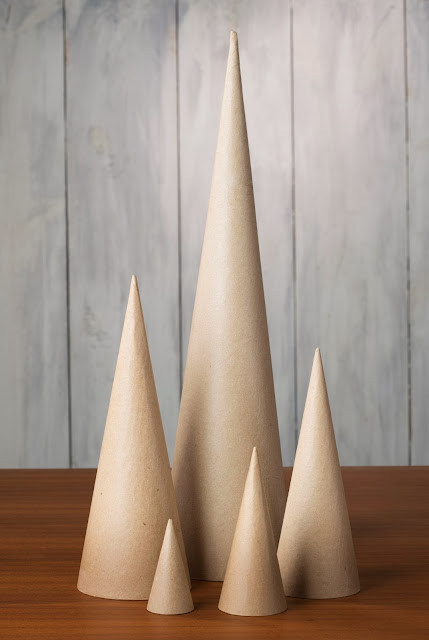
We have a paper mache project for every holiday! These Doodlebug Designs cones are perfect for your Halloween party or home decor!

Halloween Paper Mache Cones @craftsavvy @sarahowens #craftwarehouse #halloweeen #papermache #diy #party

Doodlebug Designs Cones

Supplies:

2 - large paper mache cones
10 - 12x12 sheets of patterned paper of your choice.
Marvy scalloped punch 1.5”
Glass 3”candle stick
Chip board
Glue gun
E6000 glue
Gray primer spray paint
Black spray paint
Black glitter blast spray paint.

Directions:

Punch scalloped circles out of scrapbook paper of your choice.
Glue on to cones using glue gun.
Cut a circle out of chip board to fit in the base of your large cone. Glue circle into cone using a glue gun.
Spray the glass base with gray primer, once dry spray it with black spray paint, then glitter blast!
Attach the candle stick to the base of your cone using E6000.

Witch Hat

Directions: 

Cut 12x12 chipboard into a circle with a craft knife. (Tip: Use a plate for a template.)
Spray paint the cone and chipboard bottom.
Spray Black Webbing Spray over the top of the painted cone.
Glue base to cone using Beacon's 3 in 1 adhesive.
Add embellishments.

* Paper Mache Cones 50% off regular prices until September 21st, 2014

Monday, June 30, 2014

Awesome Stars and Stripes Nail Tutorial


Get ready to celebrate 4th of July by doing a little nail art! I love nail art! I have realized that it is like painting, just on a small surface. Ha! I can't wait to share this fun tutorial with you using scrapbooking supplies!


Awesome Stars and Stripes Nail Tutorial @craftysavvy @createoften #craftwarehouse #nailart #naildesigns #diy

To create this look you will need your nail polish, piercer, stylus, and washi tape. A great tip is to try to use light stick washi tape. Also, in the video I am using the Doodle Bug Designs thin washi tape which I like better. It is easier to cut the pieces you need because of the stripes or chevron patterns.


I also used the Silhouette Cameo in this tutorial, but you can look for stickers in your stash or even cut shapes from washi tape if you don't have a Cameo!

Watch the video below and have fun!

Sunday, June 15, 2014

Doodle Bug "Patriotic Parade" Mini Sign


4th of July is around the corner! Here Danielle created this adorable plaque with clothes pins to change out photos. Samples are also displayed at each of our Craft Warehouse locations


She created the USA by using Hazel and Ruby Handmade Mask Stencils.


She used mini clothes pins so you could change out photos.


I love the detail of using red acrylic paint and then distressing with white acrylic paint.

Wednesday, April 16, 2014

Fun Ways To Decorate Wood Easter Eggs


Handmade projects don't have to be complicated to be impressive! Join us through out the month of April for ideas that are easy DIY, that will satisfy your desire to create, and will wow your family and friends!                                                 With Easter just around the corner, let your kids decorate with out the mess of dyeing eggs!

Supplies:
  • Wood Eggs
  • Lara Crafts mini wood candle sticks (4 in a package)
  • Chalk Board Paint
  • Acrylic paint for your candle bases
  • Foam Brush
  • Wood Glue
  • White Chalk (for seasoning)
  • Bistro Marker
Directions:
  1. Paint your eggs with chalk paint. Let dry.
  2. Paint Each candle base a different color or all the same. Let paint dry.
  3. using wood glue, glue the egg on top of the candle base and let adhere overnight.
  4. Then season your egg with white chalk.
  5. Then decorate with bistro marker!

Here is another fast and easy way to decorate wood eggs!


Supplies:
  • Wood eggs
  • Bling, stickers and washi tape!
  • Becon 3in1 glue for whatever doesn't want to stay on.

Wednesday, October 16, 2013

Halloween Paper Mache Cones


We have a paper mache project for every holiday! These Doodlebug Designs cones are perfect for your Halloween party or home decor!


Doodlebug Designs Cones

Supplies:

2 - large paper mache cones
10 - 12x12 sheets of patterned paper of your choice.
Marvy scalloped punch 1.5”
Glass 3”candle stick
Chip board
Glue gun
E6000 glue
Gray primer spray paint
Black spray paint
Black glitter blast spray paint.

Directions:

Punch scalloped circles out of scrapbook paper of your choice.
Glue on to cones using glue gun.
Cut a circle out of chip board to fit in the base of your large cone. Glue circle into cone using a glue gun.
Spray the glass base with gray primer, once dry spray it with black spray paint, then glitter blast!
Attach the candle stick to the base of your cone using E6000.

Witch Hat

Directions: 

Cut 12x12 chipboard into a circle with a craft knife. (Tip: Use a plate for a template.)
Spray paint the cone and chipboard bottom.
Spray Black Webbing Spray over the top of the painted cone.
Glue base to cone using Beacon's 3 in 1 adhesive.
Add embellishments.

* Paper Mache Cones 40% off regular prices until October 27th, 2013


Friday, October 11, 2013

Doodlebug Designs Halloween Parade Paper Wreath by Holly Gagnon


Holly here from Ribbons & Glue excited to be back again designing for Craft Warehouse.   
For this project,  I was sent Doodlebug Designs Halloween Parade to play with.  I have to mention, when I opened up my Craft Warehouse supply box, I did let out a lil' ... Eeeek!!  Total appropriate excitement for Halloween, right?

The Doodlebug Halloween Parade collection is a must have for your Halloween projects this season.  
I decided to make a BIG  Halloween statement this year by using the Halloween Parade paper pack to make a festive Paper Ribbon Wreath.

Supplies Used to Make a Paper Ribbon Wreath:

  • Wreath Form  (I covered mine in black crepe paper)
  • Doodlebug Designs Halloween Parade 12x12 Paper Pack
  • Paper Trimmer
  • Hot Glue Gun
  • Stapler
How to make a paper ribbon wreath 

How to make a Paper Ribbon Wreath:

  • Cut various sheets of patterned paper into 1 x 5 inch strips.
You'll be cutting LOTS of paper strips.  I ended up using all  11 sheets in the entire pack.  Eeek!
    • Fold paper strips in half.
    • Staple ends together. {this step just makes life easier}
    • Ink edges as desired. 
    • Hot glue paper ribbons onto wreath.
    • Keep gluing ribbons until the wreath base is covered.  
    When your wreath is finally covered  {Phew!} you can now add Halloween Parade embellishments.

    Spiders are totally not cute but a spider made of glitter is.  This Halloween Spider is cut from a Lori Whitlock cut file and sits in the middle of the wreath.  
    He's a lil' cutie, huh?  The googly eyes and Halloween Parade heart sticker really does make him too cute to spook.  

    To make the Halloween sign, I used my Silhouette again to cut another Lori Whitlock  Halloween Label and Scallop Circle cut file.  I layered the sign pieces together then embellished it with various Halloween Parade This and That stickers. To keep up with my cute spider theme,  I adhered googly eyes on to a spider sticker, stuck him on a Halloween Parade Pixie straw and attached it behind the sign.

    Thanks so much to Craft Warehouse for having me as a Guest Designer this week!  I hope my design inspires you to make your own festive Paper Ribbon Wreath.

    Tuesday, October 1, 2013

    Holiday Signs


    Spell out your holiday spirit! Get inspired all week long with these fun projects wood and vinyl projects! Don't stop with the holidays though. Go ahead and brag. Add your family name or even your favorite football team!

    Short on time but what to spell it out? Start with these partially done signs and simply add your message or photos!


    (Shown above 4"x5" Burlap Sign with Base - Already painted black with burlap attached)


     (4.75" Sign with Base - Comes plain and ready to embellish. Add a wood candle holder for a taller statement)

    We took our plain sign stand from Halloween to Thanksgiving with a change of paper and lettering! 

    Instructions:

    1. Paint plain stands with acrylic paint. (Burlap stands are already black.)

    2. Cut paper to fit each stand.

    3. Glue paper to stand using a Pioneer Glue Stick.

    4. Add a vinyl of your choice.

    5. Embellish with stickers or twine if you wish. 

    * Burlap Sign With Base 3 for $10 (reg $3.99) and Sign with Base 2 for $5 (reg $3.99) on sale until October 6th, 2013

    Monday, July 1, 2013

    Doodlebug Designs {Stars & Stripes} Wreath


    We are loving this New paper line from Doodlebug called {Stars & Stripes}
    Follow super simple steps to create your own!


    Supplies:
    • Stick wreath
    • Doodlebug paper pack collection {Stars & Stripes}
    • Canvas Corp mini flag burlap pennants, red fabric flower & red mini clips
    • Small metal stars (on sale for $1 till the end of July)
    • Wood letters
    • Red bandana
    • Jute string
    • Beacon fabric tack glue
    • Wire
    Directions:
    1. Cut paper to fit the front of the mini burlap pennant. (cut a little smaller than pennant so you can still see burlap)
    2. Glue paper on to burlap using beacon fabric glue
    3. Glue sticker that says "4th" on to the front of the red fabric flower.
    4. Tie the burlap string to go from one side of the wreath to the other.
    5. Glue fabric flower to the wreath using beacon fabric glue.
    6. Add the mini pennants by clipping them on to the burlap string.
    7. Secure metal stars to the wreath by using wire to hold them on. 
    8. Cut a strip of your bandana and attach it to your wreath for hanging.
    Now you are ready to Celebrate!


    Monday, June 24, 2013

    Fourth of July Card and Pin Wheel Wreath by Guest Designer Michelle Wofford


    Hi everyone, Michelle back again to share a couple more projects for 4th of July.  The Stars & Stripes line from Doodlebug Designs Inc. has some great double sided paper and what better to make for the 4th of July than a United States Flag card with this line. 


    Start by making your card base, trim cardstock to 6" x 6 1/2", score on the 6.5" side at 3 1/4".  Fold in half, your card base is now 3 1/4" x 6".


    Trim seven 1/4" x 6" strips of the red star patterned paper and one 1 3/4" x 2" rectangle from the blue patterned paper.  Ink edges if desired. 


    Starting at the top of the card base, adhere the first red stripe.  I use a liquid adhesive, like Beacon's 3 in 1, which allows you a little wiggle room to line up the paper. 


    Continue adding stripes, evenly spaced until you reach the bottom.  Use one of the strips to place between the strips as you adhere them to the card base.  This will make it easier to line up the strips and keep the spaces even without much work.


    The bottom strip should be flush with the bottom of the card base and your card should look like the picture above.


    Take your blue rectangle and lay out star brads to get an idea of where you want to place them so you have an idea of where to pierce your paper.


    Use a paper piercer an piercing mat to pierce holes for your brads.


    Add your brads.  The way these brads are made you can play with them a bit until you have them in a position you like, just twist the bottom to rotate the star.


    Using pop up adhesive attach the star studded rectangle to the top left corner to complete the flag. That's it your done!  You could make this on a larger scale for a home décor piece as well.

    Speaking of home décor, my next project is a simple pinwheel wreath  made using the pre-cut pinwheel kit from Doodlebug Design Inc.'s Stars & Stripes collection.  I love this kit for a quick and easy project like this.
     
    First assemble all your pinwheels.  The kit comes with enough to make 12 pinwheels, you need 11 to make this wreath.

    Start by separating each pre-cut square from the sheet it is attached to.  Then gently separate the diagonal slits at each corner.  Stick a glue dot in the center.


    Start with the top left corner and gently fold over, being careful not to crease it and attach the tip to the glue dot in the center. 

    repeat for all four corners.


    Now you have your pinwheel base. 


    The kit comes with these fun circle punch outs, they are reversible and have a different pattern on the back.  You can use these with a pop up adhesive in the center, or you can do what I did.


    I love the look of these with a little bling so I used the largest size of the coordinating jewels for the centers.  To secure the gem, I added a glue dot to the bottom for extra hold and used a dab of quick dry liquid adhesive  to make sure they hold long term. 


    Once you have all your pinwheels made, make the base for the wreath.  Trace a circle about 6" in diameter onto a piece of chipboard.  Trace a second line about 1/2" in.  Use scissors or a craft knife to cut around the outside circle and around the inside to create a ring.  Cover with patterned paper.  Your ready to attach the pinwheels.


    Use a liquid adhesive so you can make adjustments as needed as you place the pinwheels on the wreath. 

      
    When your done you have a fun pinwheel wreath for your 4th of July décor.  Allow to dry and add a ribbon to the back as a hanger.

    I hope you've enjoyed viewing these fun 4th of July projects, as much as I enjoyed creating them for you.  Now go create something great!


    Supplies used -
     Cardstock
    Patterned Paper - Doodlebug Designs Inc. 
    Jewels - Doodlebug Designs Inc.
    Brads - Doodlebug Designs Inc.
    Pinwheel kit - Doodlebug Designs Inc.
    Paper Trimmer
    Wet / dry Adhesive
    pop up adhesive
    Martha Stewart score board
    scissors
    chipboard
    glue dots
    Thanks for looking ~ Michelle

    Do you have a great idea to share with us? Would you like to design for Craft Warehouse? We would love to hear from you! Send an email with your name, blog address, and a sample of your work to jenevans at craftwarehouse dot com.  

    LinkWithin

    Related Posts Plugin for WordPress, Blogger...
    Blogging tips