Showing posts with label canvas corp. Show all posts

Monday, July 1, 2013

Doodlebug Designs {Stars & Stripes} Wreath


We are loving this New paper line from Doodlebug called {Stars & Stripes}
Follow super simple steps to create your own!


Supplies:
  • Stick wreath
  • Doodlebug paper pack collection {Stars & Stripes}
  • Canvas Corp mini flag burlap pennants, red fabric flower & red mini clips
  • Small metal stars (on sale for $1 till the end of July)
  • Wood letters
  • Red bandana
  • Jute string
  • Beacon fabric tack glue
  • Wire
Directions:
  1. Cut paper to fit the front of the mini burlap pennant. (cut a little smaller than pennant so you can still see burlap)
  2. Glue paper on to burlap using beacon fabric glue
  3. Glue sticker that says "4th" on to the front of the red fabric flower.
  4. Tie the burlap string to go from one side of the wreath to the other.
  5. Glue fabric flower to the wreath using beacon fabric glue.
  6. Add the mini pennants by clipping them on to the burlap string.
  7. Secure metal stars to the wreath by using wire to hold them on. 
  8. Cut a strip of your bandana and attach it to your wreath for hanging.
Now you are ready to Celebrate!


Burlap & Bandana Banner


Create a No Sew banner in a matter of minutes! I love how quick and simple this is to create... you can even have your kid's help you too!
 Supplies:
  • Burlap pennant from Canvas Corp.
  • Mini red clothes pins from Canvas Corp.
  • Jute string
  • Red & Blue bandana
  • Star print fat quarter
  • Metal stars
  • Beacon fabric glue
Directions:
  1. Cut your star fabric to fit pennant, then glue on using beacon fabric glue. Let dry.
  2. Fold your bandanas in half and cut strips 1.5" wide.
  3. Using mini clips attach pennant to the jute string.
  4. Take strips of bandana and tie them in between the pennants.
  5. Add metal stars.
  6. Hang & celebrate!

Thursday, April 18, 2013

Kaisercraft Inspirational Canvas Art


We all love Pinterest, but it's time to stop searching for ideas and start creating in real life!

Use our projects as a tool: replicate the project entirely, tweak it with your favorite colors and embellishments or use it as a starting point for something even more amazing! No matter what your 'crafting' skill level, there's a project here for you!


Designed and Created by Elizabeth Doran for Craft Warehouse
Supplies:
  • 12"x12" Deep Black Canvas
  • KAISERCRAFT "75 Cents" Paper Collection: Sixpence Paper, Dollar Paper, Shilling Paper & Guinea Paper
  • Metal Decorative Strip
  • Ranger Patina Onyx for metal
  • Ranger Alcohol Ink "Cloudy Sky"
  • Sanding Block
  • Canvas Corp Burlap Flower
  • Zva Rhinestone (colored with alcohol ink)
  • Tim Holtz Vintage Photo Distressed Ink
  • Sizzix Flower Dye Cut
  • Sizzix Big Shot Machine
  • Pioneer Embellishment Glue Stick

Friday, March 29, 2013

Easter Family Nest


Happy Easter! All week we are celebrating by inspiring you with fun, simple, and creative holiday projects! This project is from our creative vault that we knew you would love to see again

This desktop display is a perfect Easter gift or Spring decor! It is an easy project that will wow the person you give it to


I started out with a simple 8x8 pine box and painted it black with acyclic paint. Then, I took sand paper and distressed the edges.


I love these curio knobs! I'm putting them on everything.


To make the "our" pendant. I cut 6 pendants and then sewed them together so that the fabric is double sided. (You could also purchase a Canvas Corp Mini Burlap Banner found in the scrapbooking department). 

Then, I stenciled on the letters using Tim Holtz Distressed Ink and I also distressed the pendents.

Next I spray painted the mini clothespins in black. Using jute twine and tacks I tacked up the pendant. Brads were placed in each corner of the photo and glued into the box. On this side of the box I cut a piece of burlap 7 1/2" x 7 1/2" when I used Mr. Huey's Mist to give it the bright blue color.
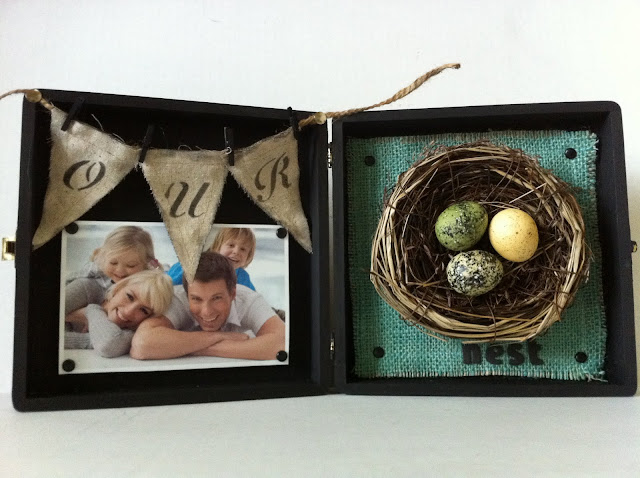
After the burlap dried I added 4 black brads to each corner and glue it into the box using E6000 glue. I used Thickers stickers to spell out "nest" and glued my nest in with E6000.


Now you have it a home for your treasured photo!


Thursday, February 14, 2013

Canvas Corp Weekend Giveaway!


This giveaway is now closed. Thanks for playing along! Our winner has been picked via Random.org and is 

Cute! One of every color please!
Vicki O


Happy President's Day Weekend! This weekend we are giving away a set of Canvas Corp Flowers to one lucky winner! These flowers can be added to a mixed media project, home decor, or even added to a headband!

To enter to win, you can...

1. Comment here! We need to be able to contact you if you win! If your email is not attached to your profile, please add an email address in your comments making sure to add spaces as shown: email (at) address (dot) com. Thank you!

2. Share our giveaway via Facebook by clicking "share" on our Facebook post, then come back here and tell us that you did.

3. Share our giveaway via Twitter, then come back here and tell us that you did.

4. Pin our giveaway via Pinterest, then come back and tell us that you did.

One winner will be picked via Random.org on February 18th, 2013!

*We ship in the US only thank you.


To see our full Weekend Savings and coupons, go to our website here!


Friday, January 25, 2013

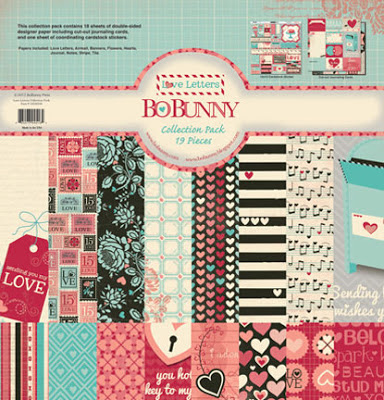
Bo Bunny Love Letters


Just arrived!


Designed by Danielle Cohen for Craft Warehouse


Take mini buckets and chalk board vinyl, use a die cut or punch to create a circle or design.
Place chalk vinyl on the front of each bucket and use bistro chalk marker to spell out your message. Cut paper to fit the inside of the buckets.

 
This Bucket was created using a 3x3 wood block and a mini candle stick glued to the bottom of the block. Paint block and add paper and photos!
 
 
This is the perfect bucket for a gift. Homemade cookies would fit perfectly!
Paper was cut to fit inside the bucket then a knob was glued to the top of the bucket, add a fabric flower by Canvas Corp to the front and you are done!

LinkWithin

Related Posts Plugin for WordPress, Blogger...
Blogging tips