Check out this page as we'll update it with fun and unique project ideas. For a more complete list of project sheets in EVERY department make sure you visit our Learning Center and check back often!
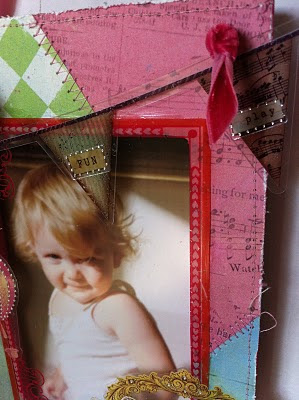
Make a hanging picture frame

- MDF Hanging picture frame item #1892 11x5.25 - holds 3.5x5.5 picture
- Glitz Afternoon Muse Banner 12x12 paper AM2907
- Glitz Afternoon Muse Carte Postal 12x12 paper AM2914
- Glitz Afternoon Muse Polka AM 2884
- Glitz Afternoon Muse Peek.A.Boo PAB 2808
- Glitz Afternoon Muse Glitzers GL 2846
- Pioneer extra strong glue stick
- Diamond Glaze
- 1/2 yrd assorted ribbon
- Heart Attack by We R Memory Keepers
- Pop dots
- Start with cutting 5x5 pieces of Banner paper & Carte Postal paper. Sew paper together using the zigzag setting on your machine.
- Flip over paper and trace the frame on to the paper. Cut out then sew around the out side of the paper and glue to frame using glue stick. If you want an extra strong hold put glue stick on frame & paper.
- Glue pink frame out of the Peek.A.Boo package, using Diamond Glaze (you will not need very much and it will dry clear).
- Using Diamond glaze glue on your banner. add Glitzers words Fun, Play, & Enjoy to the banner.
- Cut out the horse and carte. Then use the Heart Attack to ruff up the edges. Place on to frame using pop dots to elevate the paper.
- Cut 1"x12" piece of paper and fold to make a ruffle. Then sew down the middle to hold in place. Add a long sticker over the top to embellish the ruffle. Glue to the bottom of your frame.
- Embellish using the Glitzers stickers.
Make A Memo Board
Make Your Very Own Kitchen Menu
Supplies:
12 x 12 tile frame12 x 12 chalkboard
12 x 12 clear, calendar overlay
Kitchen menu vinyl
2 patterns of 12 x 12 scrapbooking cardstock/paper
Embellishments
Bistro marker
Pioneer Embellishment Glue Stick
Beacon’s 3-in-1 glue
Hole Punch OR 4 small buttons
Small glue dots and large glue dots
Instructions:
Cut one paper into four 1 ¼ x 12 strips, and out of the other cut four 1 ¼ x 1 ¼ inch squares. Attach paper to the frame using Pioneer Embellishment Glue stick – the sides first, and then the corners on top.
Center vinyl onto the blackboard. Burnish using a credit card and peel off.
Place a clear overlay on top. Adhere the overlay with four large and small glue dots until secure. Now you can use a bistro marker to update the menu for every day of the week.
Adhere your embellishments using Beacon's 3-in-1.
*Optional...you can use four small punched circles of the "corner paper" on top of the overlay to hide the attachment method.
Enjoy your new menu organizer! Now you can impress everyone with your creativity and organization in the kitchen!
Clothespin Memo Board
Shopping List
- 2ft. Piece of wood with blue tin (serves as the base, available in most stores) or substitute with unfinished 2ft. board.
- 8”x24” assorted fabric
- 4 clothespins
- Mod Podge
- Scrapbooking paper and paint
- Acrylic Paint
- E-6000 Glue
- Pioneer Extra Strong Glue Stick
1. Take off metal strip on the base and paint your board. Let the board dry.
2. Use Mod Podge to cover the front of the board.
3. From there, lay fabric on top. Coat top of fabric with Mod Podge. Let your board dry.
4. Paint your clothespins with acrylic paint. Cut scrapbook paper to fit the top of the clothespins.
5. Glue scrapbooking paper on the clothespins using the Pioneer Extra Strong Glue Stick.
6. Use E-6000 to adhere clothespins to the board.
Embellish with ribbon or trinkets! Your completed project will allow you to display pictures, notes and so much more!
A fun and easy project! Here's what you need to make yourself a 12x12 memo board!
Product you'll need...
- 12x12 frame
- A fat quarter and extra fabric for magnet buttons (you'll use with your I-Top)
- 12x12 metal sheet
- Rick Rack or trim (optional)
- I-Top and I-Top magnetic buttons
- Glue Gun
- Beacon's 3 in 1 Advanced Craft Glue
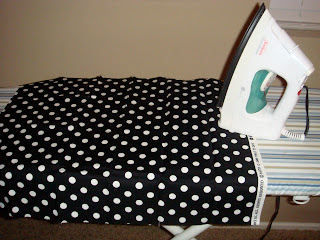
Starting off, iron your fat quarter
Take your 12x12 metal sheet and center it...leave some room around the edges to glue gun the fabric to the sheet. Pull it tight.
Pop in your frame, and remove the metal glass
Optional...use rick rack trim around the edges (or the trim of your choice). Glue down using Beacon's 3 in 1. It's good stuff.
Cut circles for your I-Top (this is for the magnetic fabric buttons). I used a medicine bottle...use whatever fabric you wish. You want to make sure your circle is large enough so that when you use the I-Top, it won't pucker and leaves a clean finish. My circles are about 2 inches wide.
Get your I-Top Out along with the magnetic button shells, and start creating buttons.
You don't have to use fabric buttons, but I think they look so cute. I also used the Big Shot Machine and have this cute felt heart. I just put a magnet on the back and was able to use it.
As you can see, it's super easy and you can put your own spin on this project.


