Friday, April 29, 2011

What's new at Craft Warehouse!


New in Quilt Shop!


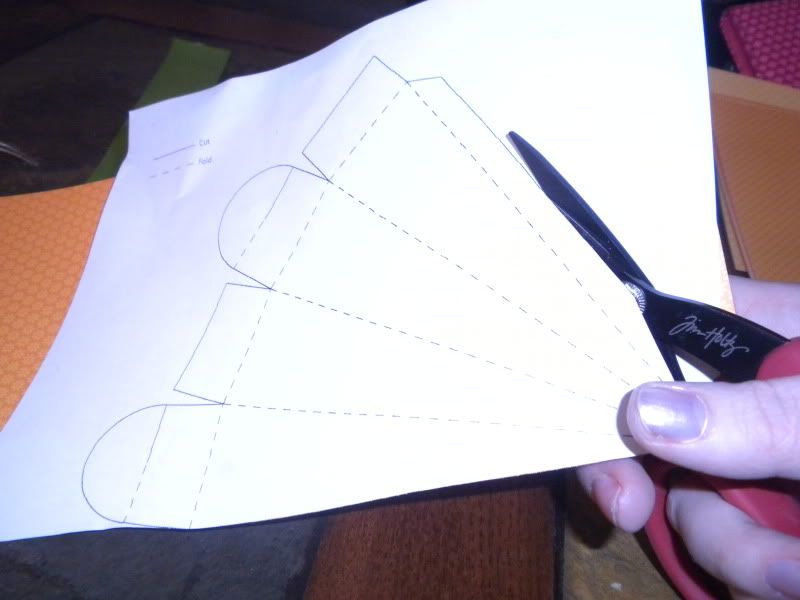
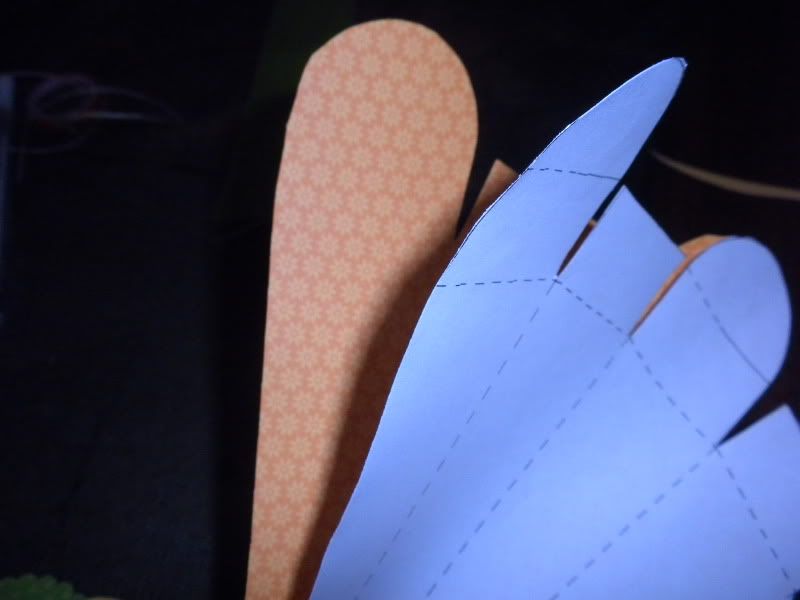
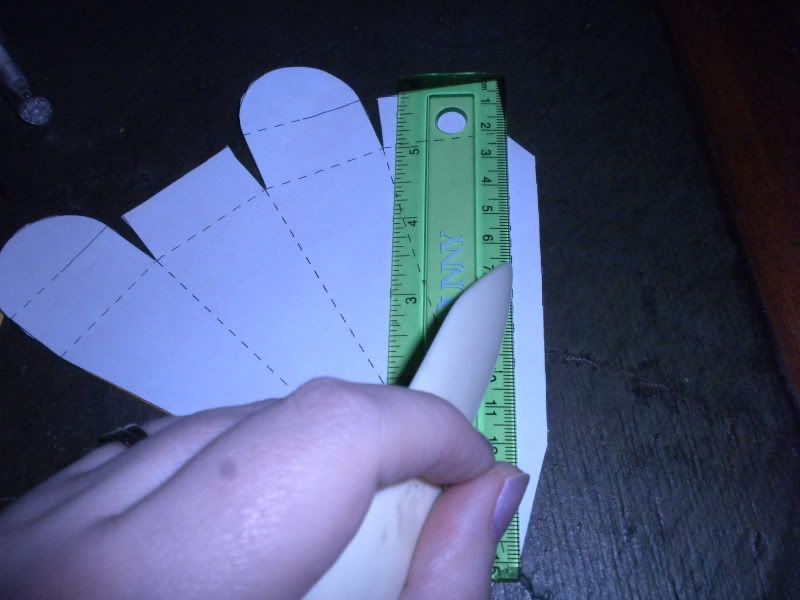
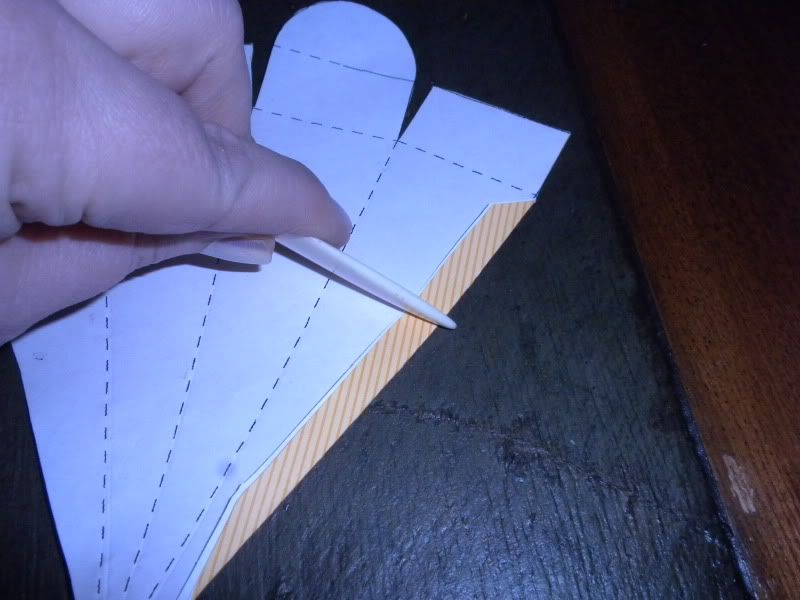
Just arrived....super simple steps to make this adorable skirt!


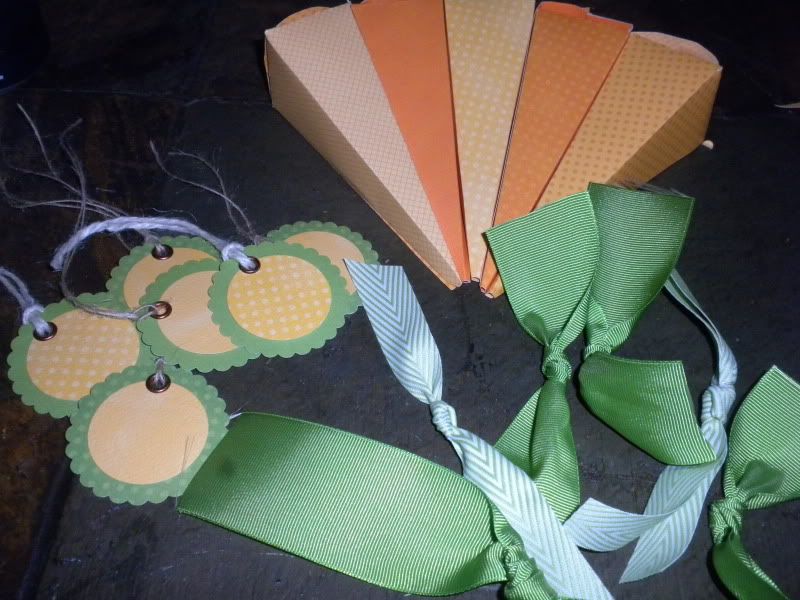
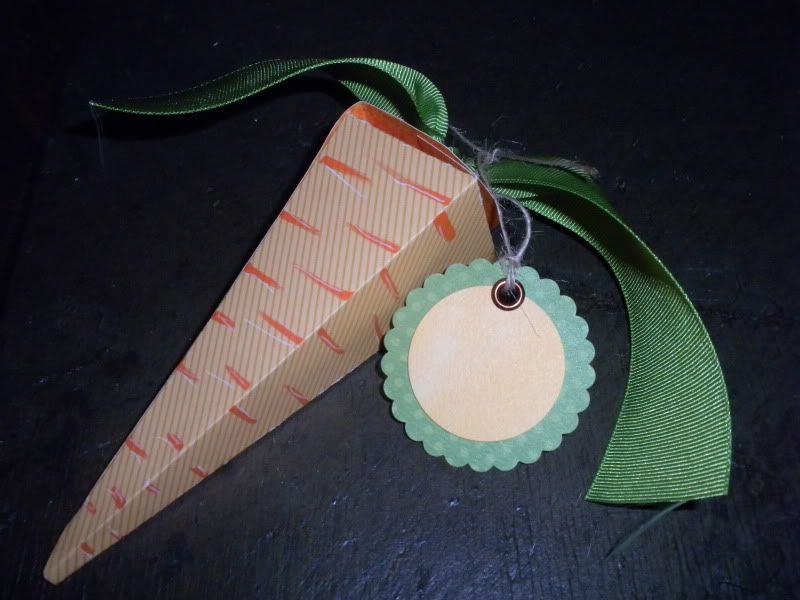
Composition Covers & Slice Fabric Cutter


The slice is on Sale for $119.99


Just arrived in frame shop....


I was visiting the Vancouver store when this display caught my eye!


The frames come in a rustic red, cream and olive green. They are so simple to decorate, here are some other ideas of what you can do with these adorable frames....


This cream frame I took cardboard letters out of the Making Memories department and glued on scrap booking paper, then cut around the letter and used Tim Holtz distressed vintage photo ink. The embellishment sticker came out of the "My Minds Eye" collection.


Haley from frame shop created this great garden theme. What a great Mothers Day gift!


She also created this one by adding burlap from our fabric department and vinyl words.


I really liked this frame! It's hard to tell in the photo but this black 12x12 frame has 4 pieces of glass to give you different depths. You don't have to be a scrapbooker to create a great keepsake.


Just out of the box in Making Memories Department!


This was one of my favorite things at our last show! They are huge glue dots to make the most adorable flowers. You can use paper, ribbon, or fabric. I can't wait to show all the projects I used these on!


Tattered Angel Spritzers and Kaisercraft Wood Flourishes can jazz up any frame. This project it so great for all ages. The wood flourishes are just spritzed with the Tattered Angels and you get beautiful results!


This keepsake was make by Heather at the Vancouver Store. She used the puzzle pieces out of the Bo Bunny scrap booking collection and placed them in a 12x12 frame. Then used some of the embellishments out of the Bo Bunny collection. It turned out beautifully!


Here is the puzzle pieces and embellishments out of the Bo Bunny Collection.


New Bo Bunny "Time Piece" collection. I love the stopwatch book, its already together with different papers just add your photo's and embellishments.


This was another project using Bobunny and three wood plaques.


Mix Media in the Jewelry department

How much fun is this necklace and earrings! Sam in the Vancouver store has created this stunning piece out of buttons, beads and treasures she has been collecting.


Baby Fever...part 2

You gotta give it up for our Yakima CW store and our associate Kim.  She's full of Itty Bitty Baby Ideas.  Here are some more creations she sent over. 


You can pick up Itty Bitty Babies in the fabric department FYI! 


Wednesday, April 27, 2011

Happy Birthday CW Gresham


Our Gresham store is hosting a birthday bash this weekend!  They're celebrating 23 years!  Want to attend?  Click here to see what's going on!

Friday, April 22, 2011

Truckload Fabric Sale Happening Soon


Hey fabric fans!  Get ready for our Truckload Fabric Sale May 11th through the 26th.  What can you expect?  Well...here's a quick update with more offers to come.
  • New quilting cottons have arrived.  When the sale hits, they'll be $3/yard.
  • Save up to 70% on new markdowns (selection may vary by store though).
Mark it down...May 11th through the 26th.  Don't forget!

Thursday, April 21, 2011

Bracelet Bling for Mom

Want to do something fun for Mom this Mother's Day?  Saturday, May 7th stop by the Craft Warehouse location nearest to you (click here to see our stores).  For only $3.99 you can make Mom a fun bracelet using Beadtini Beads. Of course our staff will be there to guide you through the process.  It will be a good time, so pencil us in!


Baby Fever

For those of you that are fans of Itty Bitty Babies, our sales associate Kim, wanted me to post her Itty Bitty Baby creations.  Unclothed, these babies might remind you of something you'd see in a Twilight Zone episode, but really dress them up and you might fall in love.  Hmmm I'm thinking I could have fun with these the next time a family member asks me when I'm going to have a baby.  What do you think? 


Should you want to create one of these Itty Bitty Babies this is what you'll need:
  • Itty Bitty Baby
  • Mini flower tops and leaves
  • Clip on butterfly (if you wish)
  • Hot glue gun and glue sticks
Glue leaves to the bottom of baby or glue butterfly wings to the back of the baby.
Glue flower tops around babies front and bottom, glue flower top to the babies head and give to someone who has baby fever!  haha

2011 scrapbook design team search

The deadline for entries is fast approching! Get your submissions sent in before it's too late! Your entry must be recieved by Friday April 29th 2011 at the latest to be considered for the 2011 Scrapbook Design team!

CALL FOR ENTRIES

We're looking for a team of talented, creative individuals to be a part of our Scrapbook Design Team.
Design team members will create scrapbook projects for use in our store displays and in-store promotions.
If you love scrapbooking and want to inspire others with your designs, then this is your chance to show us what you got!


see the rules here.
SUBMISSION REQUIREMENTS
2 Layouts: Layouts should be product-driven, with an emphasis on patterned paper, embellishments and feature current trends in scrapbooking techniques.
2 Cards: Cards should be created with scrapbook supplies. Do not focus on using stamped images.
1 Photo Memory Scrapbook Project: Project should utilize scrapbook supplies and showcase a way to display photos. Ideas include (but are not limited to) wood items, chipboard, mini-albums, canvas, etc.


Entry Form: All entries must include an entry form, available at your local Craft Warehouse store or on our website.

All designs must be original artwork, never before published or been submitted for publication.


The majority of products used in your submissions should be purchased from or available at Craft Warehouse stores.


PRIZES Design Team members will receive over $500 in free products, an 8 month contract to receive free product and assignments from Craft Warehouse, and a 20% shopping discount for the Design Team term.


DEADLINE your entry must be received by Friday, April 29, 2011.


Tuesday, April 19, 2011

carrot shaped treat boxes tutorial


fun carrot shaped box.
Fill with jelly beans and put out a bushel of 'candy carrots' for your guests, or use as place settings and write your guests name on the tag.


I found the template for this here: rubberstamping.about.com/od/halloween/ss...cleBoxTemplate_2.htm
You'll need to print one to use as your template. you should be able to just click on the template below and it should open up a new window showing template full size and then you can print it! If that doesnt work you'll have to go to the link above to get the template.


Here is how I designed my carrot boxes:

Supplies:
1 carrot box template
1 6 x 6 1/2 (ish) orange pattern paper (or cardstock) Bo bunny Press now has tone on tone dots, flourishes, stripes, flowers, and more in every color of the rainbow! Love these papers!
bright green ribbon- about 10 inches


Required tools:
removable tape (I like removable glue dots!)
scissors
red line tape or other strong adhesive
pop dot
bone folder
ruler

if making a tag you'll also need:
yellow and green scrap paper for punching
twine
eyelet
eyelet hole punch and setter- like the Crop a dile tool.
circle punch
scallop circle punch larger then circle punch

How to:

1.)
Print template
using removable adhesive, temporarily adhere template to what will be the INSIDE of your carrot. So if you are using a pattern paper like I did and you want the stripe pattern to be your carrot pattern, your template is adhered to the 'wrong' side.

use scissors to cut out template- cut all solid lines printed on template.


2.)
place ruler along dotted line on template (still attached to cut out orange paper!) and use bone folder to score dotted line.
repeat on ALL dotted lines.


3.)
did you notice? the score didn't go all the way through. it's OK. now with the template still attached to orange paper, fold over on scored line and use bone folder to 'crisp the line'
repeat on ALL folds.


4.) one last step...... in case you missed it.
notice on your template= the 2 rounded 'petals' have 1/2 a scored line (dotted) and 1/2 a cut line (solid)
If you didn't already- cut the 1/2 solid line....only cutting half way across petal!


5.) NOW you can carefully remove template.
I love the removable glue dots because they hold when you want, and when you are done just roll your finger over them until they roll off your paper and discard.


6.)
add strong adhesive like red line tape to the narrow flap on one edge of your cut and scored orange paper. adding the tape to the RIGHT side of your paper.
then secure box shape by adhering the other side of box to this taped flap.


7.) FILL your carrot with treat of your choice. (Jelly beans, gold fish crackers, m&m's, etc)
fold in 2 short flaps at top
then connect the 2 cut ends of your 2 petal shapes- they should interlock with each other


8.) use orange marker, and white gel pen to draw lines and highlights on carrot if you like.
tie green ribbon in a knot, cut ends to desired length
adhere to top of carrot box with a glue dot


9.) if desired, create a tag by punching a yellow circle and a green scalloped circle and glue together.
set an eyelet in tag, and add twine.
tie twine around ribbon carrot top.


10.) if you use a grosgrain ribbon for your carrot top you can cut into fringe and then pull apart a bit to create this soft fluffy fringe.


LinkWithin

Related Posts Plugin for WordPress, Blogger...
Blogging tips