Tuesday, April 10, 2012

Decorative Glass Vase by Design Team Member Julie Zweig


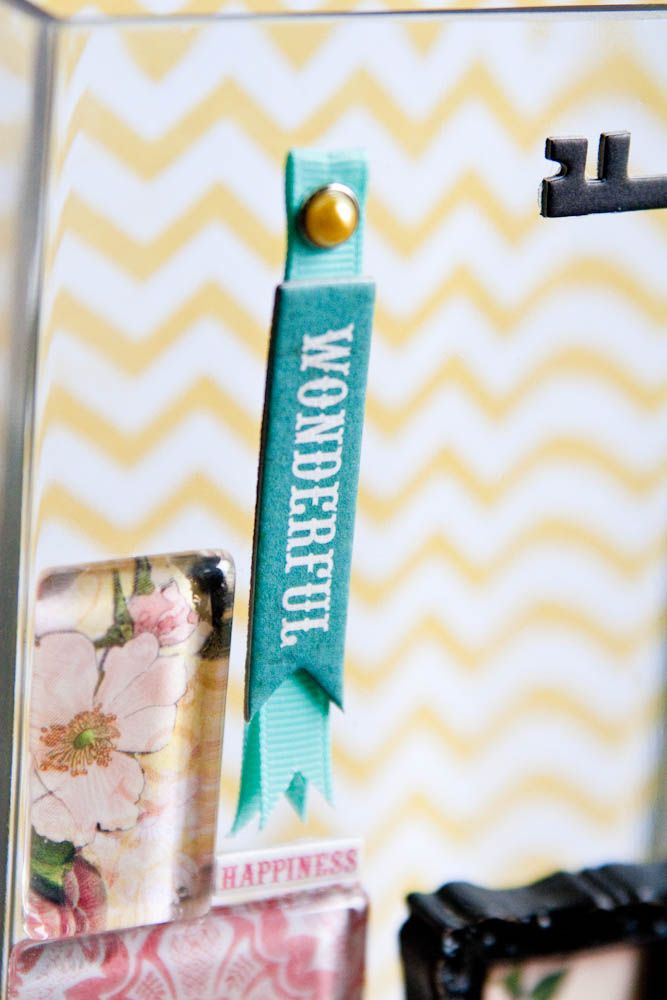
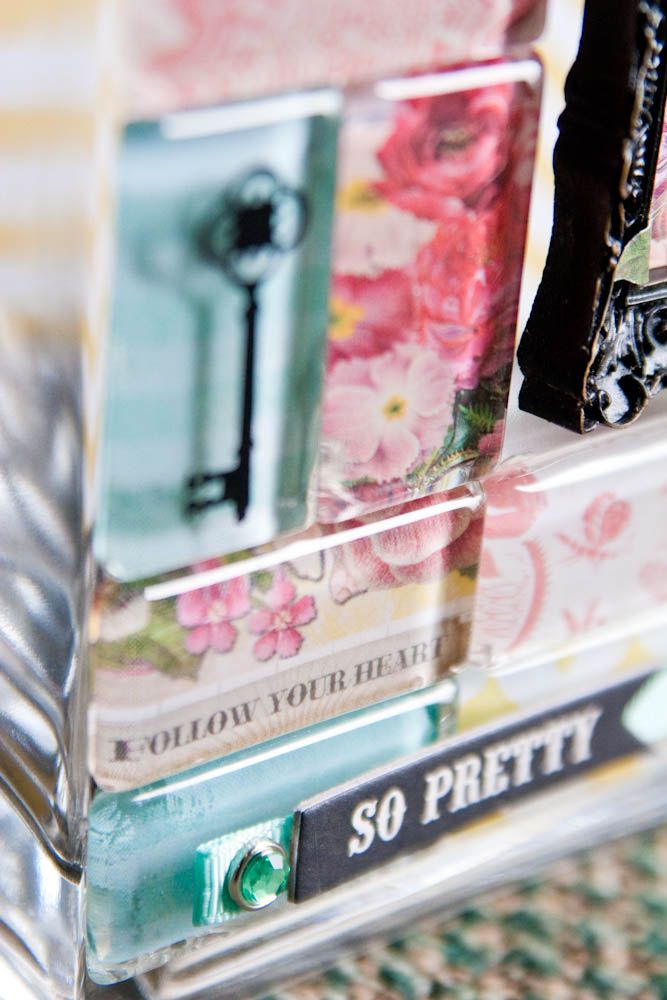
Today Julie Zweig, Craft Warehouse Design Team Member, shares with us a unique way to dress up a vase using basic scrapbooking supplies. Can you imagine filling it with spring and summer blooms?!

Hello, today I am sharing a paper craft twist using a glass vase.  It’s crisp, shiny and takes on the freshness of spring and combines scrapbooking supplies with a vase.  


Supplies used:

  • Patterned paper from My Mind's Eye
  • Chipboard accents from Echo Park
  • Brads from Echo Park
  • Ribbon by American Crafts
Additional supplies I discovered and purchased at Craft Warehouse:

  • Glass vase with a flat surface
  • Small frame
  • Little glass tiles - comes in a packet of 10
  • Key shape rub on - found in the magnet display/section
  • Rhinestones
  • Big glass crystals - found in the bead section
  • E-6000 glue (use with good ventilation)
How to decorate the vase:

Make and assemble your embellishments


  •  Trace with a pencil around the items you want as a background for each glass tile.  Cut and trim until it fits the back of the tile.  This is my favorite step.  It is amazing what you can discover in a patterned paper when you glide the glass over the different areas. 
  • Glue paper to the back of the glass tile - let dry. 
  •  Assemble various pieces of ribbon, with brad and sentiment. 
  •  Select part of a patterned paper to use in the mini frame.  I cut out the little leaves from some of the paper and made them three dimensional. 
  •  Pull apart the big crystal beads, hook part of the crystals into cardboard key. 
  •  Add rhinestones where desired.

Plan out the layout before using adhesive:


Trace around the vase on a white sheet of paper and use this as a guide for the exact size you have to work within.
Glue embellishments onto the glass vase:
  • Clean and dry the glass vase.
  • Glue on embellishments.
  • Let dry - lay flat
  • Place and glue a background patterned paper on the back of the vase, in case you want to use it for real flowers and enjoy!


My youngest son (9) assisted with the placement for this particular photo.  He found some wildflowers and thought it would be perfect to frame the vase.

Enjoy Spring!

Thursday, April 5, 2012

Spring Banner by Design Team Member Michelle Wofford

Hey Craft Warehouse fans! This is Michelle Wofford, from the 2011 Design Team, here to share how to make a simple banner for Spring.  I've noticed that we don't have a lot of seasonal decorations around our house and I wanted to create something that we could hang for during the spring months. 

When I saw Echo Parks This & That Graceful line I was sold.  I love the bright colors and fun patterns it offered.  So I picked up a 6 x 6 pad and a package of tulip shaped chipboard pieces from my local Craft Warehouse.  Here's my finished piece. Keep reading to learn how to create one of your very own.


For this project you will need the following supplies

 - Pattern Paper (6 x 6 or 12 x 12)
- Chipboard Shapes (tulips used here)
- adhesive (Beacon's 3 in 1 or Pioneer's embellishment glue stick)
- American Craft Thickers Alphabet Stickers
- Crop-A-Dile
- Ribbon
- Scissors
- Sanding Tool (optional)
- Ink Pad (optional)
- Sponge (optional)
- Martha Stewart Butterfly Punch (optional)

Start by selecting your paper and chipboard pieces.  I wanted to create a banner that didn't use the traditional pennant shape.  Depending on how large your chipboard pieces are you can use 6 x 6 patterned paper.  This size worked perfect for the tulip shape I selected, I covered the front of two tulips with one sheet of paper. 


Once you have your paper and chipboard selected start covering the chipboard with the paper.  I would use either beacon's 3 in 1 or pioneer's embellishment glue stick for this part.


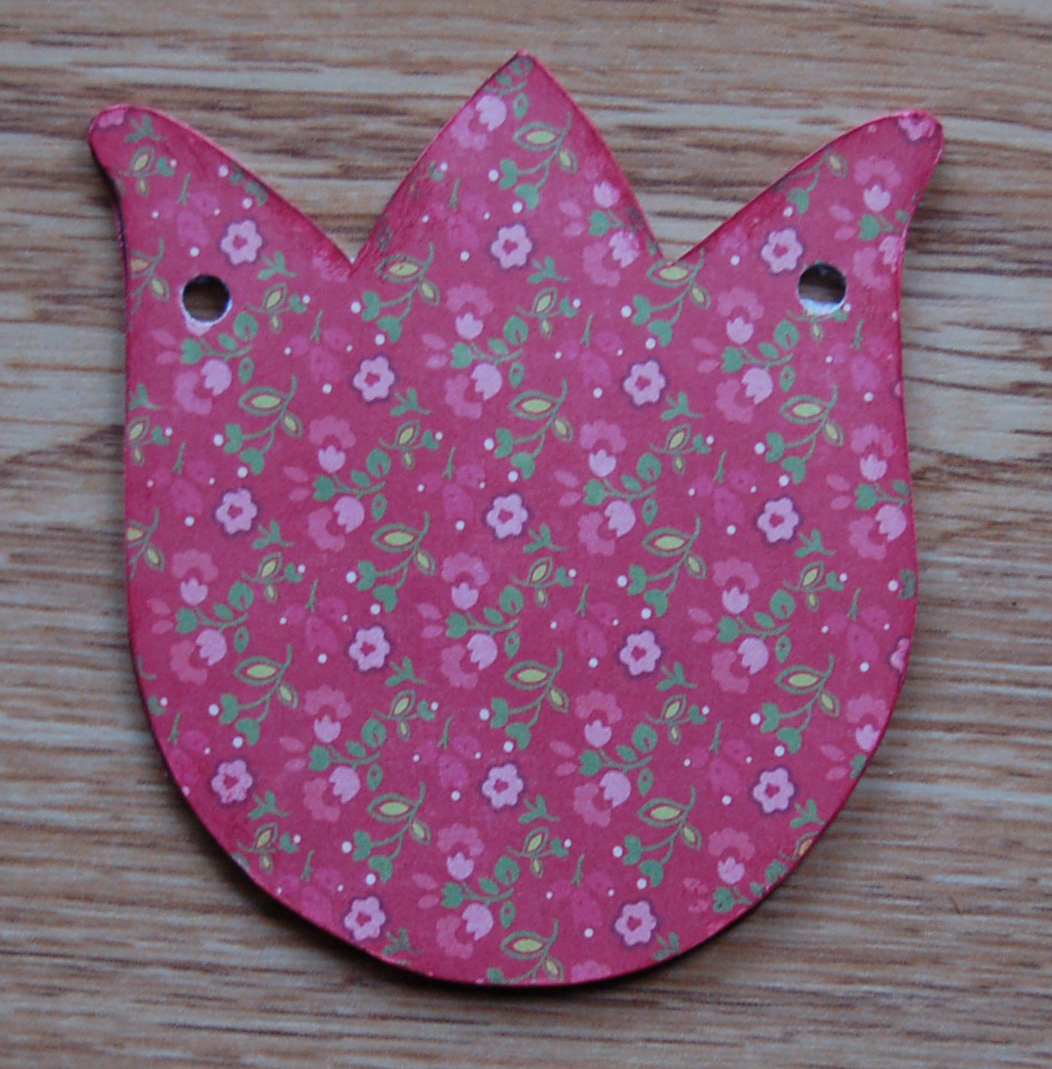
I like to adhere my paper and use a kraft knife to trim away the paper when it is dry.  If you are not comfortable using a craft knife you can trace the chipboard shape on the back side of the paper you are using a and cut out the shape first and then adhere it to the chipboard.  Once the front is dry and cut out I like to cover the back side so the finished product has a nice finished look.  Your pieces should look like this.


The next step is to punch holes on both sides of each piece so you can string on ribbon to hang.  Since the tulips didn't already have holes I created a template to use as a guide so all the holes were in the same spot.  To do this trace your shape on a piece of scratch paper and cut out with scissors. 


Next fold your template in half and using a crop-a-dile punch the paper where you'd like your holes to be. 


Unfold and lay template on top of your paper covered chipboard and punch holes on both sides of each piece.


Your pieces should now look like this.


The next steps are optional but I like to do them because I feel it gives the pieces a nice finished look.  You'll need a sanding tool, sand paper will work, but you don't want it to be too coarse.  And sanding file is great for those hard to reach spots between the petals.  After sanding I cover the edges with ink that matches the paper.  I like to use a sponge, it makes it easier to get in between the petals and it gives a subtle distressed edge. 


Your pieces should now look like this now.


Next adhere your Thicker's Alphabet stickers, here I used SPRING.  


Next string your banner pieces on your ribbon.  Start by threading the ribbon thru the top of the first piece and pulling up thru the back on the other side.  If your ribbon is wide enough you shouldn't have to knot it to keep the pieces in place.


The final step is adding any embellishments you want to use to enhance your banner.  I decided to keep mine simple and just add a few butteflies that I punched out using the Martha Stewart butterfly punch.  You can add as much or as little as you want.  


That's it, hope you enjoyed this tutorial.  I'd love to see any banners you create.
 
~ Michelle ~


Wednesday, April 4, 2012

Chevrons and Stripes Home Decor with Design Team Member Steffanie Seiler

Hi! My name is Steffanie, Craft Warehouse Design Team Member and your guest blogger for today.  I'm very honored to be here and excited to share my latest project with you! 

The inspiration comes from a very hot trend right now---chevrons and stripes!  I received a wonderful package of goodies to get me started!

I wanted to do something other than a scrapbook page for this but still include some of my favorite photos.  After a bit of browsing at the store, I decided to make this wall hanging:

So lets start at the beginning.  I was sent these materials:


  • 5 sheets of patterned paper from My Mind's Eye
  • chipboard accents from Echo Park
  • decorative brads from Echo Park
  • coordinating ribbon

 I also used these items and tools, either purchased at Craft Warehouse or from my stash:

  •  unfinished wooden wall frame (Craft Warehouse)
  •  burlap (Craft Warehouse)
  • Woodsies mini spring clothespins  (Craft Warehouse)
  • acrylic paint and satin glaze
  • Tim Holtz Distress Ink and Distressing Tool (Craft Warehouse)
  • scallop circle punch
  • border punch
  • foam sanding block
  • hot glue
  • twine
  • button
  • Advanced Tape Glider adhesive (Craft Warehouse)
  • Glue Dots (Craft Warehouse)
I began by lightly sanding the unfinished frame to remove any rough edges and loose splinters.  Then I painted it with two layers of paint.  First with a light color and then a dark color on top.  The reason for this was so that when I went back and sanded the edges, it would reveal the lighter color paint beneath and give the frame a worn look.  After sanding, I painted again with a clear satin glaze to give it some depth and a light sheen. 


I decided to divide my frame into 3 sections so after measuring the overall length and doing some simple math, I cut my patterned papers into 3 equal pieces.  I don't like white edges so I use distress ink on any and all cut edges.  Just a personal quirk.  I used my ATG (advanced tape glider) to adhere these to the background.


For more interest between the sections I created some strips. I punched both sides of a wide strip of paper (wood plank) with a border punch, then cut a thin strip of a contrasting paper (yellow polka dot) to place in the middle.  I made a clothesline by cutting 3 pieces of twine 9" in length, tying a knot and then braiding them together with another knot at the end (do this twice).  I hot glued the knotted ends to the frame.


The clothespins came unfinished.  I started by taking them apart and painting them with the dark brown paint and then applying the satin glaze (as I did with the frame).  After they dried, I reassembled and applied some embellishments to dress them up.


The flowers were created by punching 3 of the patterned papers with a scallop circle punch and crumpling them with my fingers.  The edges were distressed with ink.  Next I layered them and  embellished the centers with a decorative brad.  I hand cut burlap circles slightly larger than the flowers.  These were hot glued to the bottom of the flowers along with a bit of ribbon.


From here it was just a matter of arranging everything where I wanted it, adding some chipboard elements and making it all stick.  It goes without saying (if you know me at all) that the edges of the chipboard where distressed with ink before adhering to my project.

Here is the finished project before I added photos.  You'll notice that I ended up switching out the ribbon for twine to hang my frame.  I felt the ribbon alone was too overpowering.  I like it better as an accent along with the twine.


Here are some close ups with the photos.


That's it!  Thank you for sticking with me today and letting me share this project with you.  I had a lot of fun with this one and am so proud to display this in my home.  I hope I have inspired you to create something for your home today!

~Steffanie

Monday, April 2, 2012

Simple Stories Fabulous by Design Team Member Mendi Yoshikawa

Design Team Member, Mendi Yoshikawa, shares with us her latest Design Team project using Simple Stories Fabulous line, now in local Craft Warehouse stores! These quick and easy to create projects are perfect for first time paper crafters.

Here is the Fabulous line she used to inspire the following projects.


                                                                   Simple Card


Photobucket


I used a butterfly shape, 4x6 base, Butterfly & Sentiment Stickers from Fabulous kit and some twine.

                                                 Quick and Simple Page Protector Layout...


Photobucket


That 6x12 piece already had the 2 little strips printed on it--I just added my journaling with the girls names and dates. The only extras on that side is the girl sticker and title stickers. Used the transparency on the top photo with 2 flowers under the page protector and 2 brad over the page protector (they looked too bulky and warped the page protector when I tried them underneath). For the BFF 4x6 I just added some "tape" stickers over the tape that was already printed on that card for a little subtle dimension. :)

                                                                              Layout #2


Photobucket


For this one I cut around the label in the bottom, left corner that was already printed on the 12x12 paper to slip my photo underneath. Added foam tape under the flower and cloud stickers and some brads to the flower centers for an extra pop. Used one of the smaller cards cut down as a tab.

To see more of Mendi's work visit her Design Team page here.

LinkWithin

Related Posts Plugin for WordPress, Blogger...
Blogging tips