Saturday, April 14, 2012

Back 2 Basics Video Series : Scrapbooking 101 with Authentique Paper Company

Welcome to our blog video series called Back 2 Basics!

Let's face it, we are busy. We don't always have two hours to spend on a layout or project. Back 2 Basics will help teach those that either want to learn how to scrapbook or want quick and fast tips to help you get your project done in 30 minutes or less! Each video in the series will be less than 5 minutes long; which gives us more time to create and less time in front of the computer!


Supply List -


Click on the shopping list photo and print from your browser.


Enlarge and watch it in high definition for even more detail!


1. Cut a green strip about 3"x8 1/2".

2. Cut ivory strip about 3"x4" and tuck under photo.


 3. Add border sticker. Glue photo and add another border sticker.

4. Punch photo with square punch. Glue onto cardstock to mat square photo.


5. Cut Smash tape and add to page.

6. Cut a ticket stick in half and add it to the page. Add another sticker over the raw edge.

7. Add another border sticker. Cut an 3/4 inch of stripes from paper. Cut and glue to page above and below photo.


8. Glue small photo down.

9. Punch 3 scallops from one piece of paper. Punch 3 circles from another piece of paper. Glue the scallops and use foam squares for the circles.


10. Make 3 doily punches by punching first with doily punch from cardstock. Then, punch them out with a circle punch. Use foam squares to 2 of them add them to page. Glue 1 down to the page.

11. Cut 3 flowers out of the doily. Glue them over top of the showing foam squares.


12. Cut and add ribbon.

13. Use a paper piercer with foam mat and add 3 large brads and 6 small silver ones.

14. Put foam squares behind title sticker and add any other stickers you would like to the page.

15. Add journaling and you're done!

Friday, April 13, 2012

Simple Stories Now in Stores!

We are excited that three new lines by Simple Stories are now available in Craft Warehouse stores!


These lines are perfect for fast and easy pages in only 4 steps as seen below!


There are plenty of styles of paper, embellishments, and journaling cards to do a traditional layout too. Here are some pages by our design team to get you inspired!


Thursday, April 12, 2012

Shadow Box Card Tutorial by Design Team Member Michelle Wofford

Michelle Wofford, from the 2011 Design Team, is back to share a tutorial on how to make a fun 3-dimensional card!

Our last design team assignment included the use of fun transparencies, from Simple Stories Awesome Line.  I was excited to see these and new just what I wanted to create with it. Today I'm going to show you how to make your very own Shadow Box Card. 


Here's what you'll need:

2 sheets of coordinating Patterned Paper
Cardstock
Transparency Sheet
Paper Trimmer
Scoring Tool
Circle Cutter
Adhesive
 Scissors
Embellishments

For the card I'll be making today I chose the Alora line from Bo Bunny Press.  I LOVE this line, Such bright fun colors and lots of great patterns.


Once you've selected your paper select a coordinating color of cardstock to use as the card base. Trim two pieces of cardstock to 4 1/4" x 5 1/2".  Next score both pieces of cardstock at 1/2" & 1" on both short ends using a scoring tool. 


Next trim two pieces of patterned paper to 4 1/4" x 3 1/2", one for the front of the card and a second for the inside of the card.  Adhere patterned paper to cardstock inbetween the 1" score lines.  Once adhered use a circle cutter to cut cut a 2 3/8" circle (or whatever size desired) out of the center of one of the pieces of cardstock, this will be the front of your card. 


Next trim a 3" x 3" piece from a transparency sheet and adhere to the inside back of the front of your card. 

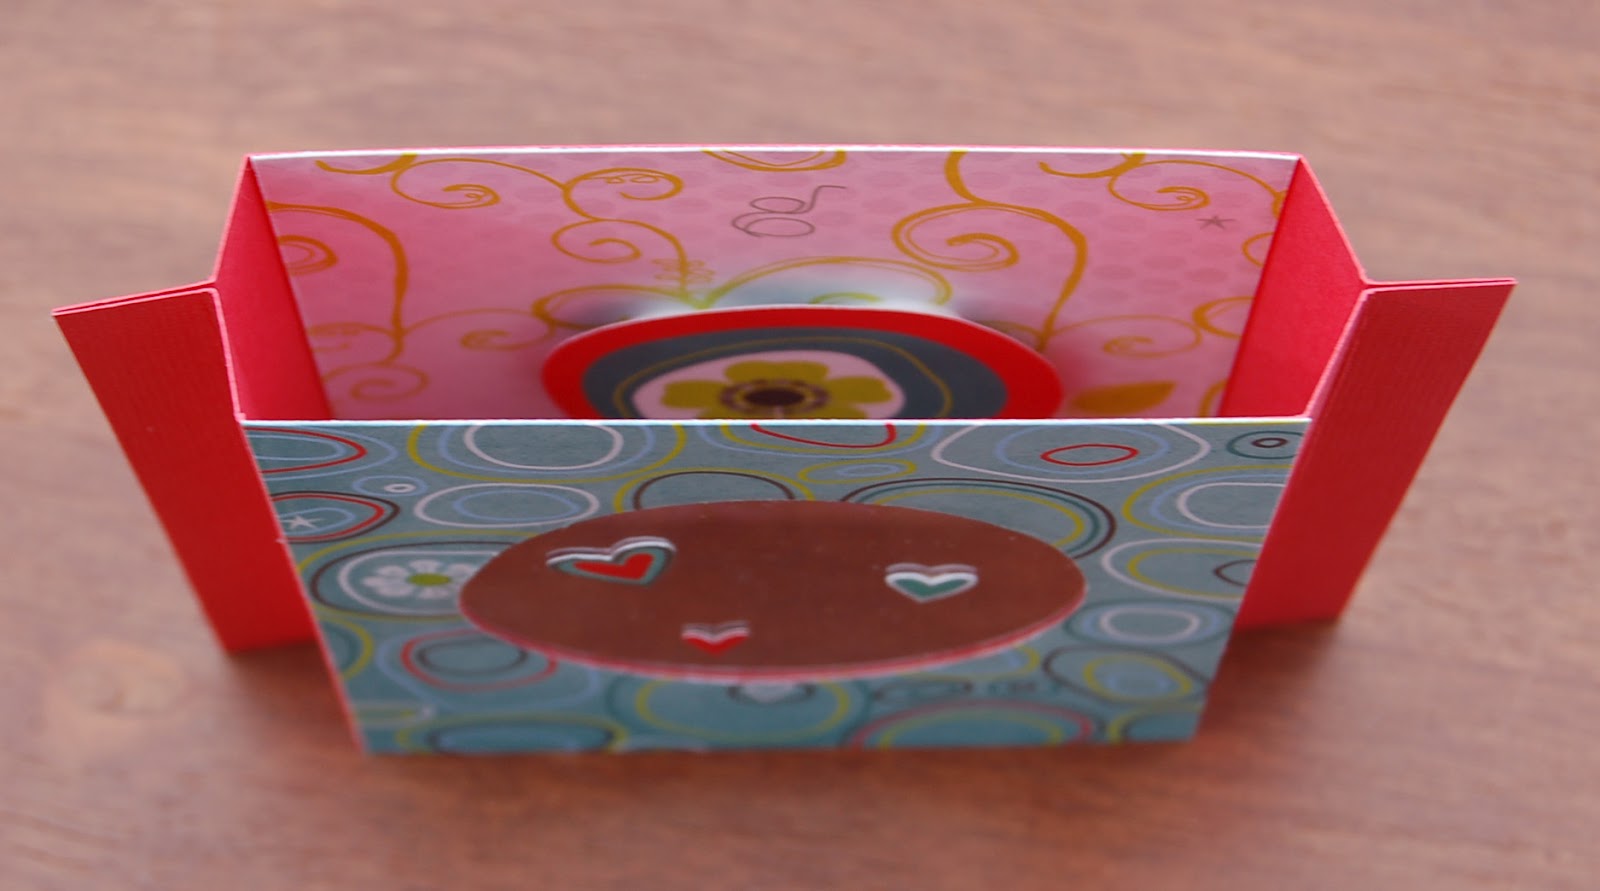
Now is a good point to fold those score lines.  Fold towards the inside of the card at the 1" score lines and out at the 1/2" score lines.  Your card should look like this from the top.


Your next step is to add embellishment or a sentiment to the back of the card that will be seen through the window you've made.  For this card I fussy cut a shape from one of the sheets of patterned paper and attached using pop dots so it's not flat on the paper and adds dimension.  Make sure to line it up with the window so it shows how you want it to.


Once you have the inside complete adhere the 1/2" flaps together.  You can use a wet or dry adhesive for this, I recommend a wet adhesive, like Beacon's 3 in 1 available at your local Craft Warehouse, because you can make adjustments and line up the ends before the glue dries.  


Complete your card by adding any finishing touches and embellishments you'd like to add.  For this card I just cut out a few small hears from some of the patterned paper and attached on top of the transparency and also a couple larger pieces to the front of the card. 


And here's another using the same line.


Thanks for looking. If you create any shadow box cards be sure to share.

~ Michelle ~ 


Tuesday, April 10, 2012

Decorative Glass Vase by Design Team Member Julie Zweig


Today Julie Zweig, Craft Warehouse Design Team Member, shares with us a unique way to dress up a vase using basic scrapbooking supplies. Can you imagine filling it with spring and summer blooms?!

Hello, today I am sharing a paper craft twist using a glass vase.  It’s crisp, shiny and takes on the freshness of spring and combines scrapbooking supplies with a vase.  


Supplies used:

  • Patterned paper from My Mind's Eye
  • Chipboard accents from Echo Park
  • Brads from Echo Park
  • Ribbon by American Crafts
Additional supplies I discovered and purchased at Craft Warehouse:

  • Glass vase with a flat surface
  • Small frame
  • Little glass tiles - comes in a packet of 10
  • Key shape rub on - found in the magnet display/section
  • Rhinestones
  • Big glass crystals - found in the bead section
  • E-6000 glue (use with good ventilation)
How to decorate the vase:

Make and assemble your embellishments


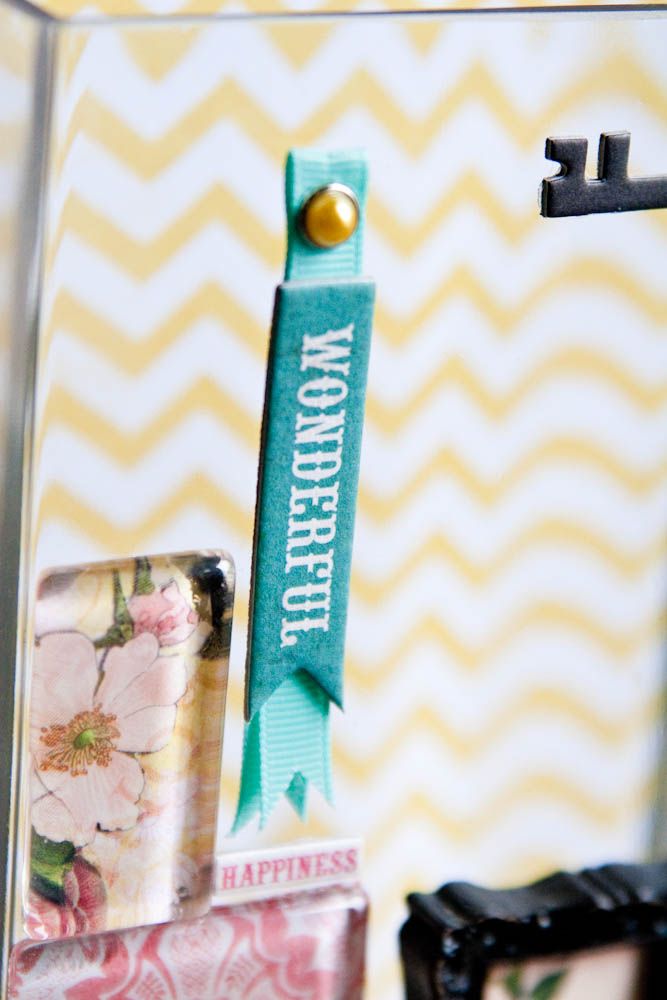
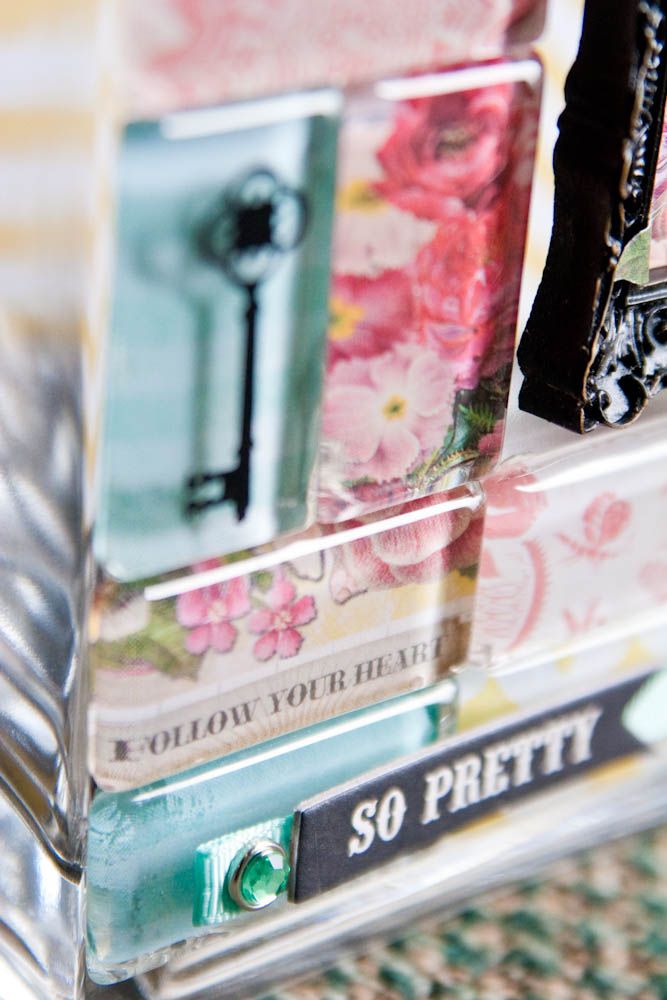
  •  Trace with a pencil around the items you want as a background for each glass tile.  Cut and trim until it fits the back of the tile.  This is my favorite step.  It is amazing what you can discover in a patterned paper when you glide the glass over the different areas. 
  • Glue paper to the back of the glass tile - let dry. 
  •  Assemble various pieces of ribbon, with brad and sentiment. 
  •  Select part of a patterned paper to use in the mini frame.  I cut out the little leaves from some of the paper and made them three dimensional. 
  •  Pull apart the big crystal beads, hook part of the crystals into cardboard key. 
  •  Add rhinestones where desired.

Plan out the layout before using adhesive:


Trace around the vase on a white sheet of paper and use this as a guide for the exact size you have to work within.
Glue embellishments onto the glass vase:
  • Clean and dry the glass vase.
  • Glue on embellishments.
  • Let dry - lay flat
  • Place and glue a background patterned paper on the back of the vase, in case you want to use it for real flowers and enjoy!


My youngest son (9) assisted with the placement for this particular photo.  He found some wildflowers and thought it would be perfect to frame the vase.

Enjoy Spring!

Thursday, April 5, 2012

Spring Banner by Design Team Member Michelle Wofford

Hey Craft Warehouse fans! This is Michelle Wofford, from the 2011 Design Team, here to share how to make a simple banner for Spring.  I've noticed that we don't have a lot of seasonal decorations around our house and I wanted to create something that we could hang for during the spring months. 

When I saw Echo Parks This & That Graceful line I was sold.  I love the bright colors and fun patterns it offered.  So I picked up a 6 x 6 pad and a package of tulip shaped chipboard pieces from my local Craft Warehouse.  Here's my finished piece. Keep reading to learn how to create one of your very own.


For this project you will need the following supplies

 - Pattern Paper (6 x 6 or 12 x 12)
- Chipboard Shapes (tulips used here)
- adhesive (Beacon's 3 in 1 or Pioneer's embellishment glue stick)
- American Craft Thickers Alphabet Stickers
- Crop-A-Dile
- Ribbon
- Scissors
- Sanding Tool (optional)
- Ink Pad (optional)
- Sponge (optional)
- Martha Stewart Butterfly Punch (optional)

Start by selecting your paper and chipboard pieces.  I wanted to create a banner that didn't use the traditional pennant shape.  Depending on how large your chipboard pieces are you can use 6 x 6 patterned paper.  This size worked perfect for the tulip shape I selected, I covered the front of two tulips with one sheet of paper. 


Once you have your paper and chipboard selected start covering the chipboard with the paper.  I would use either beacon's 3 in 1 or pioneer's embellishment glue stick for this part.


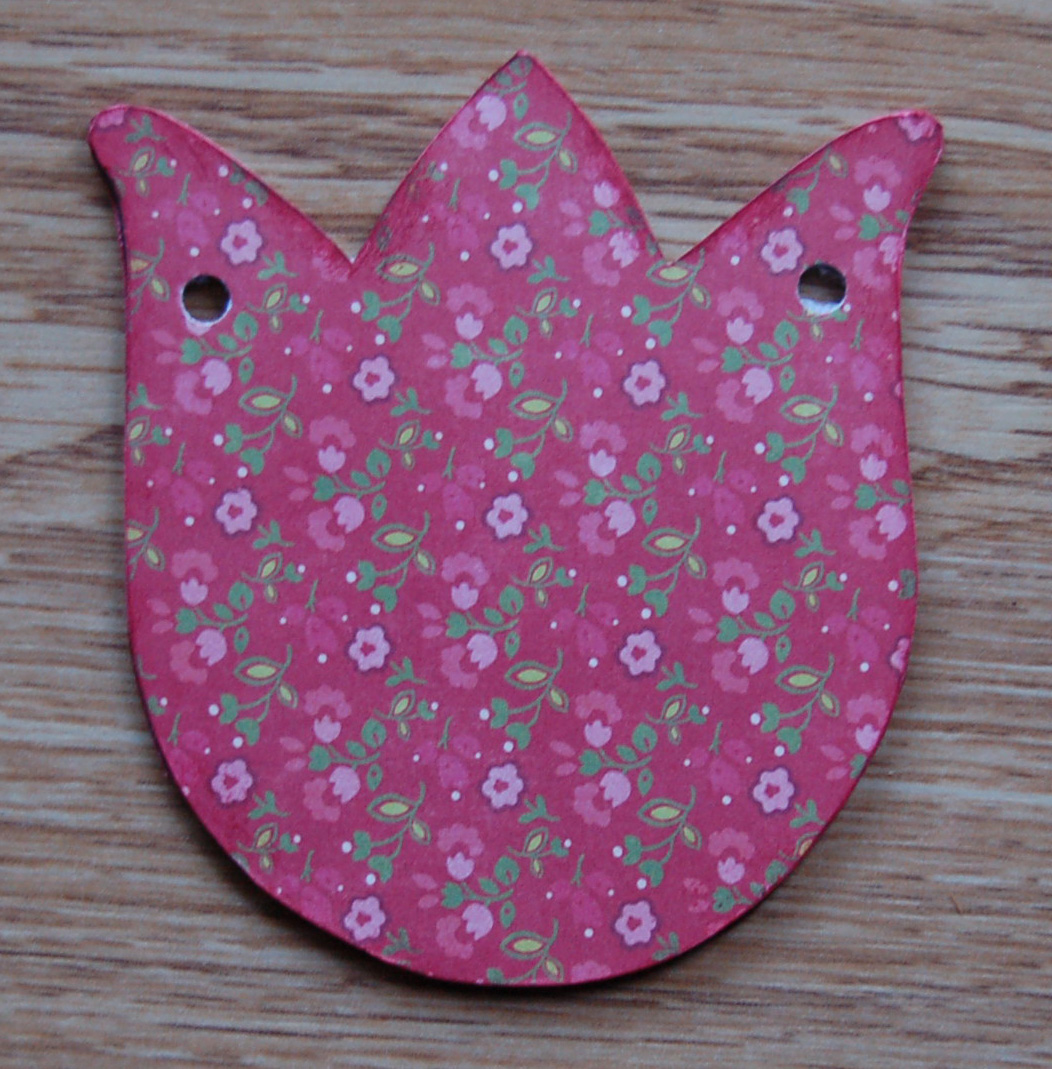
I like to adhere my paper and use a kraft knife to trim away the paper when it is dry.  If you are not comfortable using a craft knife you can trace the chipboard shape on the back side of the paper you are using a and cut out the shape first and then adhere it to the chipboard.  Once the front is dry and cut out I like to cover the back side so the finished product has a nice finished look.  Your pieces should look like this.


The next step is to punch holes on both sides of each piece so you can string on ribbon to hang.  Since the tulips didn't already have holes I created a template to use as a guide so all the holes were in the same spot.  To do this trace your shape on a piece of scratch paper and cut out with scissors. 


Next fold your template in half and using a crop-a-dile punch the paper where you'd like your holes to be. 


Unfold and lay template on top of your paper covered chipboard and punch holes on both sides of each piece.


Your pieces should now look like this.


The next steps are optional but I like to do them because I feel it gives the pieces a nice finished look.  You'll need a sanding tool, sand paper will work, but you don't want it to be too coarse.  And sanding file is great for those hard to reach spots between the petals.  After sanding I cover the edges with ink that matches the paper.  I like to use a sponge, it makes it easier to get in between the petals and it gives a subtle distressed edge. 


Your pieces should now look like this now.


Next adhere your Thicker's Alphabet stickers, here I used SPRING.  


Next string your banner pieces on your ribbon.  Start by threading the ribbon thru the top of the first piece and pulling up thru the back on the other side.  If your ribbon is wide enough you shouldn't have to knot it to keep the pieces in place.


The final step is adding any embellishments you want to use to enhance your banner.  I decided to keep mine simple and just add a few butteflies that I punched out using the Martha Stewart butterfly punch.  You can add as much or as little as you want.  


That's it, hope you enjoyed this tutorial.  I'd love to see any banners you create.
 
~ Michelle ~


LinkWithin

Related Posts Plugin for WordPress, Blogger...
Blogging tips