Wednesday, July 11, 2012

Basic Grey Flag Bookmarks by Guest Designer Michelle Wofford


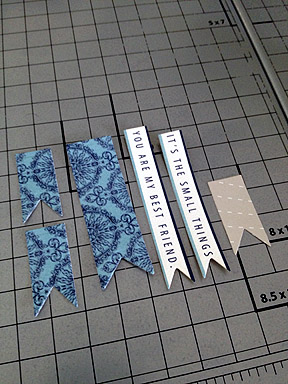
 I want to share with you a fun way to use these cute Basic Grey flags.  Really the possibilities are endless with these fun embellishments. 


I was brainstorming ideas of how to use these when I realized I didn't have a bookmark for a book a received recently.  Easy problem to solve, today I'm going to show you how to make a Corner Bookmark embellished with the Basic Grey flags. 


Supplies List:
Cardstock - 1 or 2 colors
Scoring tool
Paper Trimmer
Adhesive
Border Punch
embellishments
pencil

Trim two piece of cardstock, one 4" x 4" and the other 2 3/4" x 2 3/4"


Next mark the center of three sides of the 4" x 4" square with a pencil


Next carefully line up two of your center marks on your scoring tool on the diagnal and score, flip and repeat on the other side.


Use the bone folder that comes with the scoring tool and fold in on the score lines


On the remaining side punch a decorative border punch on the edge


Next take your smaller square and cut in half on the diagnal using your paper trimmer
Use a strong adhesive on the triangles and attach one to the back side to hold the flaps closed and one to the front side as a decorative piece


Now for the fun part, the embellishing with the flags.   For this bookmark we'll create a pinwheel, to do this remove the picks from the inside of the pennant shape flags (you could use other shapes to create a fancy pinwheel). 


Play with the layout a bit and when you're ready adhere the flags to the bookmark.  For the pinwheel you'll need 4 pennant shapes with the with one corner of each meeting in the center.  Adhere with a strong adhesive.


Add a adhesive back rinestone to the center and stickers with the word READ.  Or add ribbon or other embellishments you like. 


Slide your book mark over the corner of your page. Here's another option keeping the flags intact


Thanks for looking and have fun creating with these awesome flags.

- Michelle Wofford

Simple Card Making by Guest Designer Gina Hanson


Nothings easier than picking up a package of Studio g blank cards at your local CWH to make cards for any occasion, here I'm using this "Summer Honeycomb" kit put together by Craft Warehouse.


Supplies used:
  · Studio Calico - Classic Calico: Frequency
· Teresa Collins - Everyday Moments: Ornate Flourishes, Sentiments
· Teresa Collins - Carolina Breeze: McKay
· Teresa Collins - Blingage: Taylor's Clips
· American Crafts - DIYthickers: Poolside


Additional Supplies: (that can be purchased at your local Craft Warehouse)
· (grey) Cardstock
· Studio g - i·craft Blank Cards
· Lawn Fawn clear Stamps - Hello Friend
· Studio Calico - Wood Veneer: Butterflies
· Teresa Collins - Everyday Moments: Buttons
· American Crafts - Ribbon
· Queen & Co. - Pearls
· Vellum


Step #1

Using a blank card from Studio g as you card base . . . trim a piece of patterned paper to 3 3/4" x 5 3/4" to use as the background on your card. Go ahead and cut (3) more this exact size to use on your other (3) cards, set aside. Using a corner rounder, round all four corners.


Step #2

Decide on the sizes of circles you wish to use on your cards, cut and emboss using Spellbinders die templates.


Step #3

Trim a coordinating piece of patterned paper to 2 x 4", round the two bottom corners.


Step #4

Choose and stamp a sentiment using one of the Lawn Fawn sentiment stamps, cut and emboss using a Spellbinders circle die template.


Cut from several different patterned paper some banners varying in lengths.


Step #5

Take on the Teresa Collins - Taylor's Clips and pop off the rhinestone.

 
Step #6

Arrange all the little pieces of cut patterned papers and attach the rhinestone to the center of a wood veneer butterfly using a 3-D pop dot.


For your remaining cards . . .


Trim a piece of coordinating (blue) patterned paper and adhere across the center of your card. Gather your finishing touches and arrange on your card.


Cut a another strip from a coordinating piece of patterned paper, round the corners and adhere to the top of your card background. Now, if you've never used these little microbeads before, you'll need to make sure your pouring them over your sticky letters into some type of dish, otherwise you'll have quite the mess to clean up! ;) Gather all your embellishments to put the finishing touches on your card.


Again, select a sentiment to stamp onto the face of your card. Cut and emboss all Spellbinder die templates you'd like use and gather all other embellishments for the finishing touches on your card.

- Gina Hanson

Tuesday, July 10, 2012

Photo Canvas by Guest Designer Cara Goedeking


I'm so excited to be here to show you how to create a pretty altered canvas with a photo. I created my canvas with a fun kit Craft Warehouse put together based on this inspiration photo from Pinterest by Shabby Roses Cottage.

And here's what was included in the kit I received:


Front side of patterned paper

Chevron stripe (with pink on back)-Heidi Swapp 
Blue pattern (with butterflies on back)-My Mind's Eye
Gray pattern (with pink chevron on back)-My Mind's Eye
Floral pattern (with ivory pattern on back)-Crate Paper


Back side of patterned paper


The Embellishments

Sugar Chic "Buzz Word"Stickers (Heidi Swapp)
Self-Adhesive Pearl Bling (Bella! Bling Stickers)
"Love One Another" Vinyl Rub-On (Decorating Your Life)


Things I Added:

Black 10"x10" Canvas 
Aqua Acrylic Paint

Additional Supplies I Used

5x7 photo (trimmed to 5x5 square)
Foam Brushes
Paper Towels
Paper Trimmer
Scissors
Small Cutting Knife
Cutting Mat
Popsicle Stick (to adhere vinyl rub-on)
Foam Tape
Pioneer Extra Strong Embellishment Glue Stick


Today I'll show you how to make this cute floral canvas


STEP 1: Put some paint on a plate and add a little bit of water to thin it down. Then brush the paint over the canvas (don't forget the edges)...wipe it off a bit with a paper towel as you go along (this helps to blend the paint).


STEP 2: To create a bit more interest, go back and apply some more paint to different areas of the canvas (you don't want it to look completely uniform). Let the canvas dry for at least 30 minutes.


STEP 3: Use detail scissors to fussy-cut the blue rose with the small yellow bud and the yellow & pink rose from the floral paper (make sure to cut them from the same area of the paper so you have enough left over to make your ivory photo mat (the ivory pattern is on the back side of the floral--and you will need a 5-3/4" square piece as shown in Step 7 below).


STEP 4: Use a small cutting knife and a cutting mat to make any inner cuts that are hard to make with your scissors.


STEP 5: From the bottom of the chevron-striped paper, carefully cut out 4 stripes with your scissors.


 STEP 6: Cut off the top of the chevron piece as shown to make a straight edge. Trim this piece (I cut off the left side) to 10" in width.


STEP 7: Cut a piece of the ivory patterned paper to 5-3/4" by 5-3/4" to create a photo mat.


STEP 8: Cut a piece of the gray patterned paper to 8" square.


STEP 9: Glue down your gray paper, your ivory photo mat and your photo. 
Then adhere the chevron piece along the bottom of the photo (see final photo of project for correct placement of everything). STEP 10: Use a Popsicle stick to adhere the "Love" vinyl rub-on (follow the instructions on package). Then add the "adore" sticker on top.


STEP 11: Cut pieces of foam tape and adhere to the back of the floral pieces you cut out.


STEP 12: First adhere the blue rose, then layer the yellow/pink roses on top.


STEP 13: Fussy-cut a yellow butterfly from the butterfly patterned paper and use a thin piece of foam tape along the middle only to secure (that way you can bend up the wings). Add a yellow heart sticker on top of the "O" of the LOVE rub-on.


STEP 14: Add the 3 self-adhesive pearls and the "sparkle" sticker to the photo.


And...here is the completed canvas!

Thanks for stopping by...hope you enjoyed this project! 

LinkWithin

Related Posts Plugin for WordPress, Blogger...
Blogging tips