


Tah Dah! Did I kick it up a notch or what?
You know you're in love (well, I know I am at least) and you know ya wanna make one to.
Here's how:

Supplies Used
Echo Park - Christmas This & That Collection Kit (Love, Love, Looove!)
Chip Board
Star Template
Kraft Paper
Red 20 gauge wire
Brown and Red Inks
White Gel Pen
Hot Glue Gun
Glue Dots
3D Foam Squares
Xacto Knife
Rolling Tool
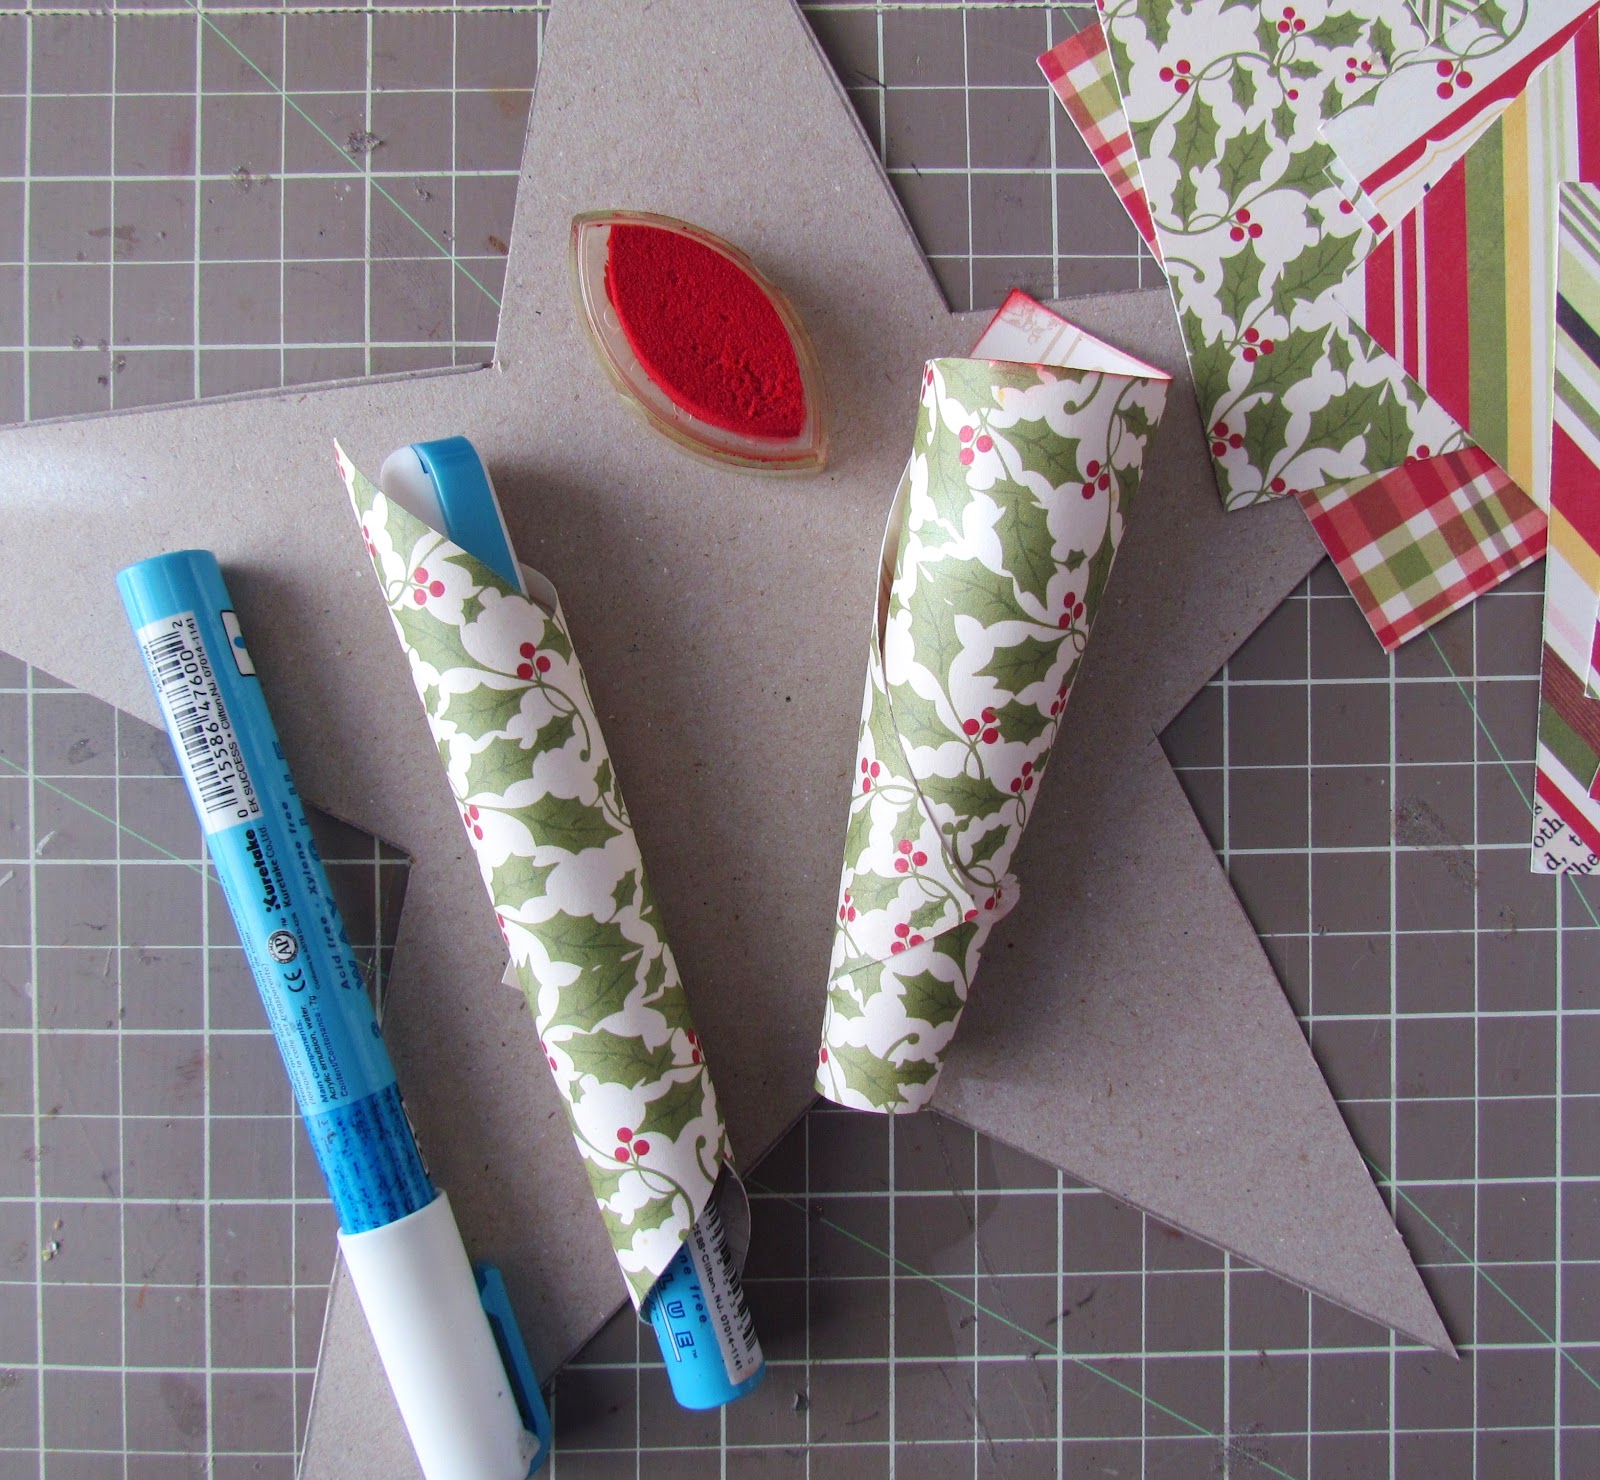
Cut a star out of chip board using an Xacto Knife. This will be the base of your wreath. I cut my star at 11 inches across. To make the cones, you'll need to cut a variety of patterned paper into 4x4 squares. To keep the cones symmetrical, I recommend using some sort of rolling tool, like a glue pen, fat marker, large dowel or any other tool that will do the job. This tip will be very helpful later on 'cause you don't want to have to many fatty and skinny paper cones when trying to make your wreath look symmetrical.

Keep on rolling and hot gluing them squares into cones. Ink the edges of the cones if desired. I ended up using 31 cones to complete my wreath.

Start hot gluing your cones on to each point of the star base first. It's helpful to tack on the cones with hot glue at first instead of a big blob of glue. This will make life soooo much easier later if you need to pull the cones off and rearrange them as needed.
After you've arranged and tacked your cones on to each star point, turn the star over.

Fill in the gaps with more cones, shaping the wreath into a star shape. Now aren't you glad you only tacked the cones on? Remember how I also mentioned to keep your rolled cones as symmetrical as possible? Now that you're filling in the gaps, to many fatty's or skinny's cones will throw off the balance. Don't ya just hate that?

Voila!
A paper cone star wreath ready to be embellished.

I finished both sides of the wreath by covering the front and back with stars cut out of Kraft paper. When I started this project, I wasn't sure if I was going to use it as a tree topper, mantle piece or a hanging wreath.
I embellished the wreath with stickers from the kit, added faux stitching around the edges and for a little rustic shine, curled some red wire and stuck a few pieces along the edges and to use as the wreath's hanger.

The stickers in this kit are so warm and cozy. I'm totally in love with rustic Christmas and totally in love with the wood grain paper too...like totally! I didn't even want to cut it but I decided to sacrifice it up for the sake of the wreath and used to make another 9.5 inch star as the base mat.

Isn't that little pennant banner so cute? It's another cozy sticker selection along with some alpha's that spell Noel.
To finish up my wreath, I cut another 8inch star, inked the edges, embellished it with doily stickers, a matted Santa sticker and popped it up with a few 3D foam squares.
Thanks so much to the Craft Warehouse for having me as Guest Designer this week!

Like Me on Facebook!


AWESOME wreath. Such a fabulous job, Holly!!!
ReplyDeletenew follower ;0)
Be blessed, Beckie
Stampin' Up Ind Demo
http://justbcreativecrazy.blogspot.com
This turned out awesome! What a great idea! :)
ReplyDelete