Tuesday, March 18, 2014

From Easter To Everyday: How To Create This Beautiful Frame


This frame comes unfinished with a 4x4 opening for a photo. It's one of our most popular DIY frames because there are so many ways to decorate. This time I thought of adding a cross, metal flower and a metal strip to create different textures. I love how simple this was to create but really turned out looking like an expensive home décor display.

Supplies:
  • Unfinished Frame (KID-107)
  • Unfinished Wood Cross (CAL-73)
  • Metal Flower
  • Metal Strip
  • Acrylic Paint Burnt Brown, Yellow & Green
  • Delta Crackle
  • "With God all things are possible" vinyl from Decorating Your Life.
  • Foam Brush
  • E6000 glue
Directions:
  1. Take glass out of the frame. Then paint the frame using the burnt brown paint.
  2. Once dry paint a layer of crackle paint by following the directions on the bottle.
  3. Paint a layer of green paint and let completely dry.
  4. Paint the cross yellow let dry. Then lightly paint cross using brown acrylic paint and a dry paint brush to add texture.
  5. Also paint metal strip with brown acrylic paint.
  6. Once all paint is dry glue metal strip to the bottom of the frame, cross & flower to the top corner using E6000 glue.
  7. Add vinyl to the top corner by following the directions on the package.

Saturday, March 15, 2014

Bubble Band Cross Rubber Band Bracelet


I can't get enough of these NEW Bubble Bands now at Craft Warehouse stores! It is like using something different than a regular loom band. Each band is embossed with little bubbles! Just creating a regular No Loom Bracelet gives the bracelet a completely new look! 


The Bubble Bands come in a variety pack that is filled with bright colors! As if that isn't enough, they have glitter in them too!


To create the bracelet above you will need the following:

2 package of Bubble Bands (just in case you don't have enough of one color, or you can mix colors for your own look)

1 Cross Charm (needs two holes, one on each side)

1 C or S clip

Rubber Band Bracelet Hook

Directions: 

 1. Slip your first band into one end of the charm. With both ends on the hook, begin your bracelet like you would a basic rubber band bracelet as shown below in the tutorial video.


2. When you are half way around your wrist, act as if you are finished with your bracelet and place a C or S hook on the end.

3. Start step 1 again with the other side of your charm. Then, when the bracelet fits around your wrist place the end on the other side of the C or S clip!

Now you are done! Enjoy your new bubble band bracelet!

Friday, March 14, 2014

Saint Patrick's Day Rubber Band Bracelet


Have you any green to wear this coming Monday for Saint Patrick's Day? No worries! This bracelet will only take five minutes to make and with the EZ Looper, you and a friend can do it together because two loopers come in one pack! 


For this bracelet, I used the four peg design with all green loom bands! After the bracelet was finished (instructions come in the package) I used jump rings to add my clover charms! 


Make a few extra for your friends! This way if they forget to wear green Monday, you can give them a bracelet to wear! ;)

Chicken Wire Framed Monogram


These are so easy and fun to decorate. We have a wide selection of metal flowers in a variety of colors, monogram letters finished and unfinished and mini banners sold in burlap or cotton fabric. Or use some things around your home to create your master piece!


Supplies:
  • White Chicken Wire Frame (NST-384)
  • Black Chicken Wire Frame (NST-385)
  • Metal Flowers
  • Canvas Corp. Mini Clips
  • Canvas Corp Burlap Banner
  • Thickers Black Basic Foam Stickers
  • Jute String
  • Monogram Black Finished Letter
  • Staple Gun
  • E6000 Glue
Directions:
  1. Staple letter on to chicken wire from the back of the frame into the back of your letter.
  2. Wrap letter with burlap string
  3. Glue flower to the front using E6000 glue.
  4. Tie jute string from one corner to the other on your black chicken wire frame.
  5. Add the word HOME to each burlap banner then clip on to jute string using mini clips
  6. Place photo on to chicken wire using mini clips.
  7. Add metal flower to bottom corner using E6000.

Thursday, March 13, 2014

Personalized Float Frame


I love how simple this project is! The trick is all in the magnets. Place a Photo behind the glass then add a magnet to the back of the photo and front of the glass and you have a photo know in a float frame!


Supplies:
  • Black Rectangle Float Frame
  • Cream Acrylic Paint
  • Label Drawer Pull
  • E6000 Glue or Screws
  • Extra Strong Mini Magnets
  • 5x7 Photo
  • Foam Brush
  • 8 mini extra strong magnets
Directions:
  1. Lightly paint frame using a very small about of cream acrylic paint. brush strokes back and forth to give the frame a weathered look.
  2. Glue or screw in label drawer pull to the front of the float frame.
  3. Place photo behind the glass then secure with a mini magnet on the front of the glass and behind the photo in all 4 corners,

Wednesday, March 12, 2014

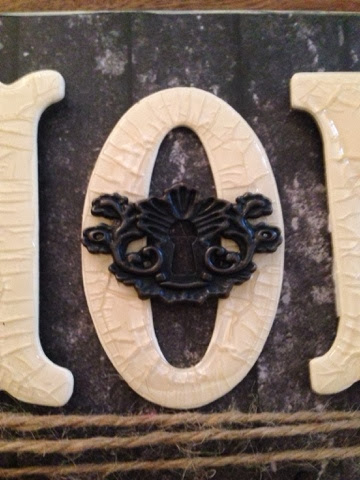
"Home" KaiserCraft Hanging Wood Board


Create this mini plaque holder by adding your favorite paper collection, I choose the new KaiserCraft "Art Of Life" collection and your favorite family photos!

Supplies:
  • Wood Board with 3 hanging wood squares (Cal-63)
  • KaiserCraft "Art of Life" paper collection
  • Black and Cream Acrylic Paint
  • Darice 3" Card Stock Letters
  • Ranger Glossy Crackle Accents
  • Tim Holtz key & key hole
  • All Night Media large pop dots
  • Jute String
  • We R memory Keepers corner punch & crop-a-dile
  • Black Acrylic Paint
  • Cream Acrylic Paint 
  • Foam Paint Brush
  • Tim Holtz Distressed ink
  • Beacon 3in1 glue

Directions:
  1. Take off the 3 mini wood squares of the wood plaque.
  2. Paint your wood surface with Black Acrylic Paint
  3. Once dry light brush cream paint to give it a weathered texture.
  4. Cut Paper to fit the wood plaque and mini boxes, Use corner punch to give you smooth corners.
  5. Then glue to the surface using Beacon 3in 1 glue.
  6. Paint Darice letters "HOME" using cream acrylic paint. once paint is dry spread a coat of glossy crackle accents and let dry. As this dries it will crackle.
  7. Start cutting paper to fit the mini hanging squares add photo's and embellishments.
  8. Punch holes in the top of the paper to fit clips and assemble on to the plaque.
  9. After your letters dry ad them to the plaque with embellishments, Key, Key hole and Jute string. Glue everything in to place using Beacon 3 in 1 glue. 


Tuesday, March 11, 2014

Home There's No Place Like It! Frame


This is a great gift idea for a special person in your life. Personalize by placing the heart where your special place is. Use paint to go with your home décor or leave the finished float frame black. Its all up to you how you want to customize your project!


Supplies:
  • Black 12" x 12" Float Frame
  • Montana Gold Red Spray Paint
  • Cream Acrylic Paint
  • United States vinyl for "Decorating Your Life"
  • Home there's no place like it! vinyl from "Decorating Your Life"
  • Map of your state
  • Beacon 3in1 glue
  • Jute String
  • Foam brush
Directions:
  1. Take string off your float frame and tape the front of the glass so you don't get spray paint on it.
  2. Spray paint the out side frame with red or color of your choice.
  3. Let dry then use a paint brush to add a little cream paint to make it look weathered.
  4. Peel off the tape.
  5. Cut map 10"x10" to fit the back of your frame.
  6. tape map to the back of your frame using packing tape or glue.
  7. Place vinyl on the front of the frame following the directions on the package.
  8. Add jute string to the top and you are done!

LinkWithin

Related Posts Plugin for WordPress, Blogger...
Blogging tips