


Hi everyone! My name is Kayla, and I blog over at Kaylanaut! I am so excited to show you how I use Project Life to document my life and keep my memories.
I'll be using the Project Life cinnamon edition core kit, which you can pick up at your nearest Craft Warehouse store.


What they say about Project Life is true: all you truly need to complete an album is a core kit, a binder, pocket pages, photos, and a pen. I don't usually stray too far from that, but on occasion I do like to play around with embellishments!
This time, I'll be using the Cinnamon Edition core kit 3x4 and 4x6 cards, as well as the 12x12 paper, which I'll show you how I use a bit later. I also use my favorite journaling pens, scissors, a paper trimmer, and a basic permanent roller adhesive. Craft Warehouse will have everything you see here and everything you'll need to create an album of your own.


Project Life is so flexible. I've been doing it since January, so I've definitely gotten into habits -- for instance, I always use the top left corner spot for my "title" card. I'm going to cut a card from the 12x12 paper to use for my title card, which is extremely simple! The title pocket is 4x6.

First, I start with a 12x12 page of my choosing.

Then, I open the paper trimmer and make a cut along the 6" mark.

I take that half of the page and then make a cut at the 4" mark.

And voila! My own title card! I do this with any 12x12 (or even 6x6) paper I want to use. I've even cut things like shopping bags to 4x6 to fit in these pockets!

Another personal preference, but totally not necessary: I like the look of rounded corners, so I use my We R Memory Keepers corner chomper at the 1/4" size to round the corners of anything I cut down.
I then start adding in my photos and Project Life cards, moving them around and finding a layout that works for me:


What is really neat about the Cinnamon Edition pack of 12x12 paper is that it has this really neat page that's filled with fun phrases. I'm going to play around with that a bit and use it for embellishment:


Once I've decided what I want to go where, I use my roller adhesive to attach the bits to the photos and journaling cards.

I can even move things around and use 3x4 photos in 4x6 slots - with just a bit of craftiness, if you will!


Next is my favorite part: adding journaling! Journaling is such a personal and fun touch to Project Life pages. This is another opportunity to tell a story, something else to look back on and smile about! I think it's my favorite part.


I've definitely learned to love my handwriting due to Project Life - I used to think it was pretty awful, but I realize that it's unique to me and it's my most valuable tool to document my life with (aside from a camera, of course, but those come and go!), so I've warmed up to it quite a bit.
After that, I go in and add a bit more "flair." I really love these roller stamps from Amy Tangerine and Dear Lizzy! They're super simple and cute ways to add a bit extra to your photos and cards.


And once all that's in place, voila! Project Life pages!
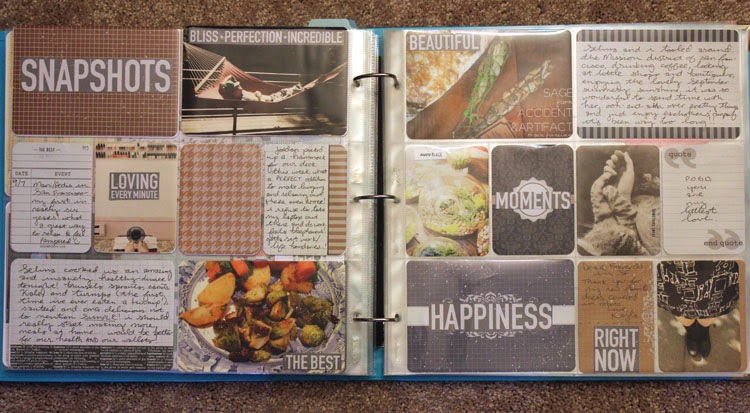
I bet my last dollar that I'll have just as much fun looking back on these pages years down the line as I do putting them together. :)
I am so grateful for the Project Life system, since it makes documenting what is without a doubt the biggest year of my life so far (marriage, moving, etc.!) so simple and so fun! I always look forward to putting my pages together, and already I swoon when I look at all of the memories that are kept safely, prettily, and seamlessly in these pocket pages.
Thanks for reading!


No comments:
Post a Comment
Thank you for your feedback! We love hearing from you!