Tuesday, March 6, 2012

Scrapbooking 30 Minutes or Less Video Tutorial


Welcome to our new blog video series called Back 2 Basics!

Let's face it, we are busy. We don't always have two hours to spend on a layout or project. Back 2 Basics will help teach those that either want to learn how to scrapbook or want quick and fast tips to help you get your project done in 30 minutes or less! Each video in the series will be less than 5 minutes long; which gives us more time to create and less time in front of the computer!


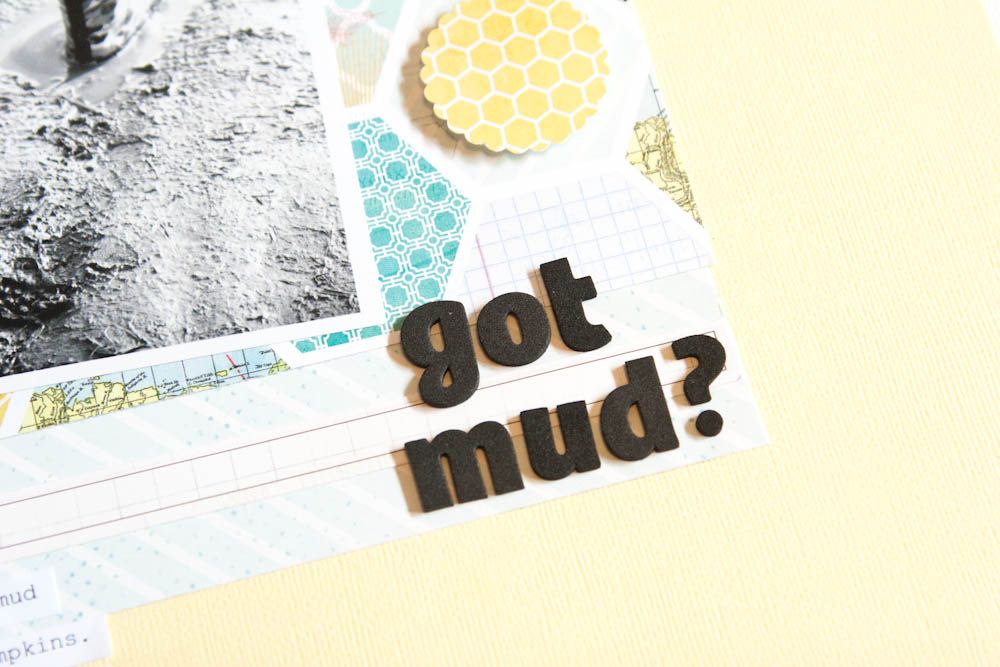
Our first tutorial is this under 30 minute page by Design Team Member, Jennifer Evans. Can you believe this page was made with only 8 items?

Supply List:

Cardstock and Alphabet Stickers by American Crafts
 

2 pieces of Pattern Paper by My Mind's Eye
 

Trimmer by Fiskars
 

Scallop Punch by Marvy Uchida

Scissors

Foam Squares
 

Adhesive Runner


Watch the under three minute video on how to create this simple page, step by step.


Inspired to create this quick layout or another paper crafting project? Share your page or project on our Facebook page!

Monday, March 5, 2012

Using 6x6 Paper Pads For Scrapbooking by Design Team Member Amanda Sherman

Hi again.  I’m Amanda, Design Team member.  In the previous post, I explored the comparisons and perks of using the 6x6 papers that are taking the scrapbooking market by storm.

Today I’m going to wrap up this little 6x6 paper adventure with a few more examples of projects done with the same two papers in different scale.  I used two sheets of My Minds Eye Lost & Found TWO to make these five projects, three cards and two layouts.


These are the papers.
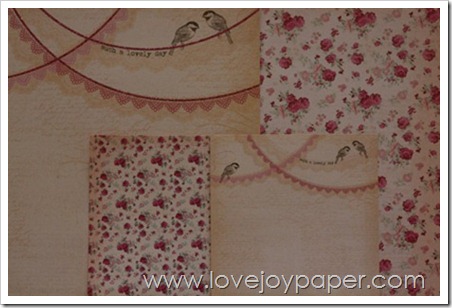


The first two projects I created were a card and a layout.  I used a 6x6 piece of paper for the card. To create this, I just cut the paper to the size of the card and added a boarder on the inside so it would stick out. Make sure to cut the top a little so it will still fit inside your envelope.

Look how easy this is?! Use the pattern of the paper to decorate the front of your card. 


“Such a Lovely Day Together” Journaling: In October, the boys went camping so we had a girl day.  We had a tea party, painted our fingernails and had fun.

 For the layout, I used the 12x12 paper in the same design. I then cut the floral paper to mat my photo using a boarder punch on the bottom of the mat.

Alright, now my next two projects are some of my favorites.

For this card, I distressed the papers and rolled the edges a bit to give it a shabby look.  I also cut the paper flowers (using both scale of papers) with my spellbinders dies and rolled and inked the edges.


The layout below I love because of the photo.  I was so happy with the result of the page and the shabby look, it went perfectly with this picture.  There is no journaling, but the title is based off a song by Steven  Curtis Chapman called “The Treasure of You.”  This is one of my favorites.


Supplies:  My Minds Eye (paper, flowers, brads, epoxy, ribbon), Misc (paper, ink & floss), Basic Grey (alphas), Cosmo Cricket (alpha ledgers)

And finally, I used the two different scales of one patterned paper to make this quilted card.


I hope this inspires you to create both cards and layouts with 6x6 paper pads! To see some new paper pads that Craft Warehouse is carrying, check out this previous post!

Saturday, March 3, 2012

6x6 Paper Pads For Scrapbooking by Design Team Member Amanda Sherman

PhotobucketWelcome Design Team Member, Amanda Sherman, as she shares why she loves to use 6x6 paper pads...

If you’ve been in any scrapbooking aisle in the last couple years you’ve noticed that 6x6 paper pads are taking the industry by storm.  It seems every manufacturer is releasing their papers in a 6x6 size as well as the full 12x12 size.

There are definite benefits to the 6x6 size, especially the obvious, for cardmakers.  The smaller size is perfect for the smaller canvas.  In addition to just being smaller in size, the scale is usually smaller as well.  Most commonly it’s 25% of the the original scale (however I have found some exceptions as I’ll show).

But the benefits go farther than just cards.  These paper pads are a great option for the scrapper on a budget.  It allows the consumer to have the entire, or majority, of a paper line at a more affordable cost.  One more benefit is the smaller scale for scrapbooking layouts too.

To demonstrate this, I pulled from my stash some papers that I had in both the 6x6 size and the 12x12 size.  Then I punched circles with my 1 1/4” punch in both the full scale and the 6x6 scale.  I have photographed those punch outs as well as the sheets of paper together.

The full size is on the left, the 6x6 is on the right in all the pictures.

Photobucket

Photobucket

 Simple Stories 25 Days of Christmas

Photobucket

Photobucket

Photobucket
 My Minds Eye Stella & Rose (both sides of paper)


Photobucket

Photobucket
 Echo Park Happy Days (this one appears to not have as dramatic reduction in scale)
                                                                  
I hope these visuals allow you to see the benefits of using the 6x6 papers in your paper crafts.  Take a chance and try something new.  I did, and haven’t regretted it yet!

Photobucket


Check out our previous article about why Craft Warehouse loves 6x6 Paper Pads which includes our favorite 6x6 paper pads that are out right now!

Thursday, March 1, 2012

Stamping Technique by Design Team Member Jules Aviles

Welcome Design Team Member, Jules Aviles, who would like to share a very simple stamping technique that anyone could do....it's a way to add a theme to any card stock for any occasion!

Supply List:

Textured red card stock from Bazzil
(You can find tons of colors and shades at your local CW)


An embossing ink pad


Any stamp.....I think Craft Warehouse's $1 stamps work perfect!!!
For clear stamps like these, you will need a stamping block, like this one


What I like to use is clear embossing powder for a "Tone on Tone" look.... so it looks like a shiny red stamp on a red piece of card stock! But of course you could use a different color if you want! I store embossing powders in a Rubbermaid container with a  plastic spoon in it to scoop the powder onto the paper. 
 

So, now you wet your stamp and stamp your image randomly on your  card stock.....kind of making it look like it's a large background stamp!


Now....stamp it all over..... make sure to do this kinda fast so it doesn't dry,  you want it nice and wet so the powder sticks really well!


After coverage, tap on the backside to shake the loose powder off. 

Now...the fun part!!! Using a heat gun, (CW carries a couple different kinds). These are not hairdryers and the heat is SUPER HOT!!!  Please be careful!!!  The heat will melt the powder keeping the image solid and crisp but make sure you  constantly move the heat gun around so the powder and card stock don't burn.  Watch for a wet shiny look then let it cool.  

I did end up placing the red card stock on my spiral notebook so my mat won't warp!


See it melt!!???  Cool huh??
 

....and voila! Easy Peasy! 


Now, You can use this for a card or a photo mat. 
 

I hope I was able to share a cool tip with you that you could try!  It really is pretty and fun and so versatile!  Leave a comment or question below, I'll be happy to answer them! 

Have a great day!! 

Wednesday, February 29, 2012

i love to create - day 29 - Hero Arts Stamp + die combo sets


Happy Leap Day! Today is the last day of our I love to Create series of blog posts. 29 days of some of our favorite scrapbook and stamping products. Stuff we use, adore, and recommend!
We're ending with one of my personal favorites...

Today's pick: Hero Arts + Dies and embossing folder combo sets.
here is a look at a couple of each...


Watch this video to see how they work!


Tuesday, February 28, 2012

i love to create - day 28 - Dimensional Flower punches


Every day is a great day to create! Each day in February we are sharing with you one of our favorite products. We actually craft ourselves, so these items are our 'picks' , things we use and recommend. Check back each day in February to see the daily pick.

Today's pick: dimensional flower punches from EK Success
these look and work like border punches, and you can use them in that way, but they are designed so that after punching you can roll them up and create handmade paper flowers!


4 styles to choose from


Here is a photo tutorial on how to create pretty flowers like these:


Select 2 different cardstock colors for your flower.


(try a double sided cardstock weight pattern paper for added interest)


Punch 3 strips total- 2 of one color and 1 of the other. Just punch along the 12" length of your paper, the design will leave a clean edge so you can punch again. no scissors or paper trimmer needed!


apply strong adhesive to the narrow border at bottom of punched design.


attach two different colors to each other- offset the petals


apply strong glue to the narrow strip at the bottom of the layered punch out borders.


starting at one end, roll up the layers.


keep going all the way to the end- the glue is holding the design together.


now you have one border strip left. apply strong glue to the narrow edge and begin wrapping it around the flower base you've already created.


as you are adding the last layer, try to offset the petals. if you need to you can pleat the paper here and there as seen in above photo to make that happen.


now you have your flower- time to make it bloom!


starting on the outside layer, gently fold down each petal, working your way around and around the flower.


keep going until you have a full pretty flower


If you like, you can embellish the flower a bit- I've added some ink to the edges of the petals. or try spritzing with misting spray for added sparkle.


add rhinestones, or beads to the centers of your flowers if you like.


LinkWithin

Related Posts Plugin for WordPress, Blogger...
Blogging tips