


Summer is here! One of my favorite parts of summers is backyard barbecues with friends. And what backyard get-together is complete without a few decorations? When I saw these little Basic Grey flags, I knew they would be perfect to incorporate into one of my favorite summer items, pinwheels! I remember as a kid being mesmerized by pinwheels for hours. Sigh, it’s the simple things. Even as an adult, I find the simplicity of pinwheels alluring.

Creating the pinwheels is really easy, regardless of how daunting it might seem.

Begin by cutting a perfect square. No, you don’t have to have specific measurements or use any math.
Cut a square to whatever dimensions you want and we’ll use a zero centering ruler to make it easy to cut the panels.

Using a paper piercer, poke a hole at the 0.

Now, we’ll need to cut the blades. So use a craft knife and cut from 3/4” to the corner along the straight edge of the ruler.

Next, we need to use the paper piercer and poke a hole in four of the corners (one hole in the same place in each of the four blades).

Now to assemble! Turn one corner in and insert a brad. Then fold up the next corners, layering under the first. Push brad through layer and repeat until all layers are pulled up.

Turn over and secure brad.

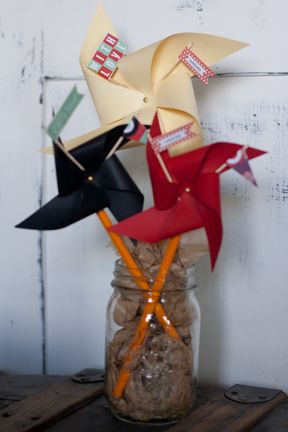
I used Beacon 3-in-1 liquid adhesive to adhere the pinwheels to pencils. I filled a jar with some old pattern tissue (any tissue paper would work) and inserted the pinwheels. Then I used the same glue to adhere the flags into the pinwheels.
- Amanda Sherman


Very clever! Nice work, Amanda!
ReplyDelete