


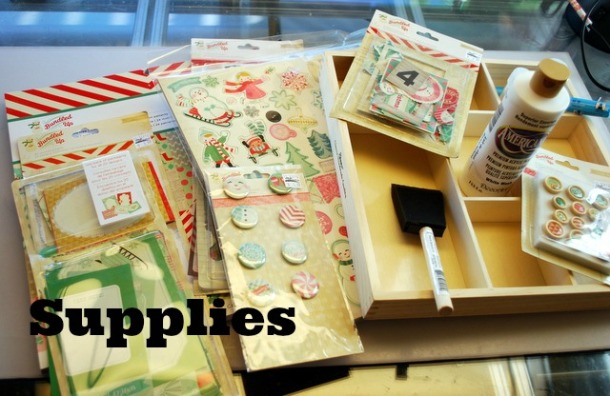
Here is what I used:
- Crate Paper Bundled Up - Journaling Cards
- Crate Paper Bundled Up- 12x12 Paper Pad
- Crate Paper Bundled Up - Chipboard Stickers
- Crate Paper Bundled Up - Button Brads
- Crate Paper Bundled Up - Ephemera Cardstock Die-Cut
- Crate Paper Bundled Up - Adhesive Badges
- DecoArt - Americana White Wash paint
- Foam brush
- Glue Pen
- Glitter (course and tinsel)
- Glue
- Glue Gun
- Hole Punch
- Paper Trimmer
- Ruler/Tape Measure
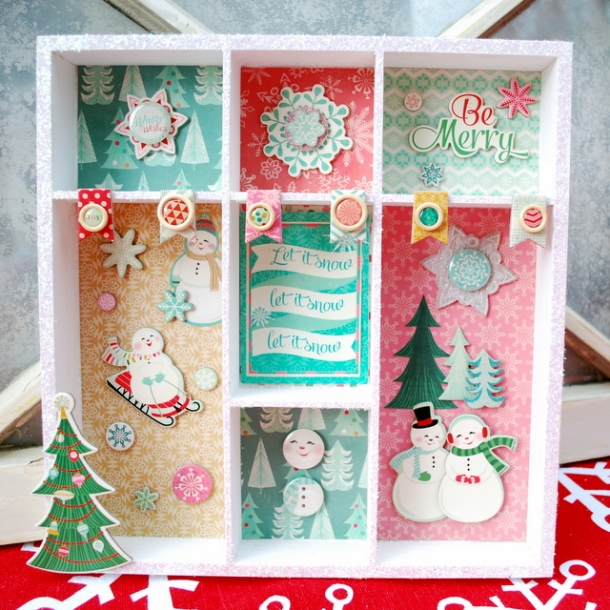
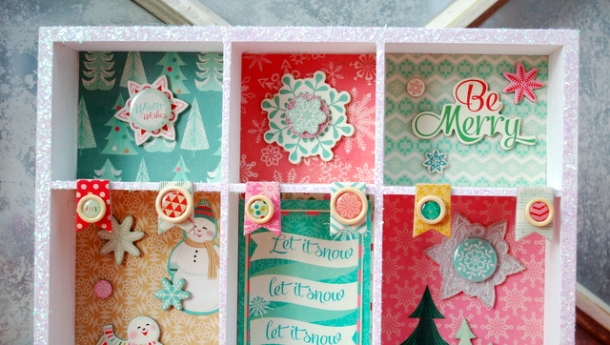
Here is how I did it: I first prepped the reclaimed wooden puzzle box by applying a coat of white wash paint. Once dried, I applied glue using a glue pen along all the box-face edges and then dusted with a combination of course and tinsel glitter. This really gave the project a nice "snowy" framing.

Once glitter was dry and set, I measured each box and then cut down sheets of the 12x12 pattern paper from the Bundled Up paper stack. Once cut, I glued down each cut sheet into the appropriate box.
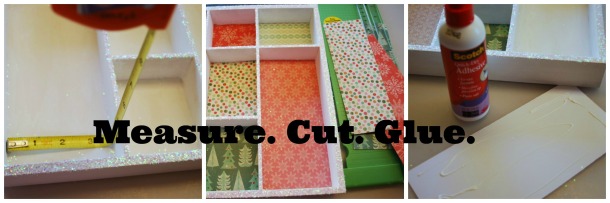
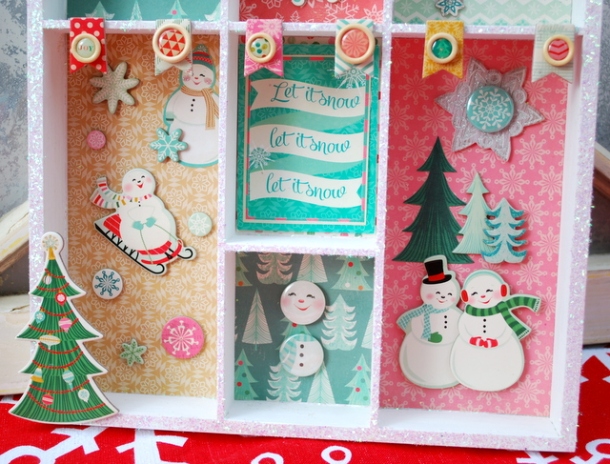
Once all the paper sheets were securely in place, I began to build my theme scenes in each box using Crate Paper's Bundled Up journaling cards, chipboard stickers, buttons brads,s, and adhesive badges. To add a bit more pizzazz to the the chipboard sticker pennants, I punched a hole through the middle and added the button brads. I used hot glue to attach to the the box. I added Pop Dots to add height and depth to various embellishments throughout the entire project.

There you have it, a quick and simple project that uses something that you would normally find yourself building a scrapbook layout or a card with. Instead, you find yourself with a new piece of home decor or a sweet cherished gift.

Wow..this is amazing! I need to give a painter's tray a try now. Holly :-)
ReplyDeleteGreat project! Makes me look forward to Christmas time even more!
ReplyDelete