


 Hello Craft Warehouse fans, Michelle Wofford here, and I'm so excited to be the guest designer today and share with you some fun 4th of July cards. I got to work with the Stars & Stripes line from Doodlebug Designs Inc. I love this line, some many cute papers and embellishments, great for patriotic or summertime projects.
First up is a simple card that could be used for the 4th of July or as a greeting card.

To start, make a card base from cardstock by cutting a piece that is 6" x 8". Score down the middle of the 8" side at 4" and fold in half.

Next trim a piece of the blue patterned paper to 4" x 6" and adhere to card base.

Next trim a piece of the red paisley patterned paper to 3 3/4" x 5 3/4" and adhere to card, layering it over the blue paper.

Adhere the "Good Times" sticker to the card using pop up adhesive. You could use any sticker to make this card more or less patriotic.

This line includes a great set of coordinating jewels that come on a sheet with a variety of colors and sizes. To jazz up the card a bit, add these jewels to the center of the larger flowers. That's it, a quick simple card you can have done in less than 10 minutes.
Next up is a fun 3D pop up card. A few years ago I received a pop up card that inspired me to duplicate the idea with my own design. These are fun and they fold up into an envelope closure so it is easy to store and give.


Start by cutting your patterned paper, you will need 1 of each of the following
10" x 12" - this will be the base / closure
5" x 6 1/4" - back row
5" x 5 3/4" - middle row
5" x 5 1/4" - front row

Place your 10" x 12" piece with the 12" side horizontal on your Martha Stewart score board and score at 3 3/8", 3 1/2", 8 1/2" & 8 5/8"

Flip paper so 10" side is horizontal on the board and score at 7".
Pre fold all your score lines. This is a little tricky with some of the score lines so close together, make sure the edges are lined up and use the scoring tool or bone folder to fold with a crisp crease.

This is what the sides should look like.

Once you fold all your score lines use scissors or a paper trimmer to trim the bottom corners from the inner most score line and below the 7" score line. The card base should look like the above picture.

Set aside your base and grab the 3 other pieces you cut. With the back side up and the long side horizontal score each piece at the 1/2" mark. Now is also a good time to trim these if you want. I trimmed the front two pieces on an angle. To get both pieces to have the same angle, place both pieces together, making sure the front sides are together and even, place on an angle on your paper trimmer and trim both at the same time (most trimmers will cut two pieces at a time).

Trim three 3" x 3" squares from cardstock and score at 1 1/4" and 1 /3/4", this is the piece that will allow your card to pop up and fold down.

Fold the score lines and put plenty of adhesive on both sides of the pop up piece, (note: don't put any adhesive on the middle strip between the score lines, this needs to move freely). Adhere one side to the back side of the tallest piece of patterned paper. You also want to apply adhesive to the bottom 1/2" flap where you scored it. The flap folds towards the back side of the paper.

Hold your paper at an angle to the base, with the base standing up straight and adhere the bottom flap to the bottom piece of the card base. The bottom flap should be flush with the back of the card. Take your time with this next part as it can be a bit tricky. Attach the other side of the pop up piece (the cardstock) to the card base, making sure that it folds up and will lie flat. I gently stick it to the back, lay the card base down and fold it up. Once it's flat give it a good rub to make sure it's on there good.

This is what your card will like from the front at this point. Repeat the last 2 steps adhering the pop up piece to the base and the card with the remaining pieces.

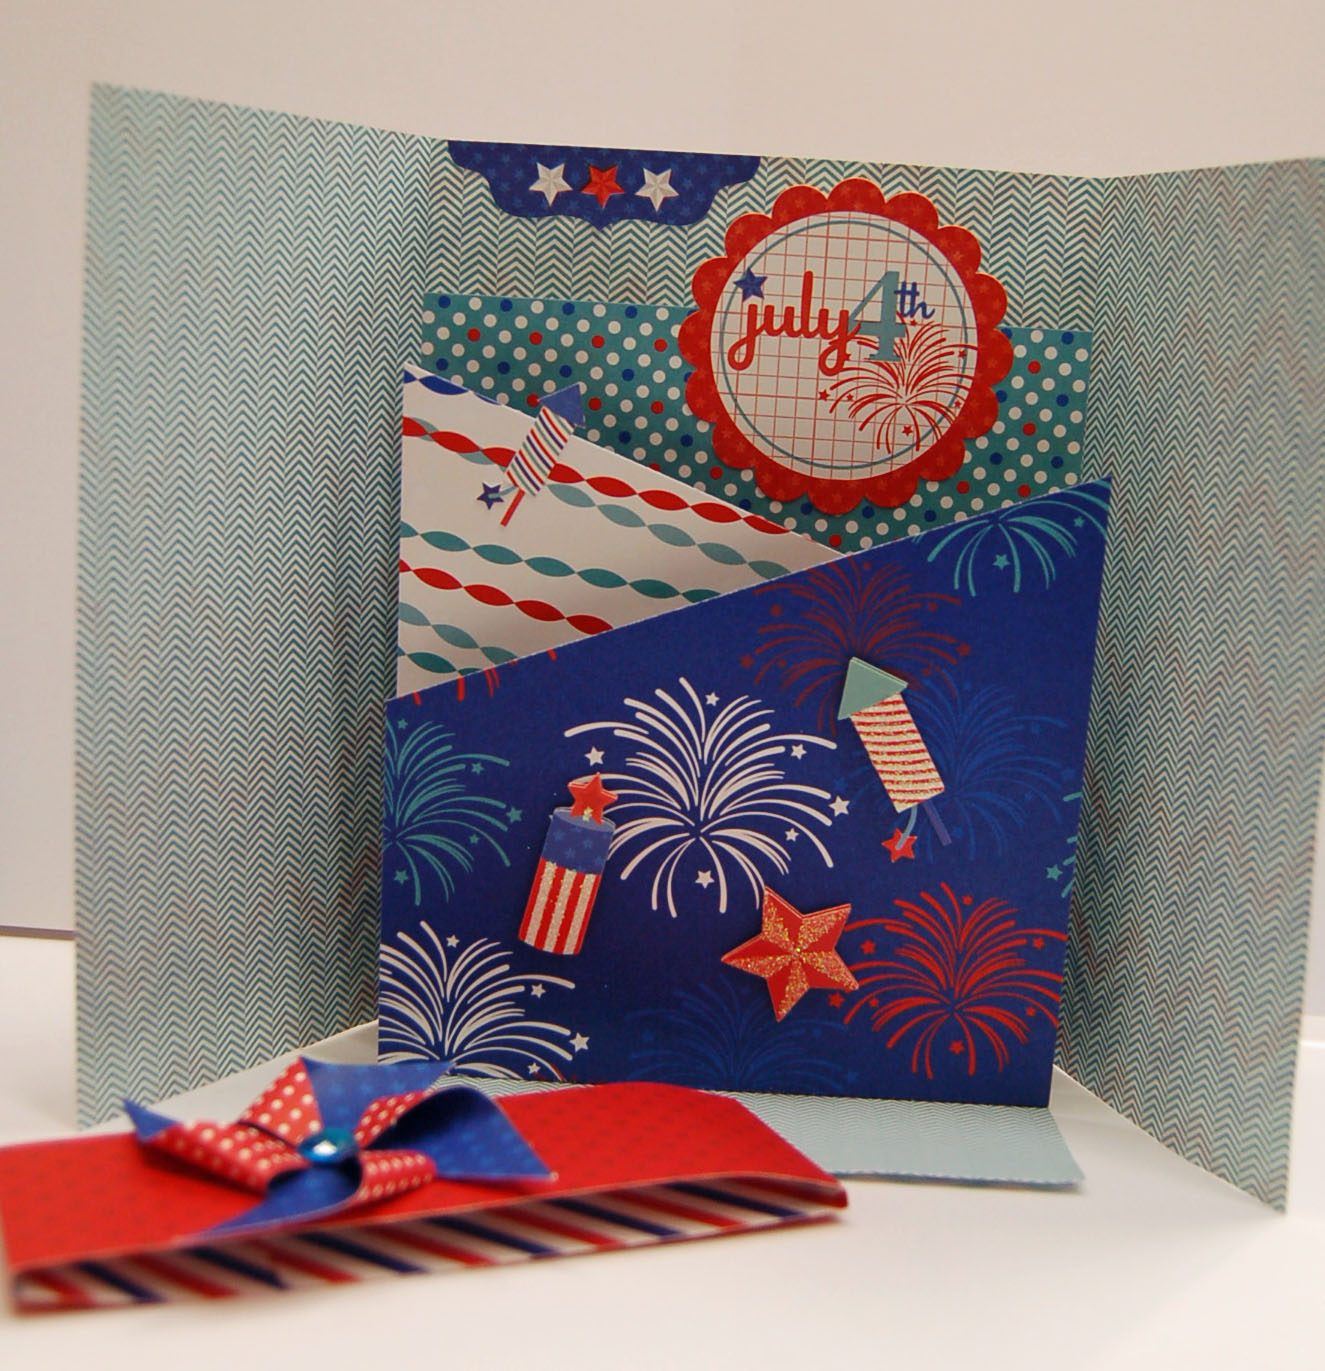
This is how your card should look when you have all the pieces assembled.

Once you have the inside assembled, fold it up so it is laying flat and closed. Trim a strip of coordinating patterned paper 2" x 12", use score board and score it at 3", 3 1/8", 8 1/4" & 8 3/8". Fold on the score lines and wrap it around the card. Adhere the overlapping ends together to create the wrap.

One of the great fun products in this line is these pre-cut pinwheels. All you have to do us punch it out and shape it and you have a cute embellishment in minutes. Check back soon for details on how to make a easy patriotic wreath using these pinwheels.

Add embellishments to the inside and you are done. The stickers on the front are the doodlebug pop up chip board stickers, the sticker on the middle section is fussy cut from the 12" x 12" sticker sheet that came with the kit. For the round sticker on top put a piece of scrap cardstock or paper on the back and cut around it so it doesn't stick where it's not supposed to.
Thanks for joining me today, I hope you enjoyed these 4th of July cards. Check back soon for a couple more 4th of July projects using this great Stars and Stripes line from Doodlebug Design Inc.
Supplies used -
Cardstock
Patterned Paper - Doodlebug Designs Inc.
Stickers - Doodlebug Designs Inc.
Jewels - Doodlebug Designs Inc.
Paper Trimmer
Wet / dry Adhesive
pop up adhesive
Martha Stewart score board
scissors
Thanks for looking ~ Michelle
Do you have a
great idea to share with us? Would you like to guest design for Craft Warehouse? We would love to hear from you! Send an email along with your name, blog address, and a sample of your work to jenevans at craftwarehouse dot com!

No comments:
Post a Comment
Thank you for your feedback! We love hearing from you!