


This layout page was made entirely from the two collections, “Sky’s the Limit” and “Up and Away”. I love to add lots of layers to my pages and mini albums and the pieces from these products were perfectly made to work together gorgeously and create effortlessly. I even altered a few to work for the look I wanted to happen. I will share those tips with you as we walk through the how to of this scrapbook page.
Here is what I used from Sky’s the Limit:
12x12 pattern paper:
Look
Flowers for Two
Pick a Card
Zig Zag
Up and Away
Chipboard Elements
Decorative Stamps
Alpha & Word Stickers
Enamel Dots
Sticker Accessory Sheet
and from Up and Away:
12x12 pattern paper:
Mixed Media
Quatrefoil
Carousel
Decorative Tape
Sticker Accessory Sheet
Layered Stickers
Decorative Buttons
a few extra items:
vellum
book paper
manila tag
label
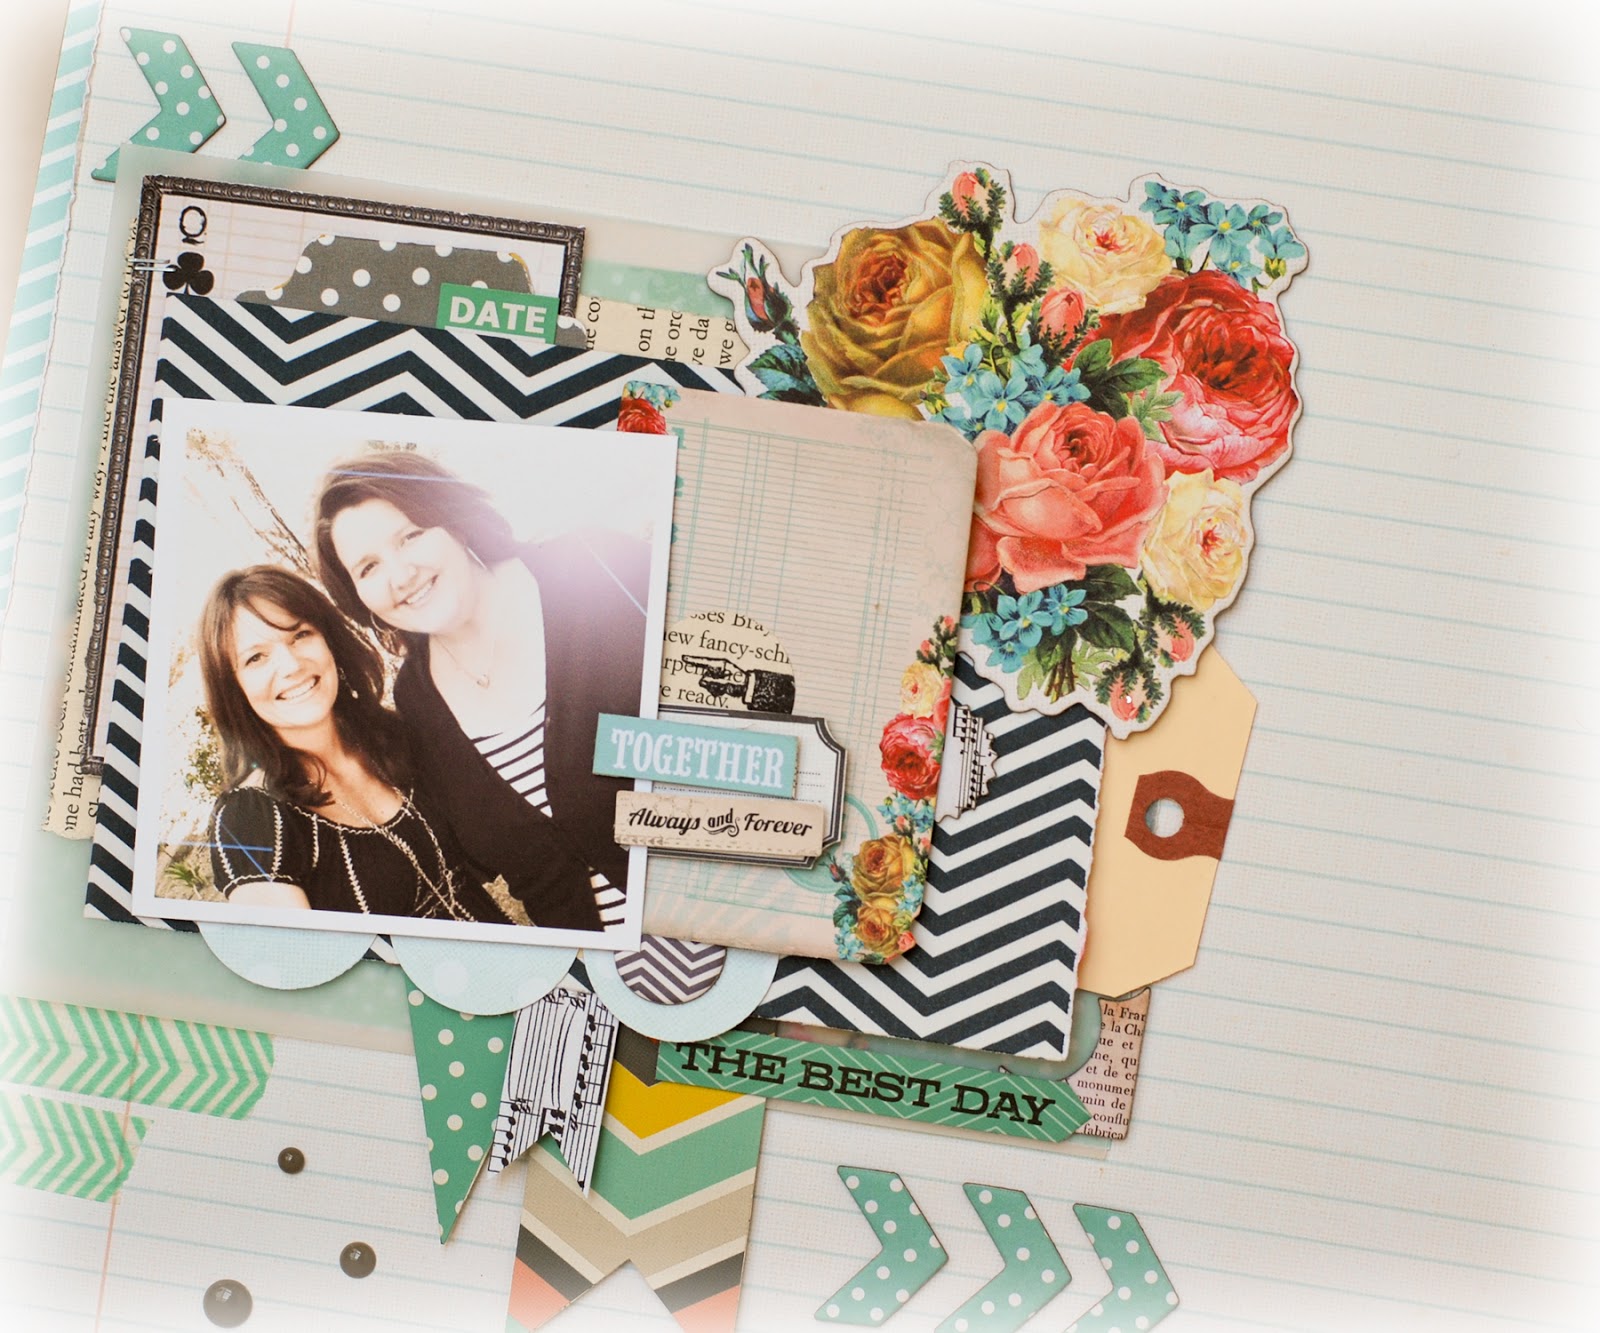
To begin, use the Mixed Media paper as the main background. Trim 1/2 inch from the side and bottom edge of the Look paper. Distress the edges and place on the Mixed Media paper at a bit of a slant.

Trim the Flowers for Two paper to about 7x5 and glue down on the left edge of the background. Trim a piece of vellum to 7x5 and layer on top of the Flowers for Two.

Trim a piece of book paper to 5x4 and glue to the vellum on the upper left hand edge.

Trim a ‘card’ from the Pick a Card paper. Then place it at the upper left hand corner of the vellum and staple to the vellum at the edge. Punch a tab shape from the Zig Zag paper and set aside.

Trim a piece of the Quatrefoil paper to 6 1/4 x4 inches. Place this piece at about the center of the other layer so that the other layers can be seen. Tuck the tab shape punched out above behind the Quatrefoil paper but in front of the Pick a Card piece as shown. Add a ‘date’ sticker from the Sticker Accessory Sheet in front of the tab but behind the pattern paper.

Use the floral chipboard piece from the Chipboard Elements and place at the top right edge of the layers of pattern paper.
Add a pop dot to the back of the photo and place on top of the Quatrefoil paper at an angle.

Use a piece from the Chipboard Elements to layer behind the photo as shown. TIP: I knew I wanted to use this piece but it was too thick on the chipboard. So I gently pulled the top of the sticker away from the chipboard piece and it was perfect to use as a layering element.

Stamp the finger image to a piece of book paper, punch with a circle punch, and layer behind photo. Trim a ticket from the Carousel paper and layer behind the photo. On top of the ticket add a sticker from the Alpha and Word Stickers plus a sticker from the Layered Stickers. TIP: I just wanted to use the “always and forever” sentiment from the Layered Stickers, so again, I gently pulled it away from the rest of the layers of the sticker.

Punch two circles from the Up and Away paper. Cut them in half. Place them like scallop pieces under the photo as shown. Add a Chipboard Element piece to the top of one of the scallops. Place another Chipboard Element at the bottom right corner of the layered pattern paper.

Use pendant pieces from the Sticker Accessory Sheet and add as a cluster under the scallops. Add a sentiment sticker as well.

Place Chipboard Elements, Decorative Tape, Enamel Dots, Decorative Stamp, and another Word Sticker at the bottom of the page layout as shown Write the date on a label, cut it in half, and sew to the very bottom edge of the background paper.
Jamie Pate is a Craft Warehouse guest designer. Do you have a great idea to share with us? Would you like to design for Craft Warehouse? We would love to hear from you! To apply for our Craft Warehouse 2013-2014 Design Team, click here!

No comments:
Post a Comment
Thank you for your feedback! We love hearing from you!