


The chalkboard and shadow boxes look lovely hung together or separately. I used the French Country paper and a set of 5 wood trays from Craft Warehouse. Having the coordinating flowers, chipboard and stickers makes it so easy to do because you know everything is going to go well together so all you have to do is have fun with it.


To make this project yourself you will need the following supplies:
Wooden Trays from Craft Warehouse
Graphic 45 French Country 12x12 paper pad
French Country Cling Stamps, Chipboard, Flowers, Banners, Tags & Pockets
Tim Holtz Distress Ink in Walnut Stain
Tim Holtz Distress Paints in Forest Moss, Walnut Stain, Tarnished Brass & Wild Honey
Color Me Crazy Flowers by Petaloo
Spray bottle with water
Acrylic Paint in Soft Black or Black
Black Chalkboard Paint (brush on type)
Darice Embossing folder
Liquid Adhesive
Scissors
Cling stamp mounting block
Sandpaper or file for distressing
Paintbrush
Mod Podge, Mat finish
Burlap Ribbon
Jute twine
Preserved moss
**Additional Items - Small foam paintbrush, Small piece of black felt, Cup hook, Toothpick, Chalk
I started by painting the trays with acrylic paint.
Use the stamp set and Distress Paint in Tarnished Brass to stamp the outsides of the small trays.


Paint the inside bottom of the large tray with chalkboard paint (follow the manufacturers directions). Cut out the images you would like to use for the inside or your trays, distress the edges with Distress Paints (Walnut Stain & Tarnished brass) Mod Podge the paper images to the inside of the trays. The image for the large tray should only have Mod Podge around the image and not on the chalkboard part of the tray.


Pop out and distress the edges of the tag & pockets, flowers, banners and chipboard with Distress Ink in Walnut Stain. Emboss any pieces you want to at this time. Its a great way to add texture without adding bulk or weight.
Assemble the flowers with glue.
Assemble the banners with glue onto pieces of twine.
Cut leaf shapes from the burlap ribbon and color them with Distress Paint in Forest Moss

Tie and cut bows from burlap ribbon and attach to trays.
Cover the sides (in & out) of the large tray with paper from the collection. You will need to piece the paper together for the longer sides of the tray so paper with a repeating pattern such as stripes is the easiest to use.
Dampen the Color Me Crazy Flowers with a few sprays of water then color them with Distress Paint in Wild Honey adding touches of the Walnut Stain Distress Paint on the edges.

Using your flowers, tags, pockets, banners, chipboard, stickers, burlap and moss create your shadow box scenes. Just go for it, tucking little bits and pieces here an there to make it uniquely yours. There is no wrong way to create.


**Finishing Touches**
Cut the ends off the toothpick, paint it black and glue it to the inside bottom of the chalkboard tray (this is to keep the chalk from rolling off the chalkboard).
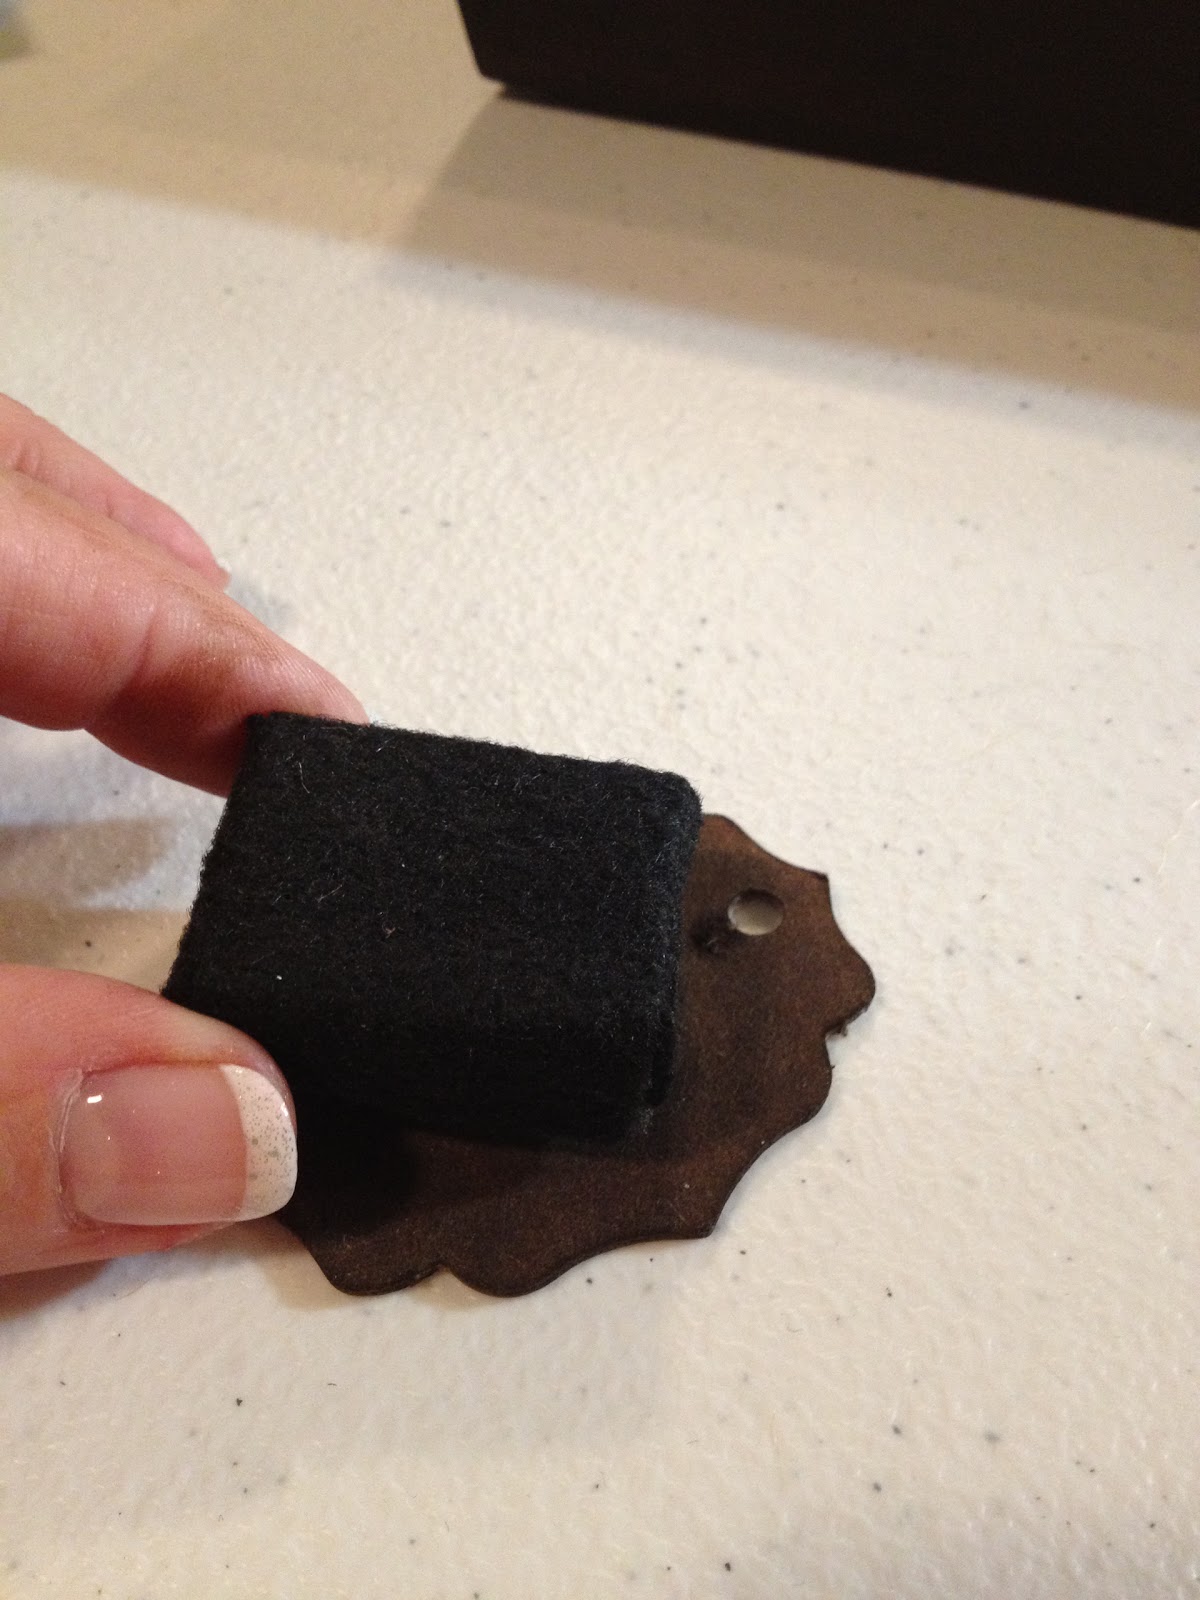
Cut the foam end off the paintbrush and glue a same size piece of black felt to it then glue it foam side down onto one of the chipboard pieces that has a hole in it.
Tie jute through the hole (this will be the eraser).
Attach the cup hook on the bottom right front of the chalkboard to hang the eraser from.

Voila!!! I hope you enjoy creating this project as much as I did. Remember there are no mistakes in art, only happy accidents that lead to better things.
Bonjour and Merci, Shari Hensley-Garza

This is gorgeous! Your layering skills are amazing!
ReplyDelete