


In case any of you want to pick up the album, but aren't sure how to get photos sized to fit the pockets, here's a little tutorial on how I created a 6x4 print using an iPhone app called PicFrame and printing my photos wirelessly to my Canon Selphy printer.
On the PicFrame start screen, the top right button defaults to 1:1, but if you click that button, you can select 3:2 (which is equivalent to 6x4).
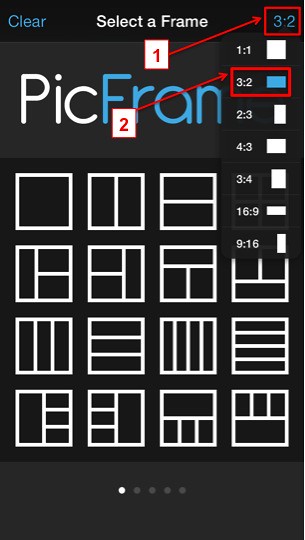
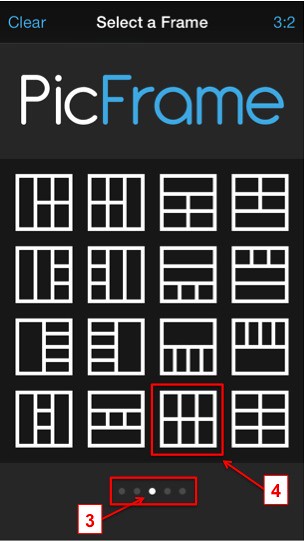
For 2x2 sized photos, swipe your screen from right to left to get to the third page of templates and select the template that has space for 6 photos.
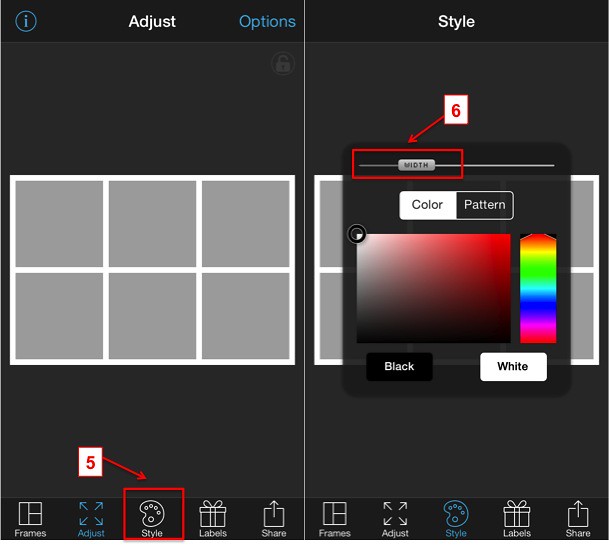
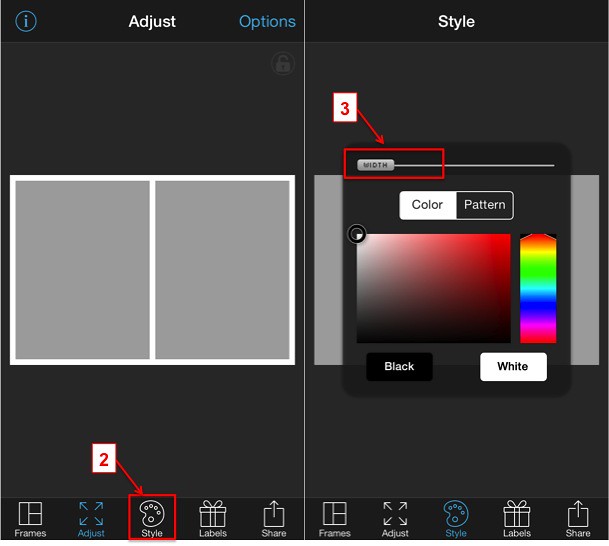
This template defaults with white borders (which I leave for my photos), but if you wanted to remove the borders, you can click the "Style" button on the bottom and slide the "Width" lever all the way to the left (and if you wanted to add a thicker white border, you can slide it to the right).
Double click into the gray areas of the template to add your photos. Once you have all 6 photos selected, click the "Share" button to save the photo to your camera roll so you can print it later.


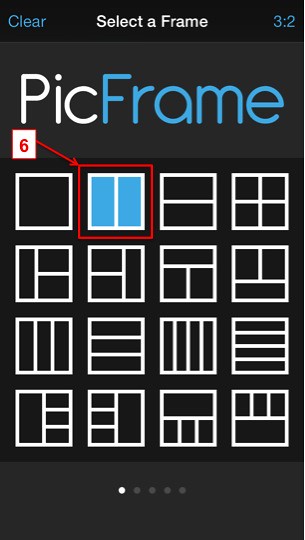
For 4x4 sized photos, you will do something similar, but from the main screen, you will select the two-photo template from the first page of templates.
For 4x4 photos, I don't add a white border, so I move the "Width" lever all the way to the left.
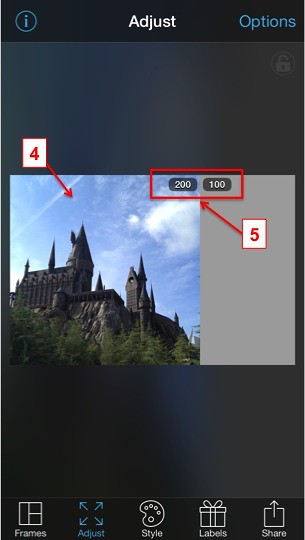
Here is where it will get a little tricky with this sized photo. After putting your photo in, you want to move the horizontal line so that it sizes the photo to 200-100. This is roughly equivalent to 4x4. [With a Canon Selphy printer, the photos are slightly smaller than 6x4, so it's not going to be perfect, but I promise.. it's close enough! ;)]
From there, you would save it like you did the 2x2 template. And hopefully you found that tutorial helpful, so you can head on over to Craft Warehouse to purchase a We R Memory Keepers album for yourself!
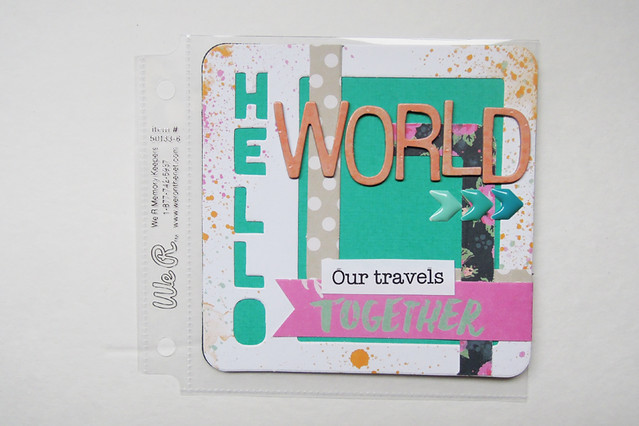
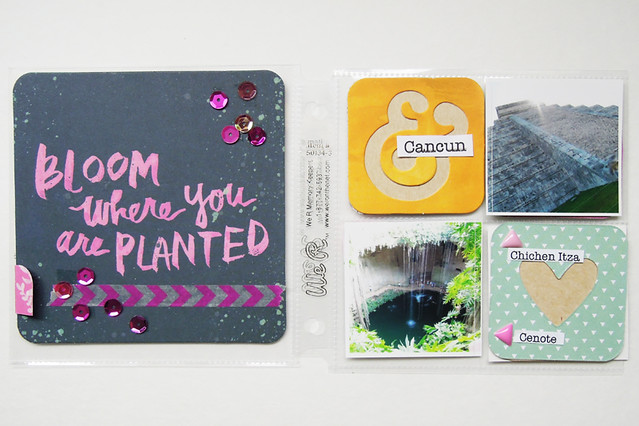
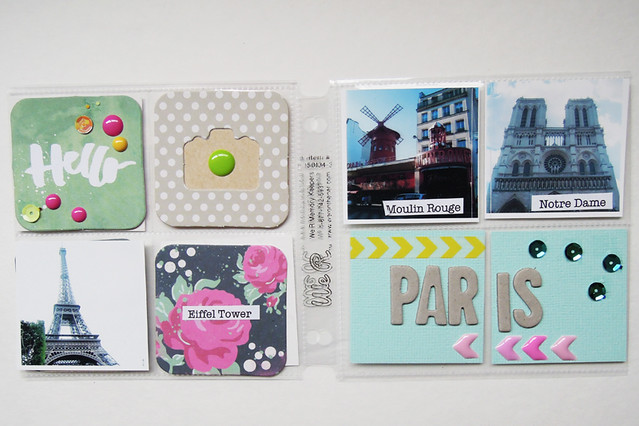
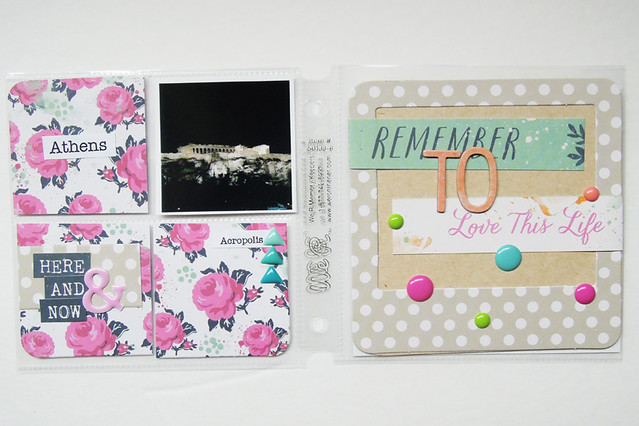
And now, here is the start of an album I put together to document the places my husband and I have been lucky enough to travel together to! It's titled "Hello World - Our Travels Together."
For the cover page, I loved the die-cut journaling cards that came in the Inky Rose collection, so I used the die-cut "Hello" as a starting point.
Thanks for stopping by! I hope you enjoyed my little album as much as I loved putting it together! :)

Wonderful tut! Thanks for the first part especially! Just bought an album and can't wait to make one and print pics! Your travel album looks so pretty!!
ReplyDeleteFound this little tutorial via Jen Evans blog. I use Picframe all the time. Its a great app. Did you realise if you leave the ration at 1:1 and select the first frame that it will be a 4 x 4 print. I often print at this size for my pocket pages.
ReplyDelete